











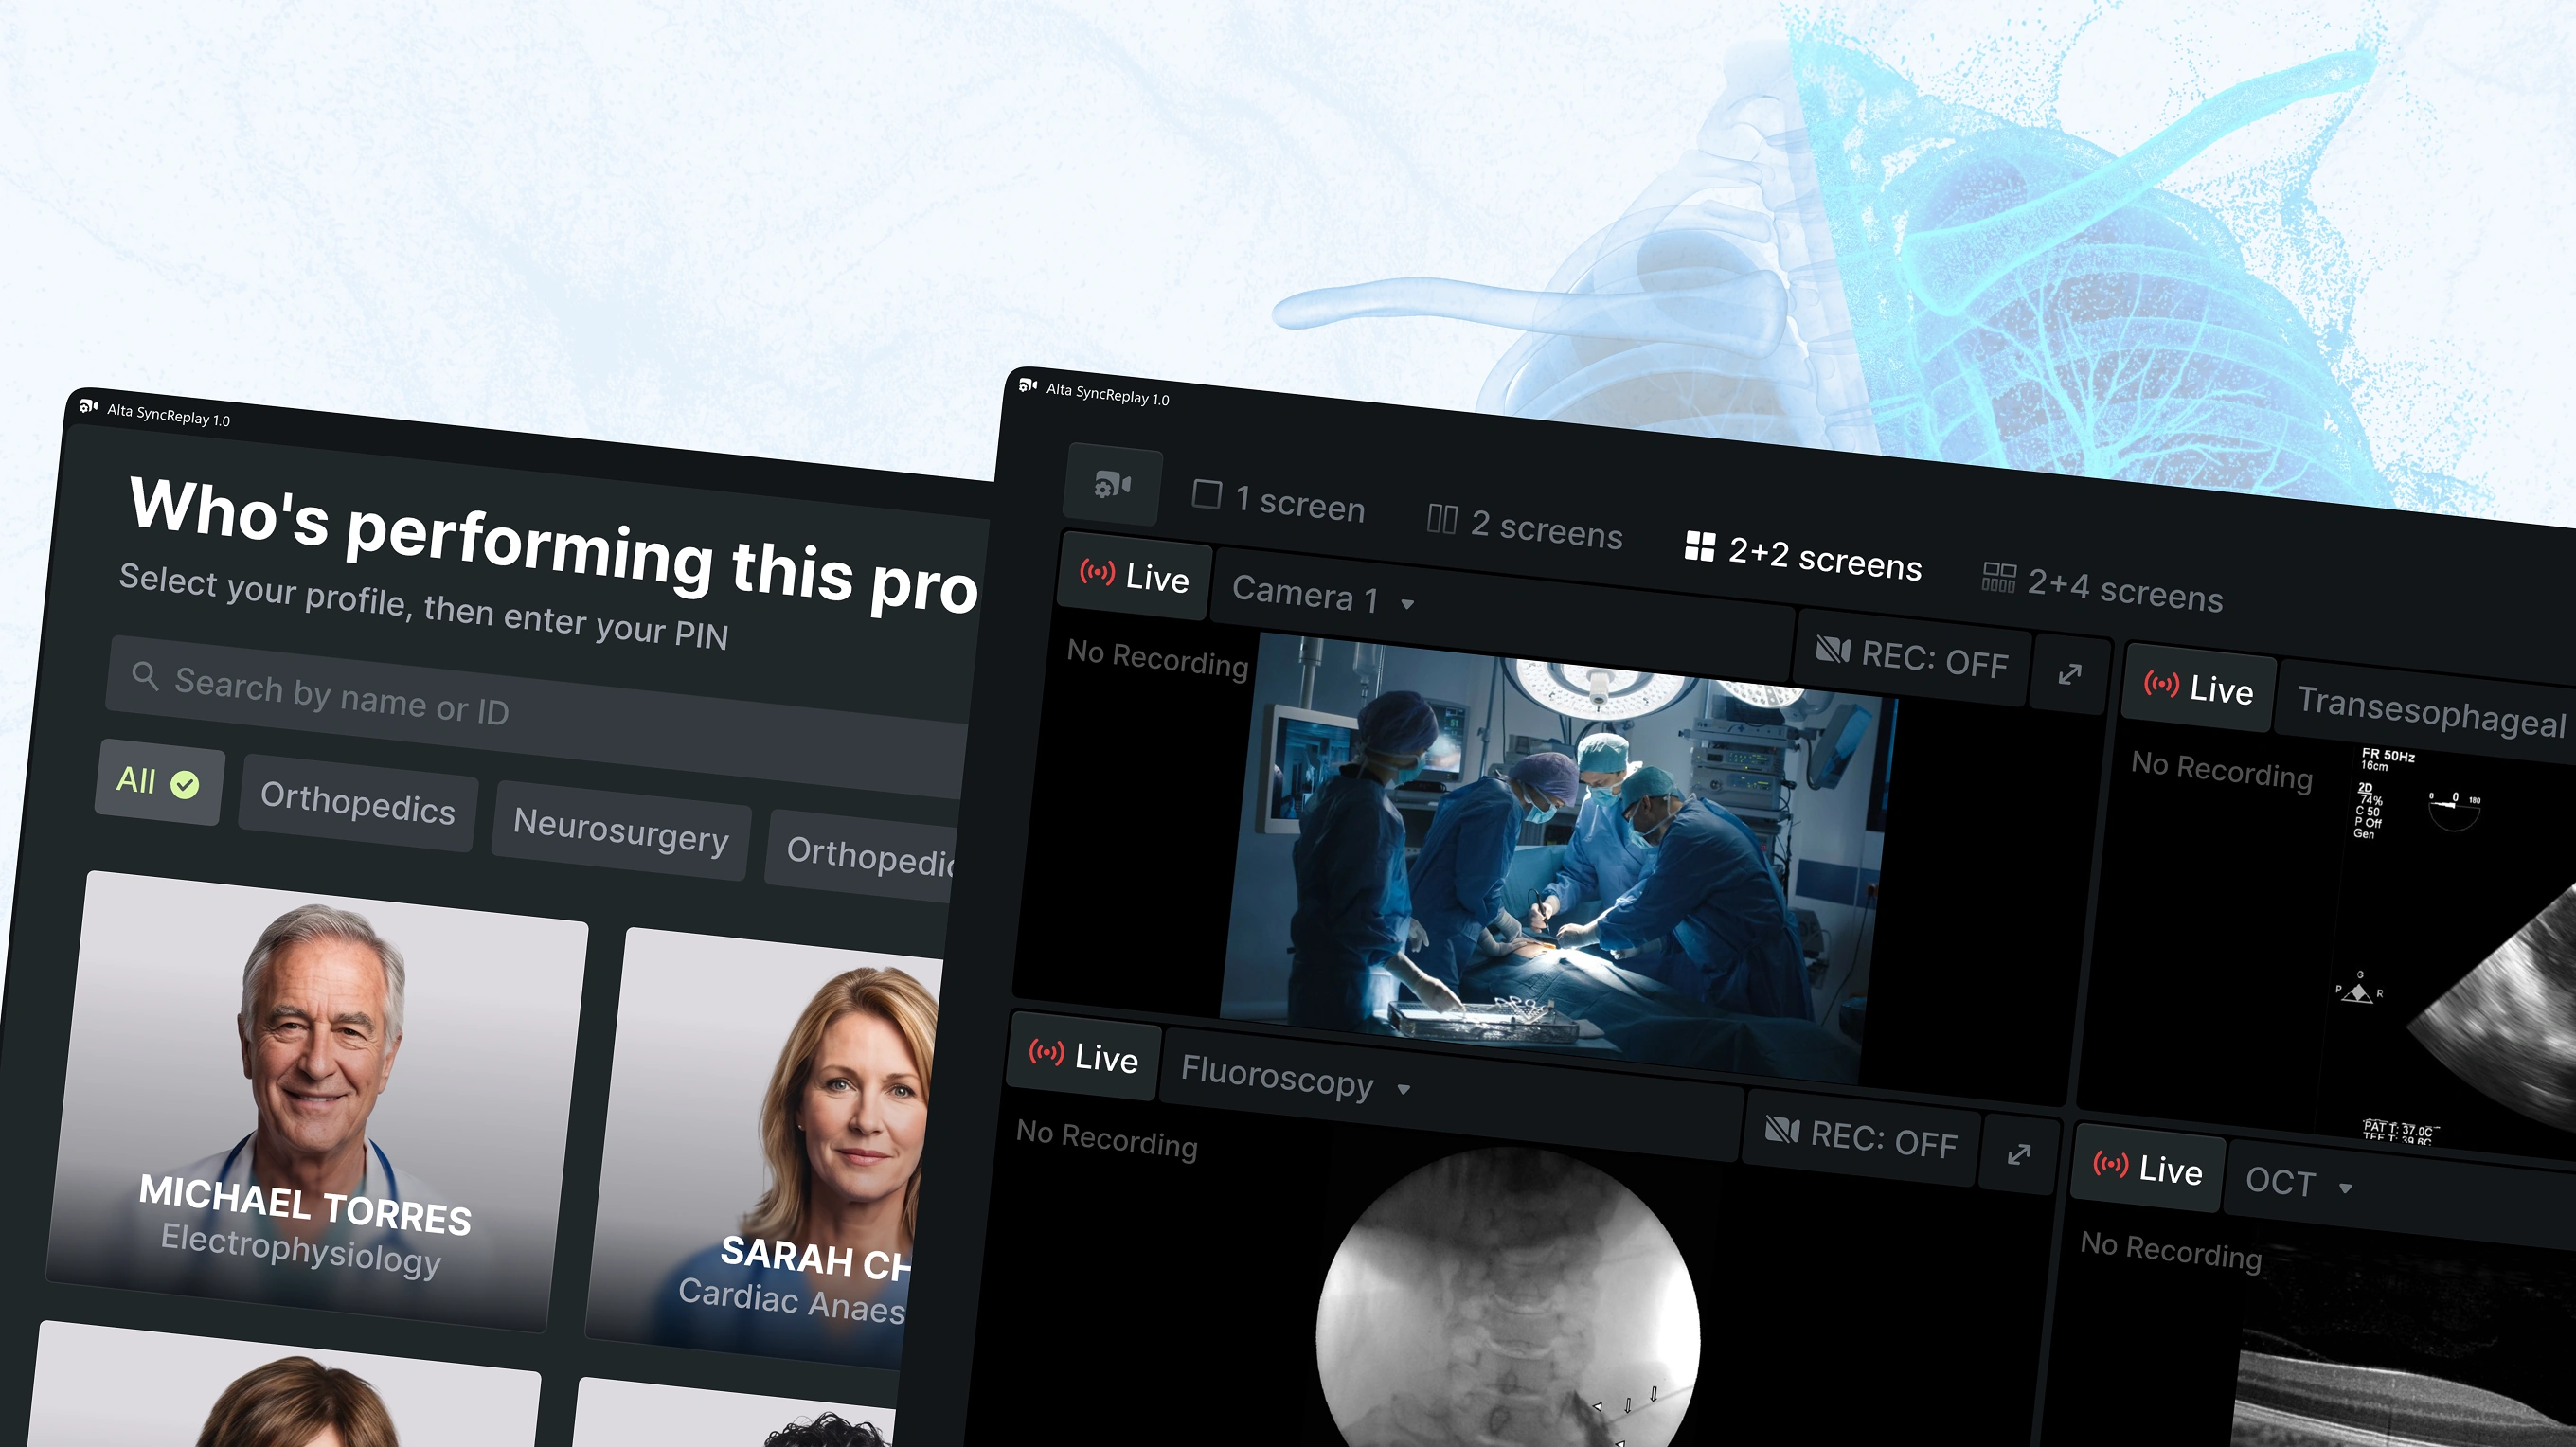
We designed it as a clinical replay and remote support platform, synchronising up to 8 live/recorded procedural feeds into one composite multi-screen interface with glanceable replay and comparison modes. Surgeons needed a usable interface during active surgery – a zero-attention environment – and the design now works across wall displays, workstations, laptops, and tablets in sterile settings.
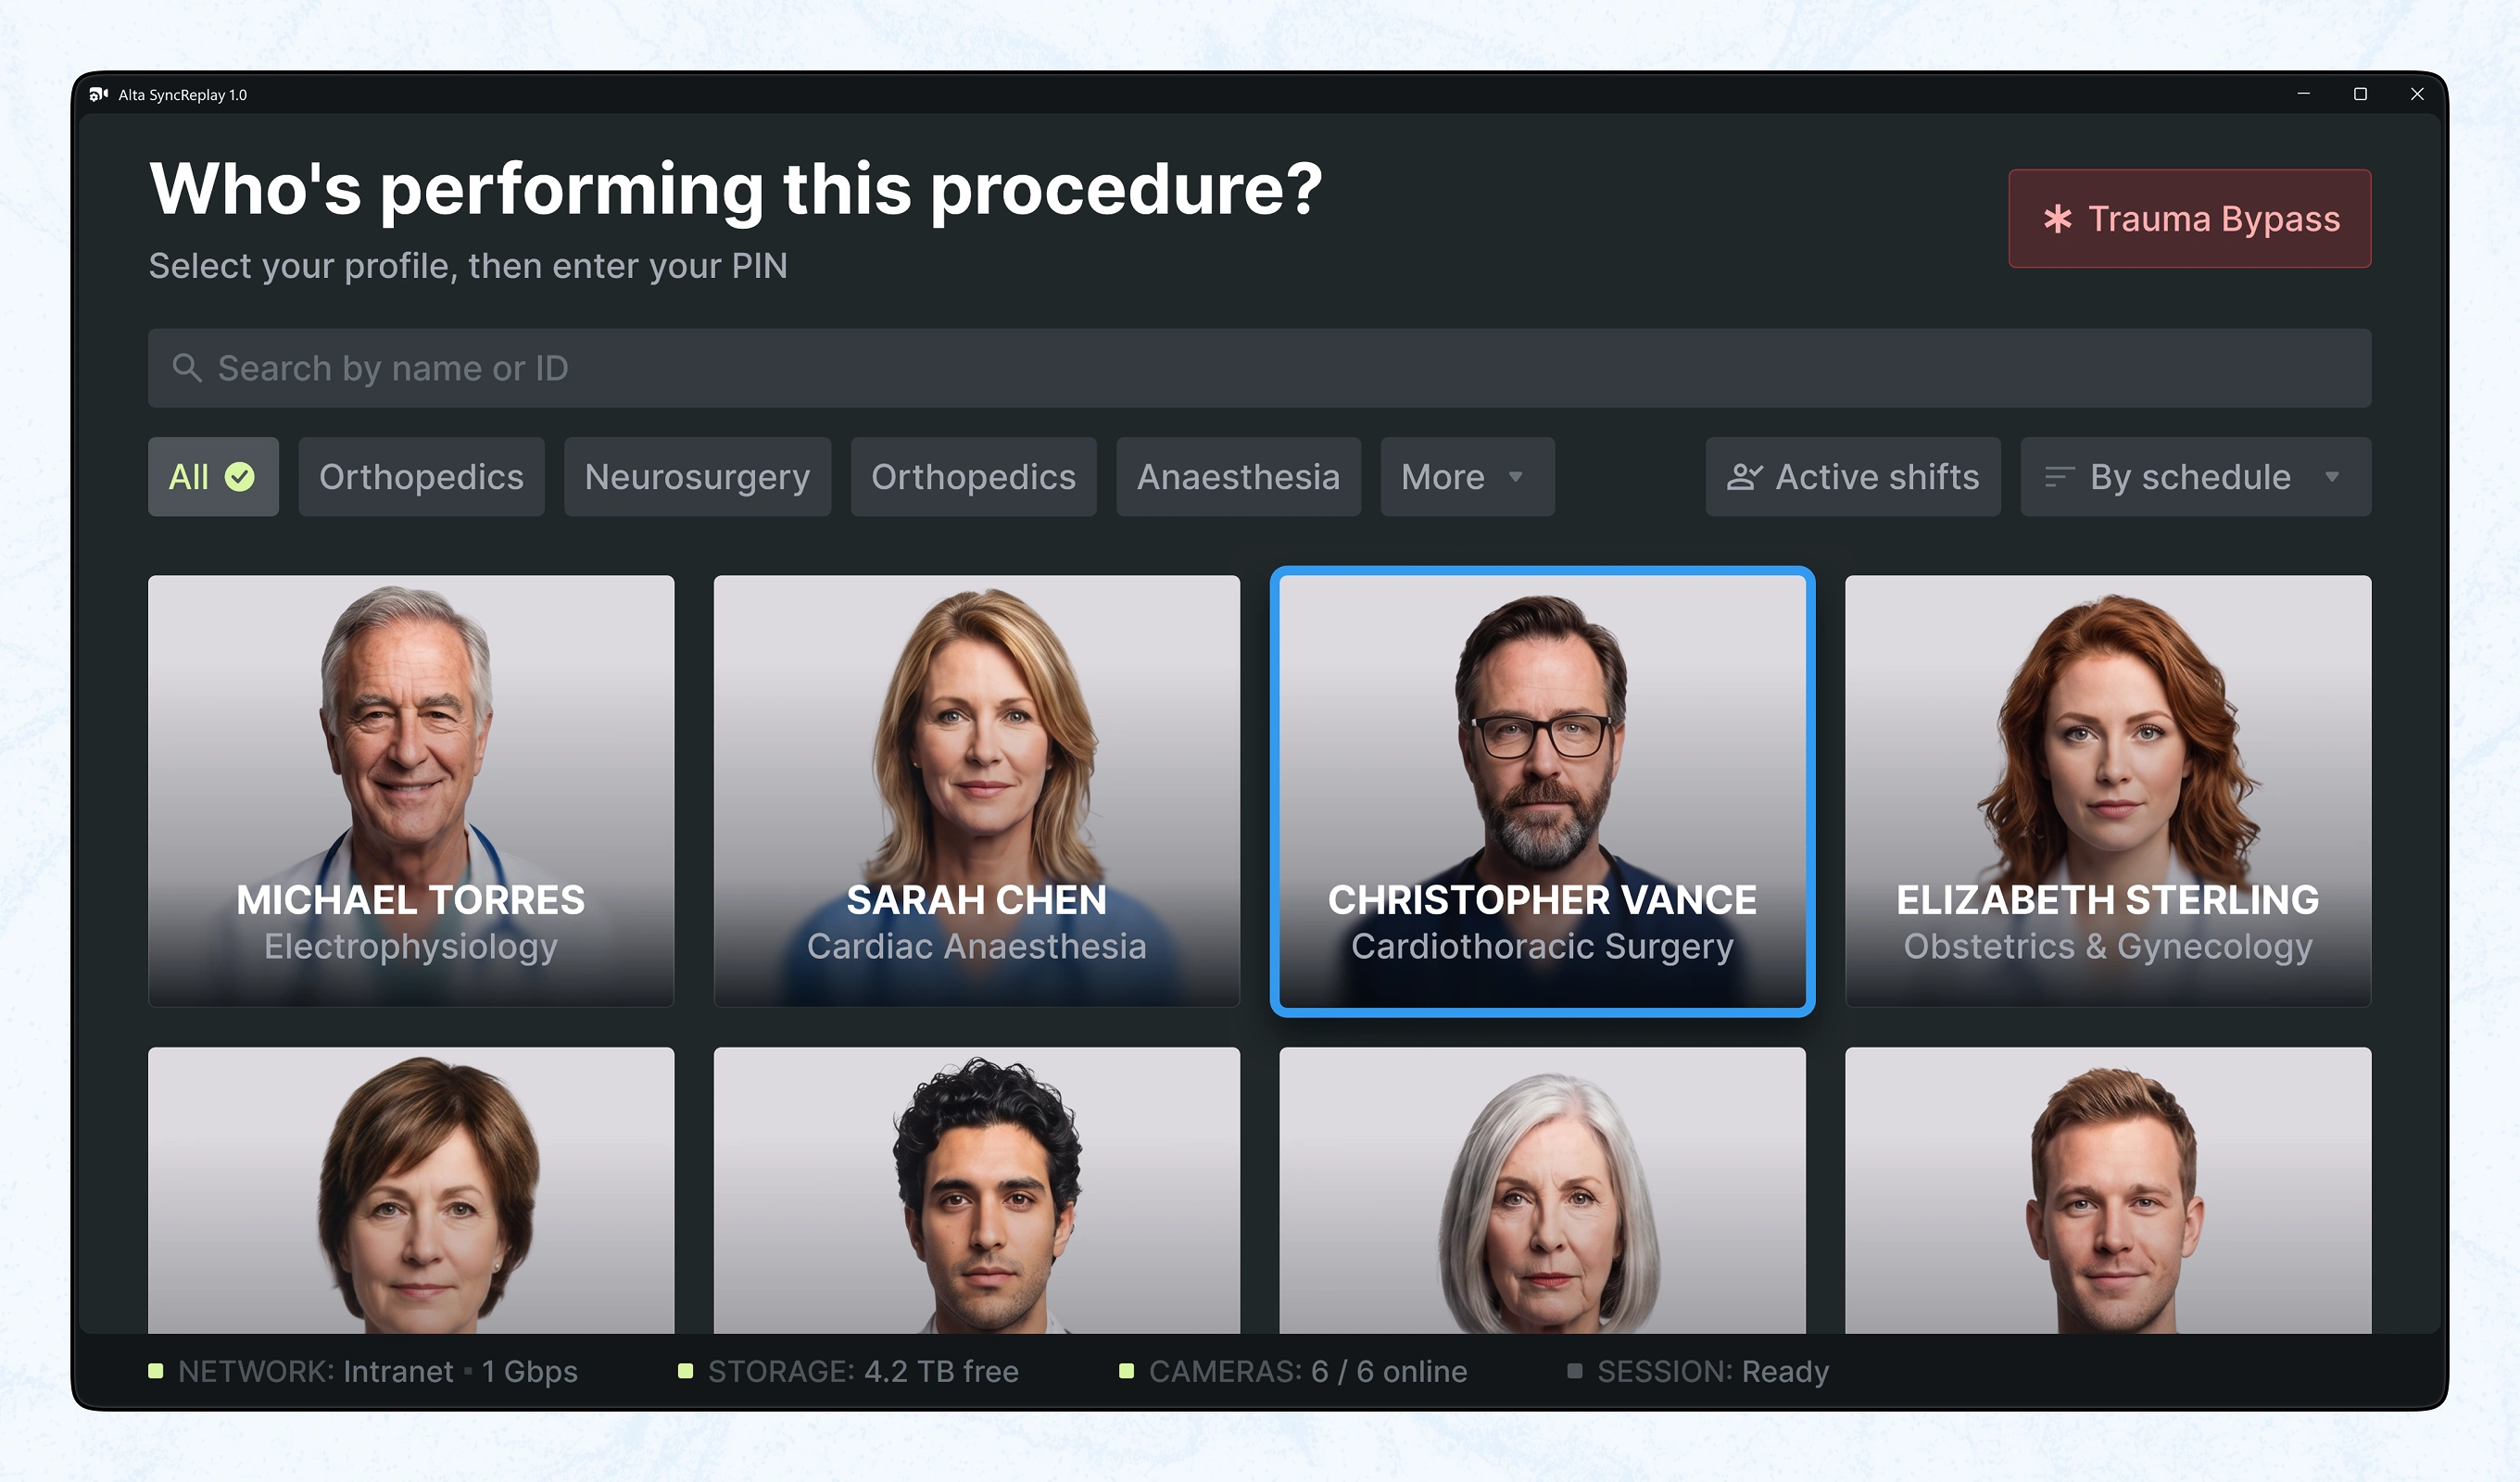
Entry screen for surgical staff logging into the platform before a procedure. Filters by specialty, active shifts, and a dedicated Trauma Bypass option handle emergency cases without slowing routine logins.
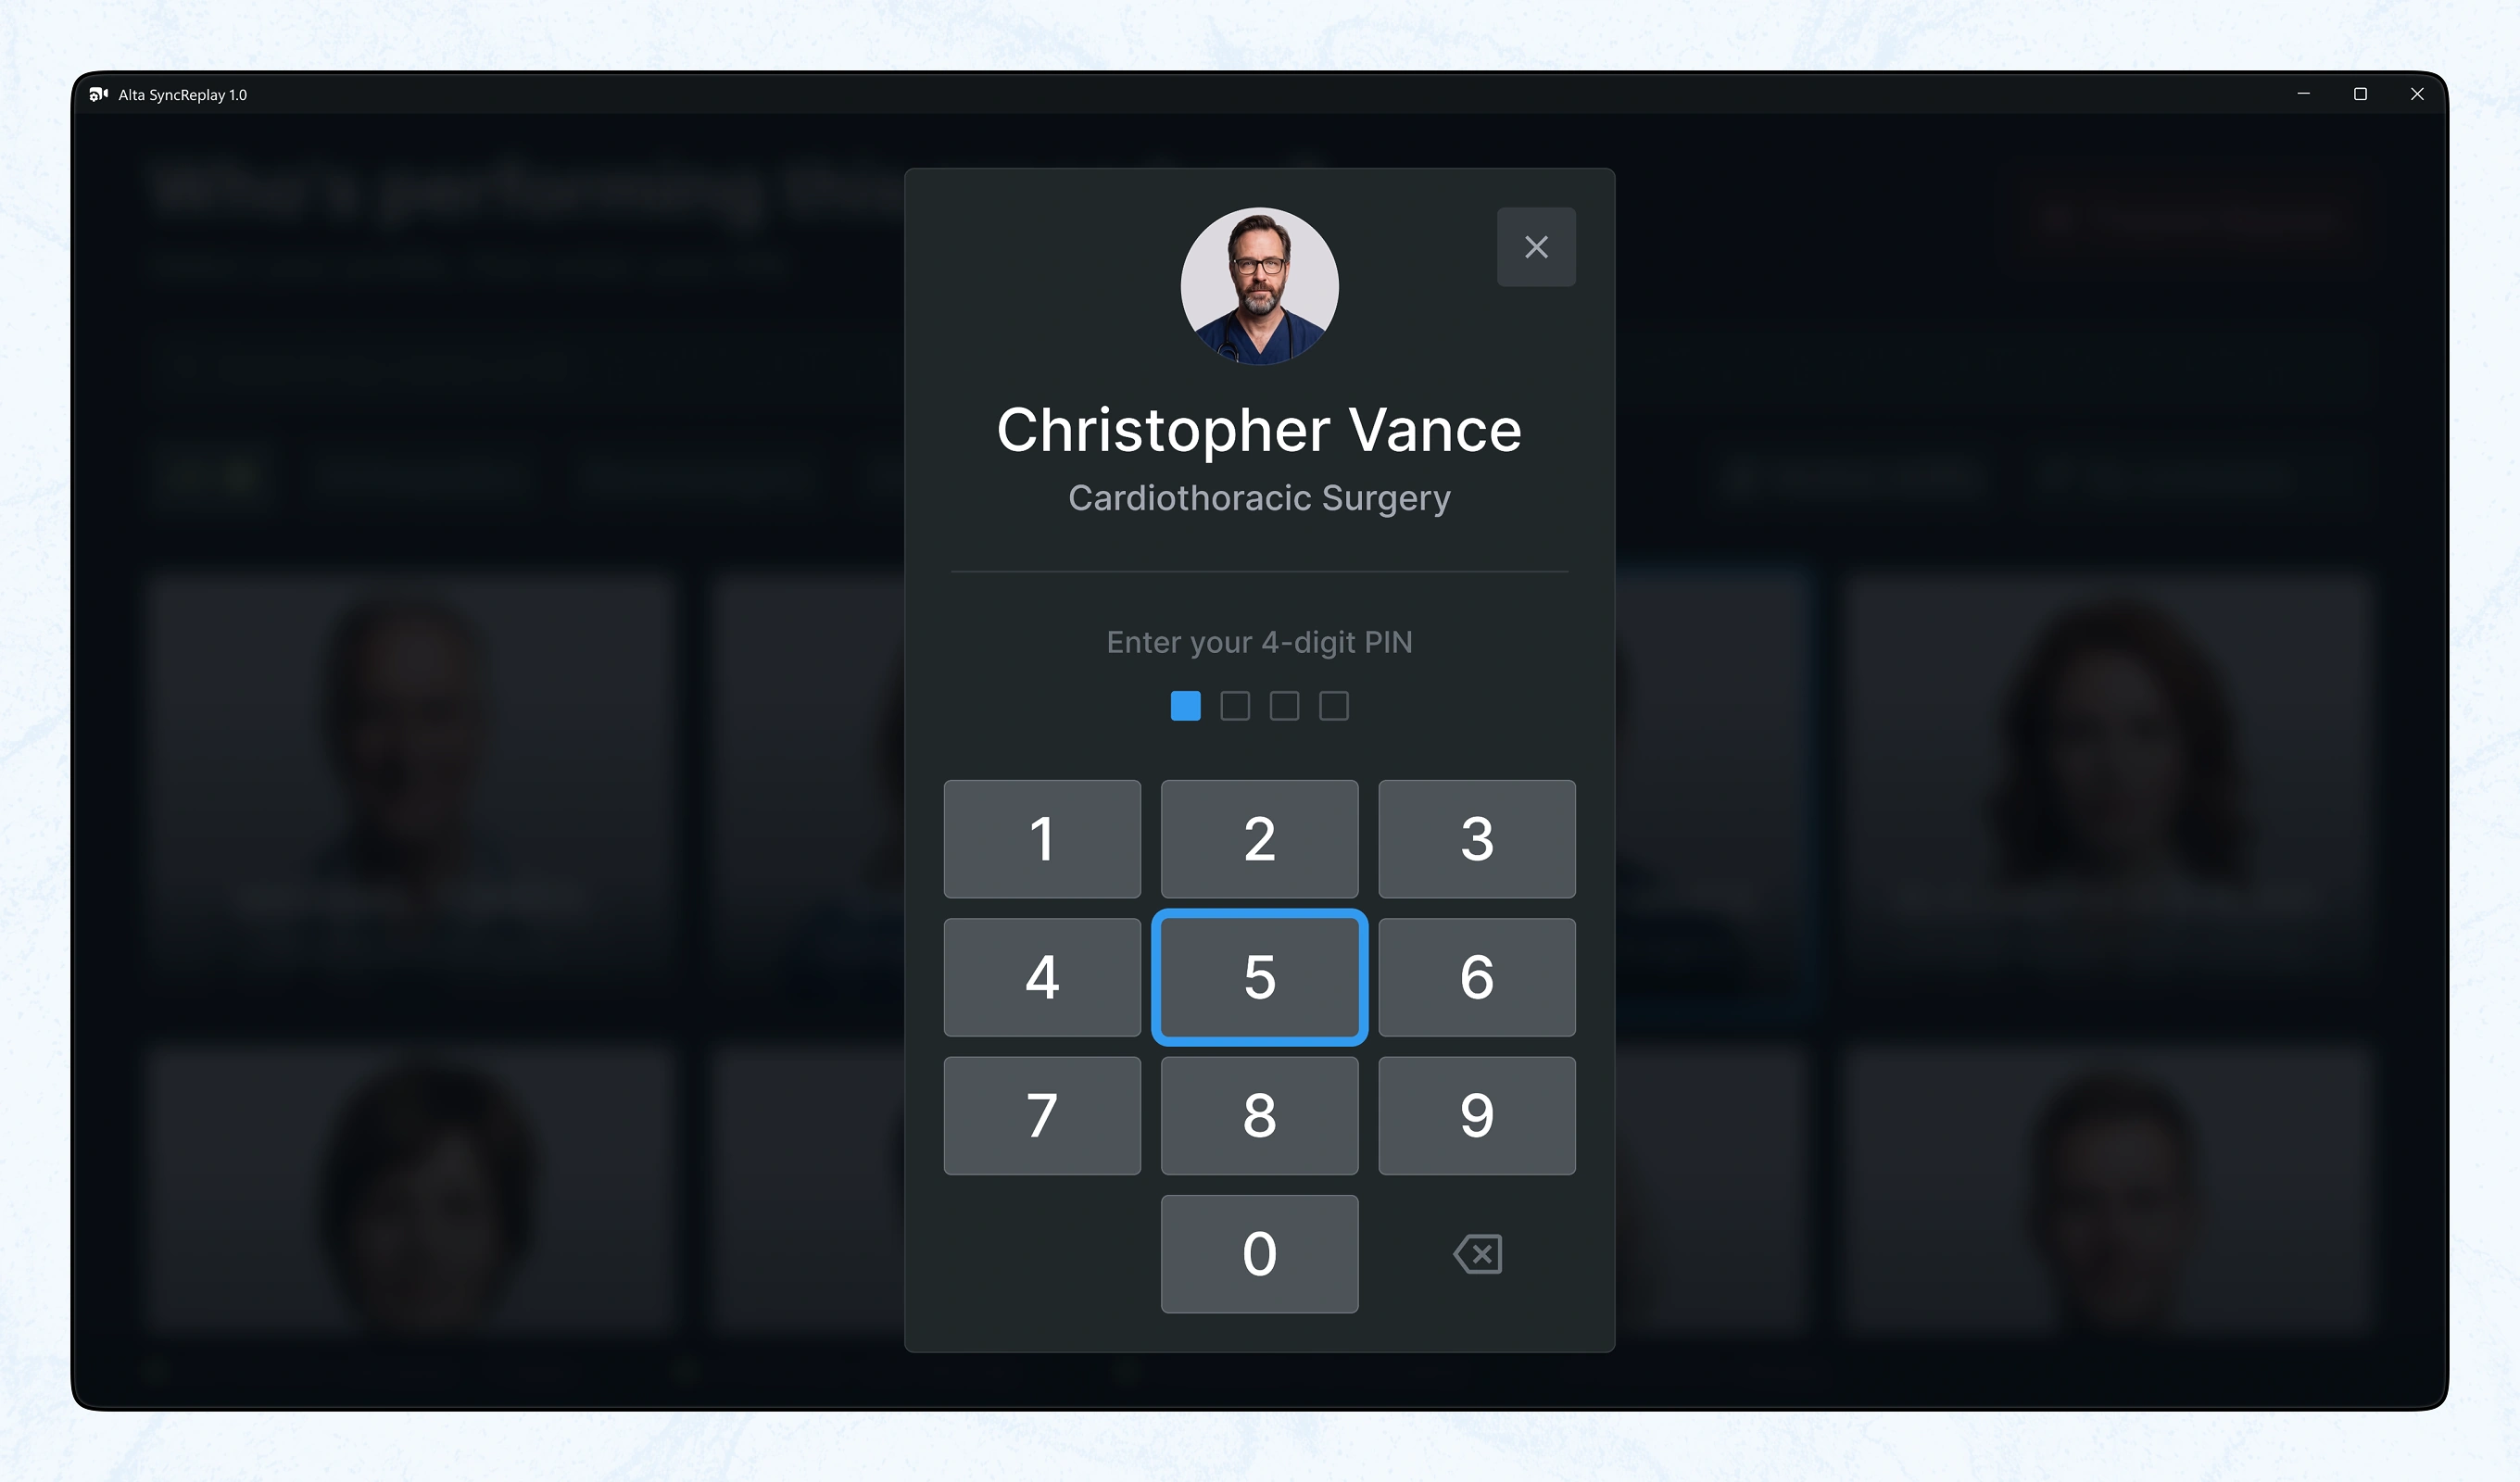
Second authentication step confirming the selected clinician's identity before entering a session. A 4-digit PIN keeps profile switching fast without a full login form each time.
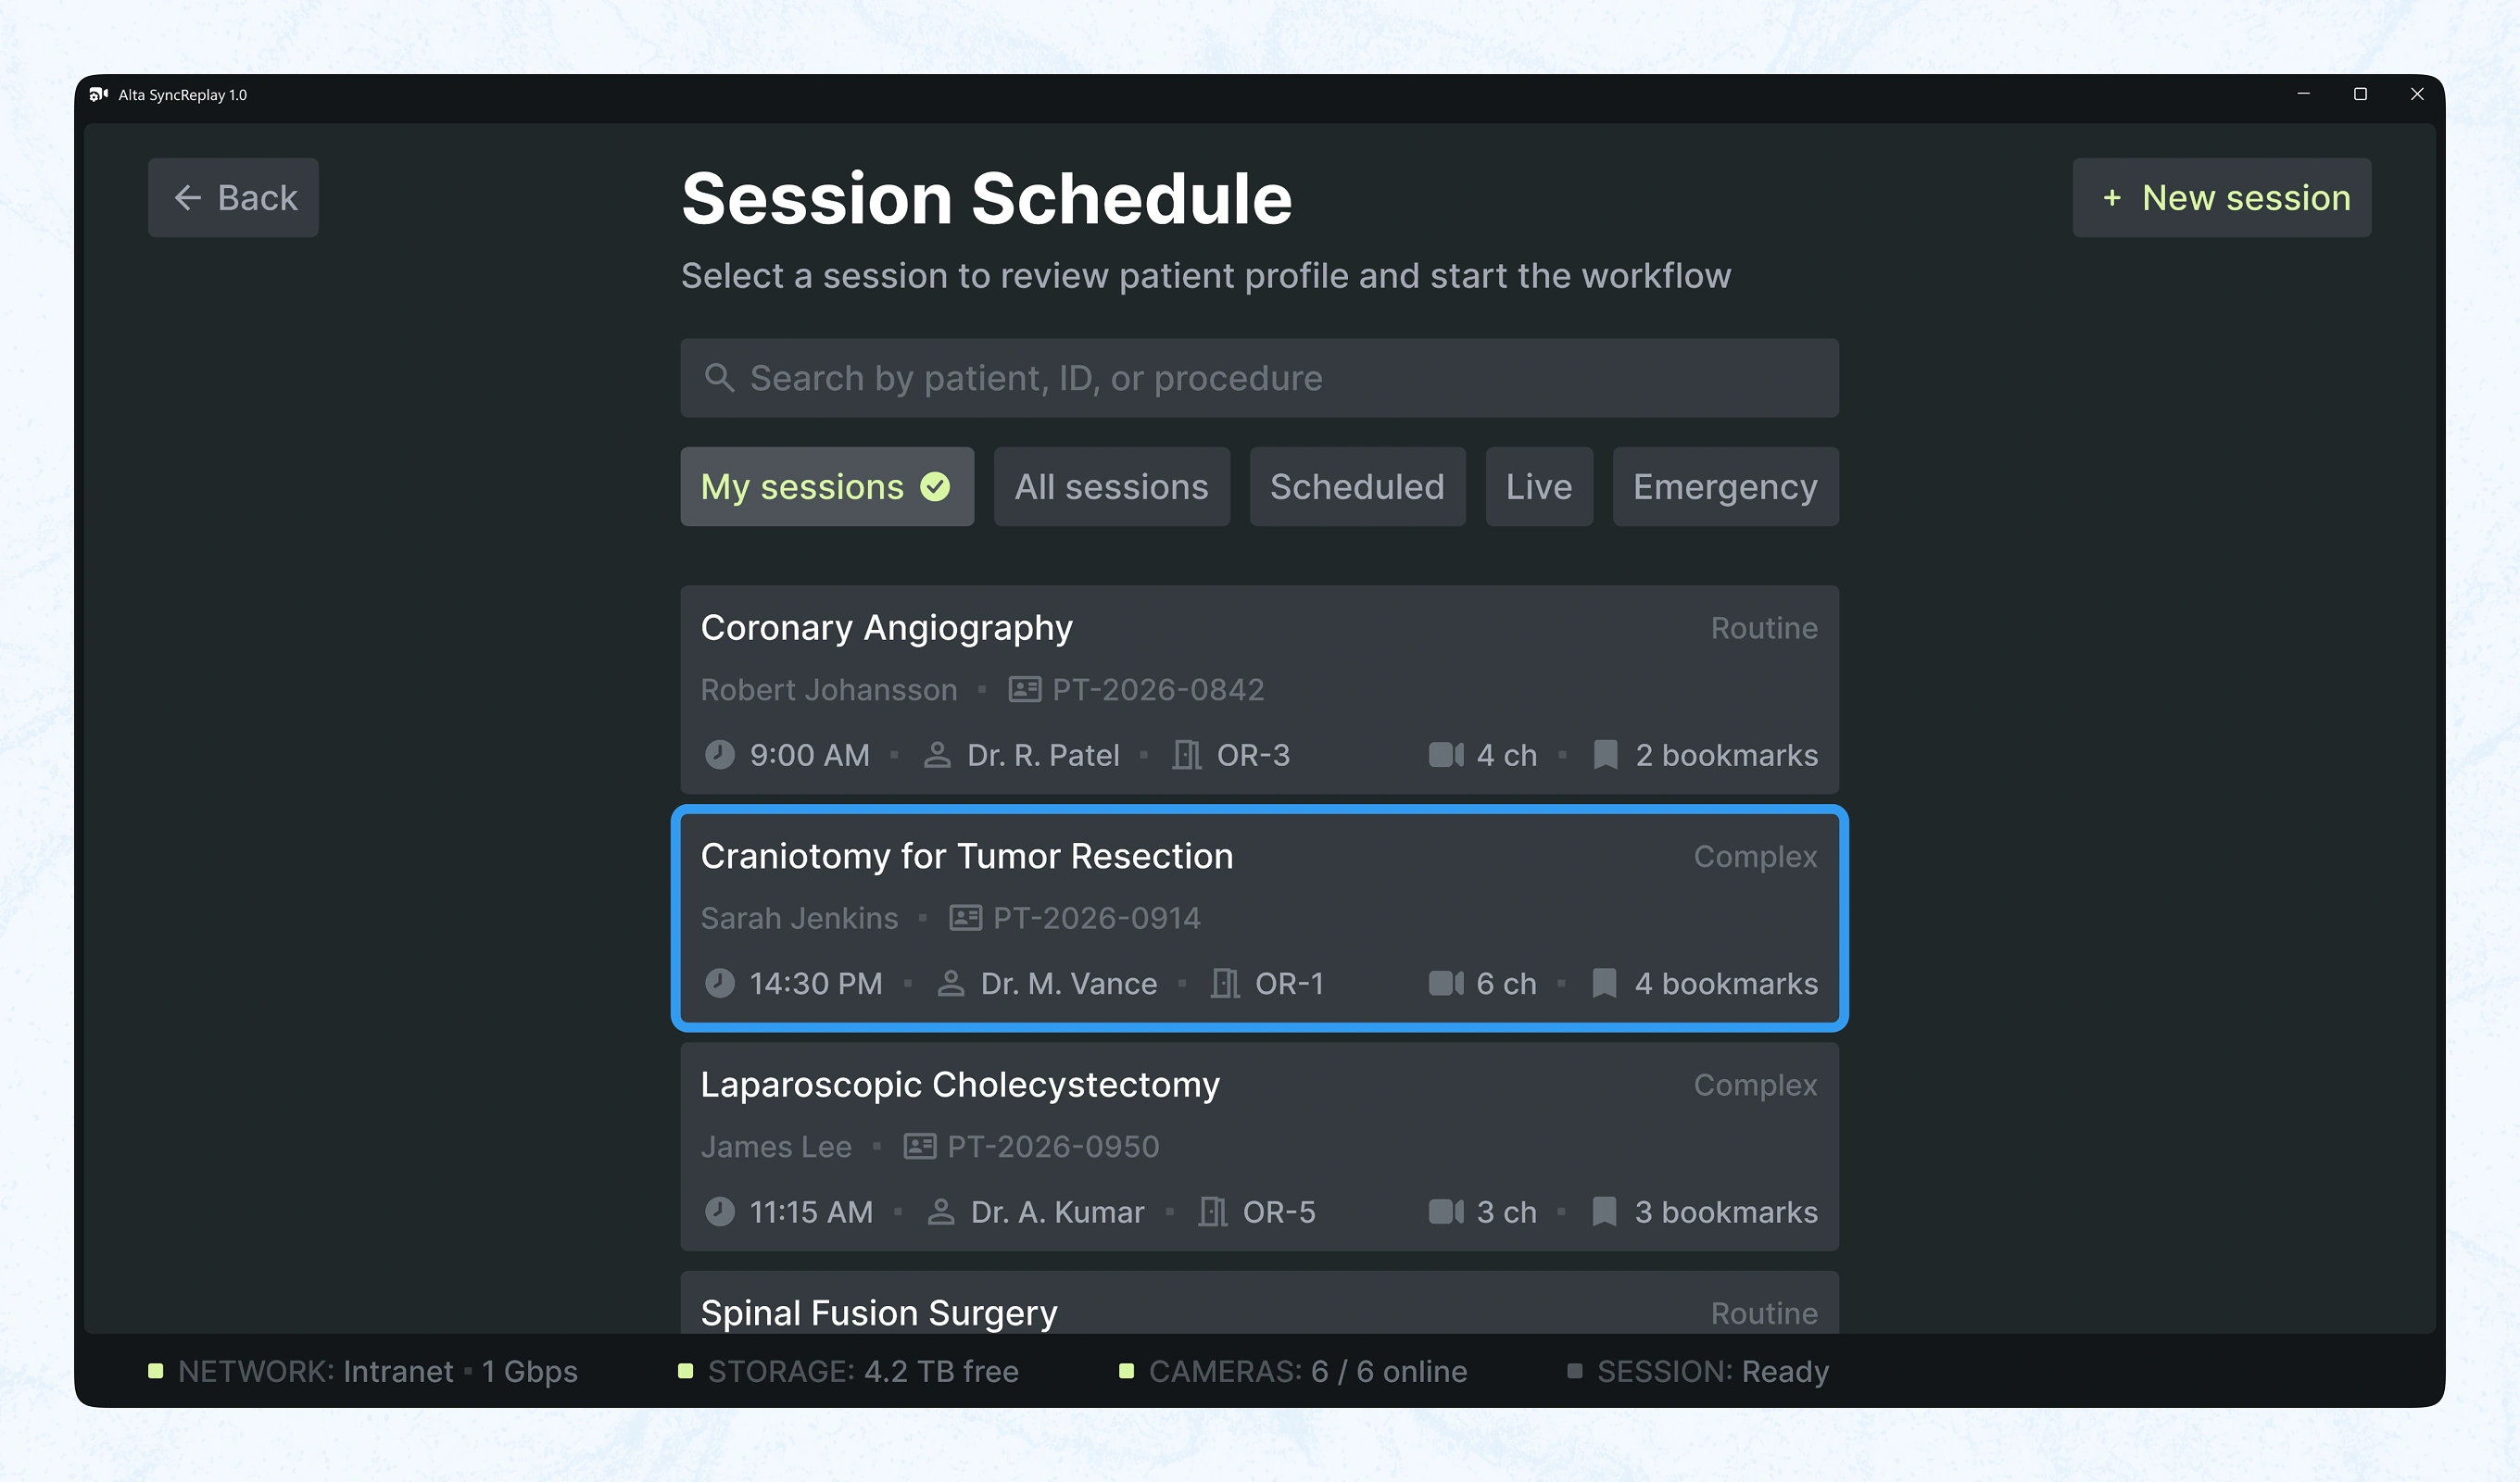
Daily list of scheduled procedures inside the clinical decision support platform, sorted by time, operating room, and case complexity. Filters split live, scheduled, and emergency sessions so staff find the right case fast.
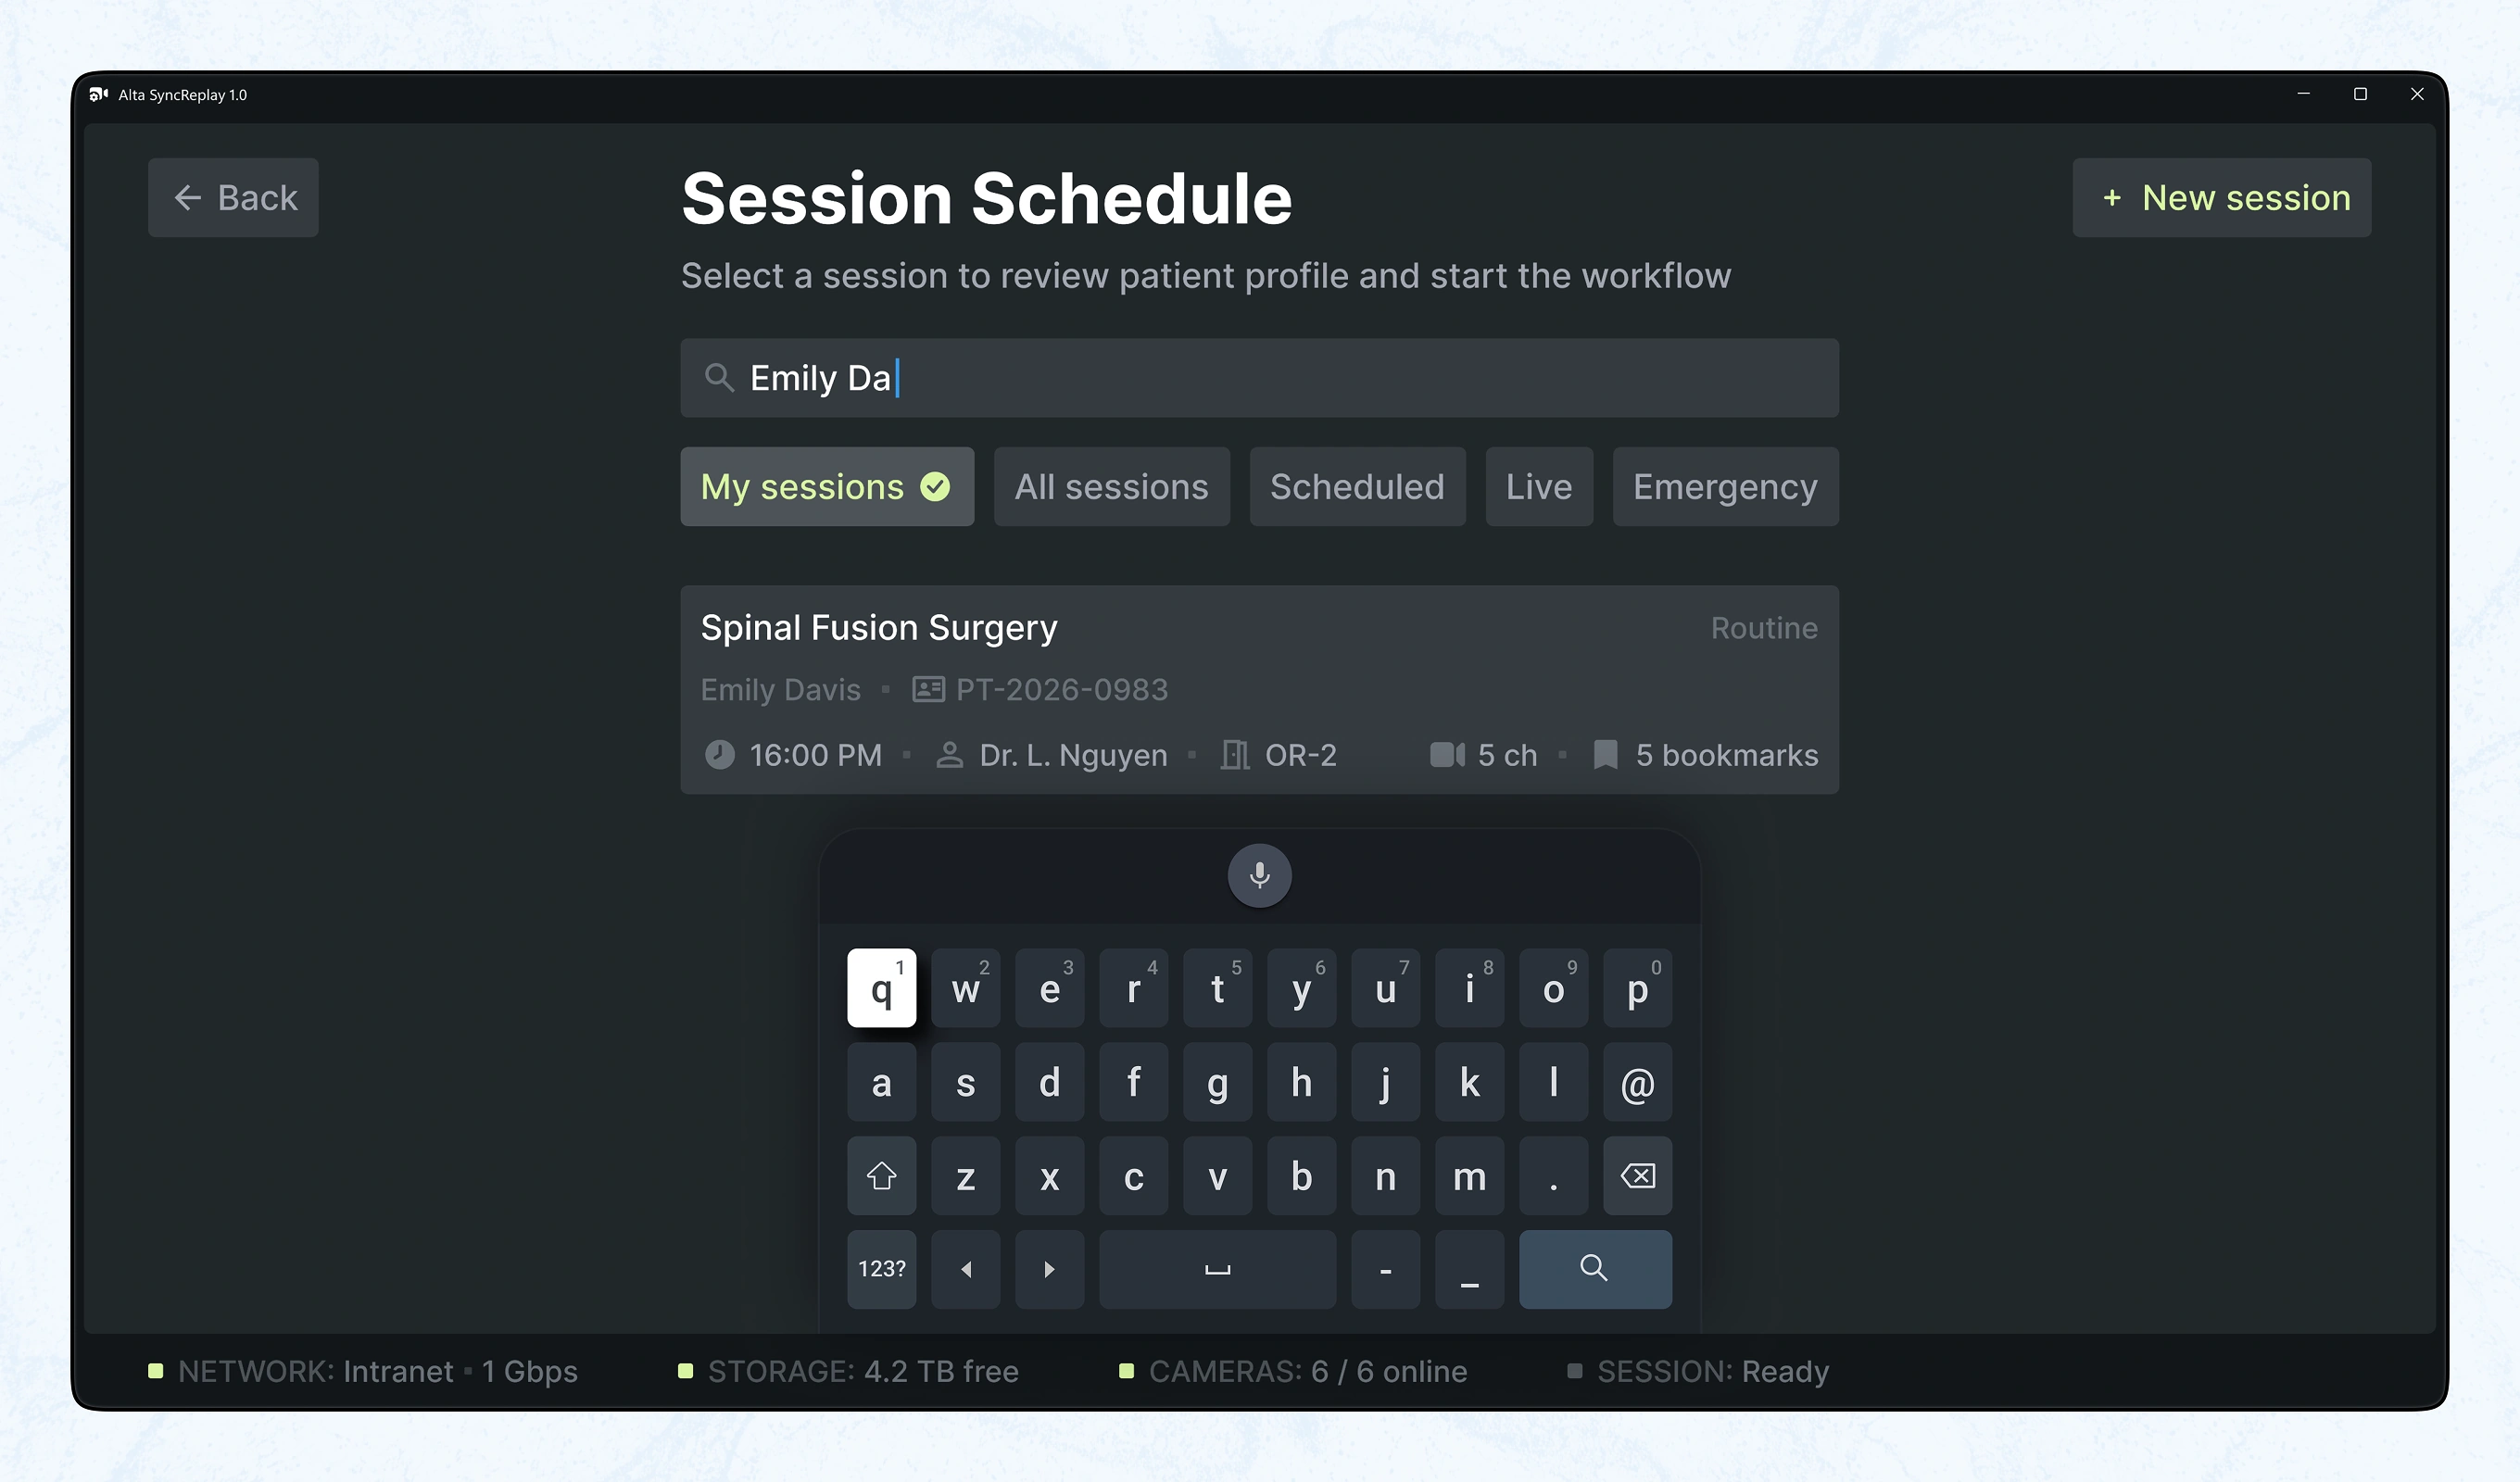
Same schedule view on a tablet, using an on-screen keyboard for touch input in the OR. A partial patient name narrows results instantly, confirming the layout adapts to touch as well as desktop use.
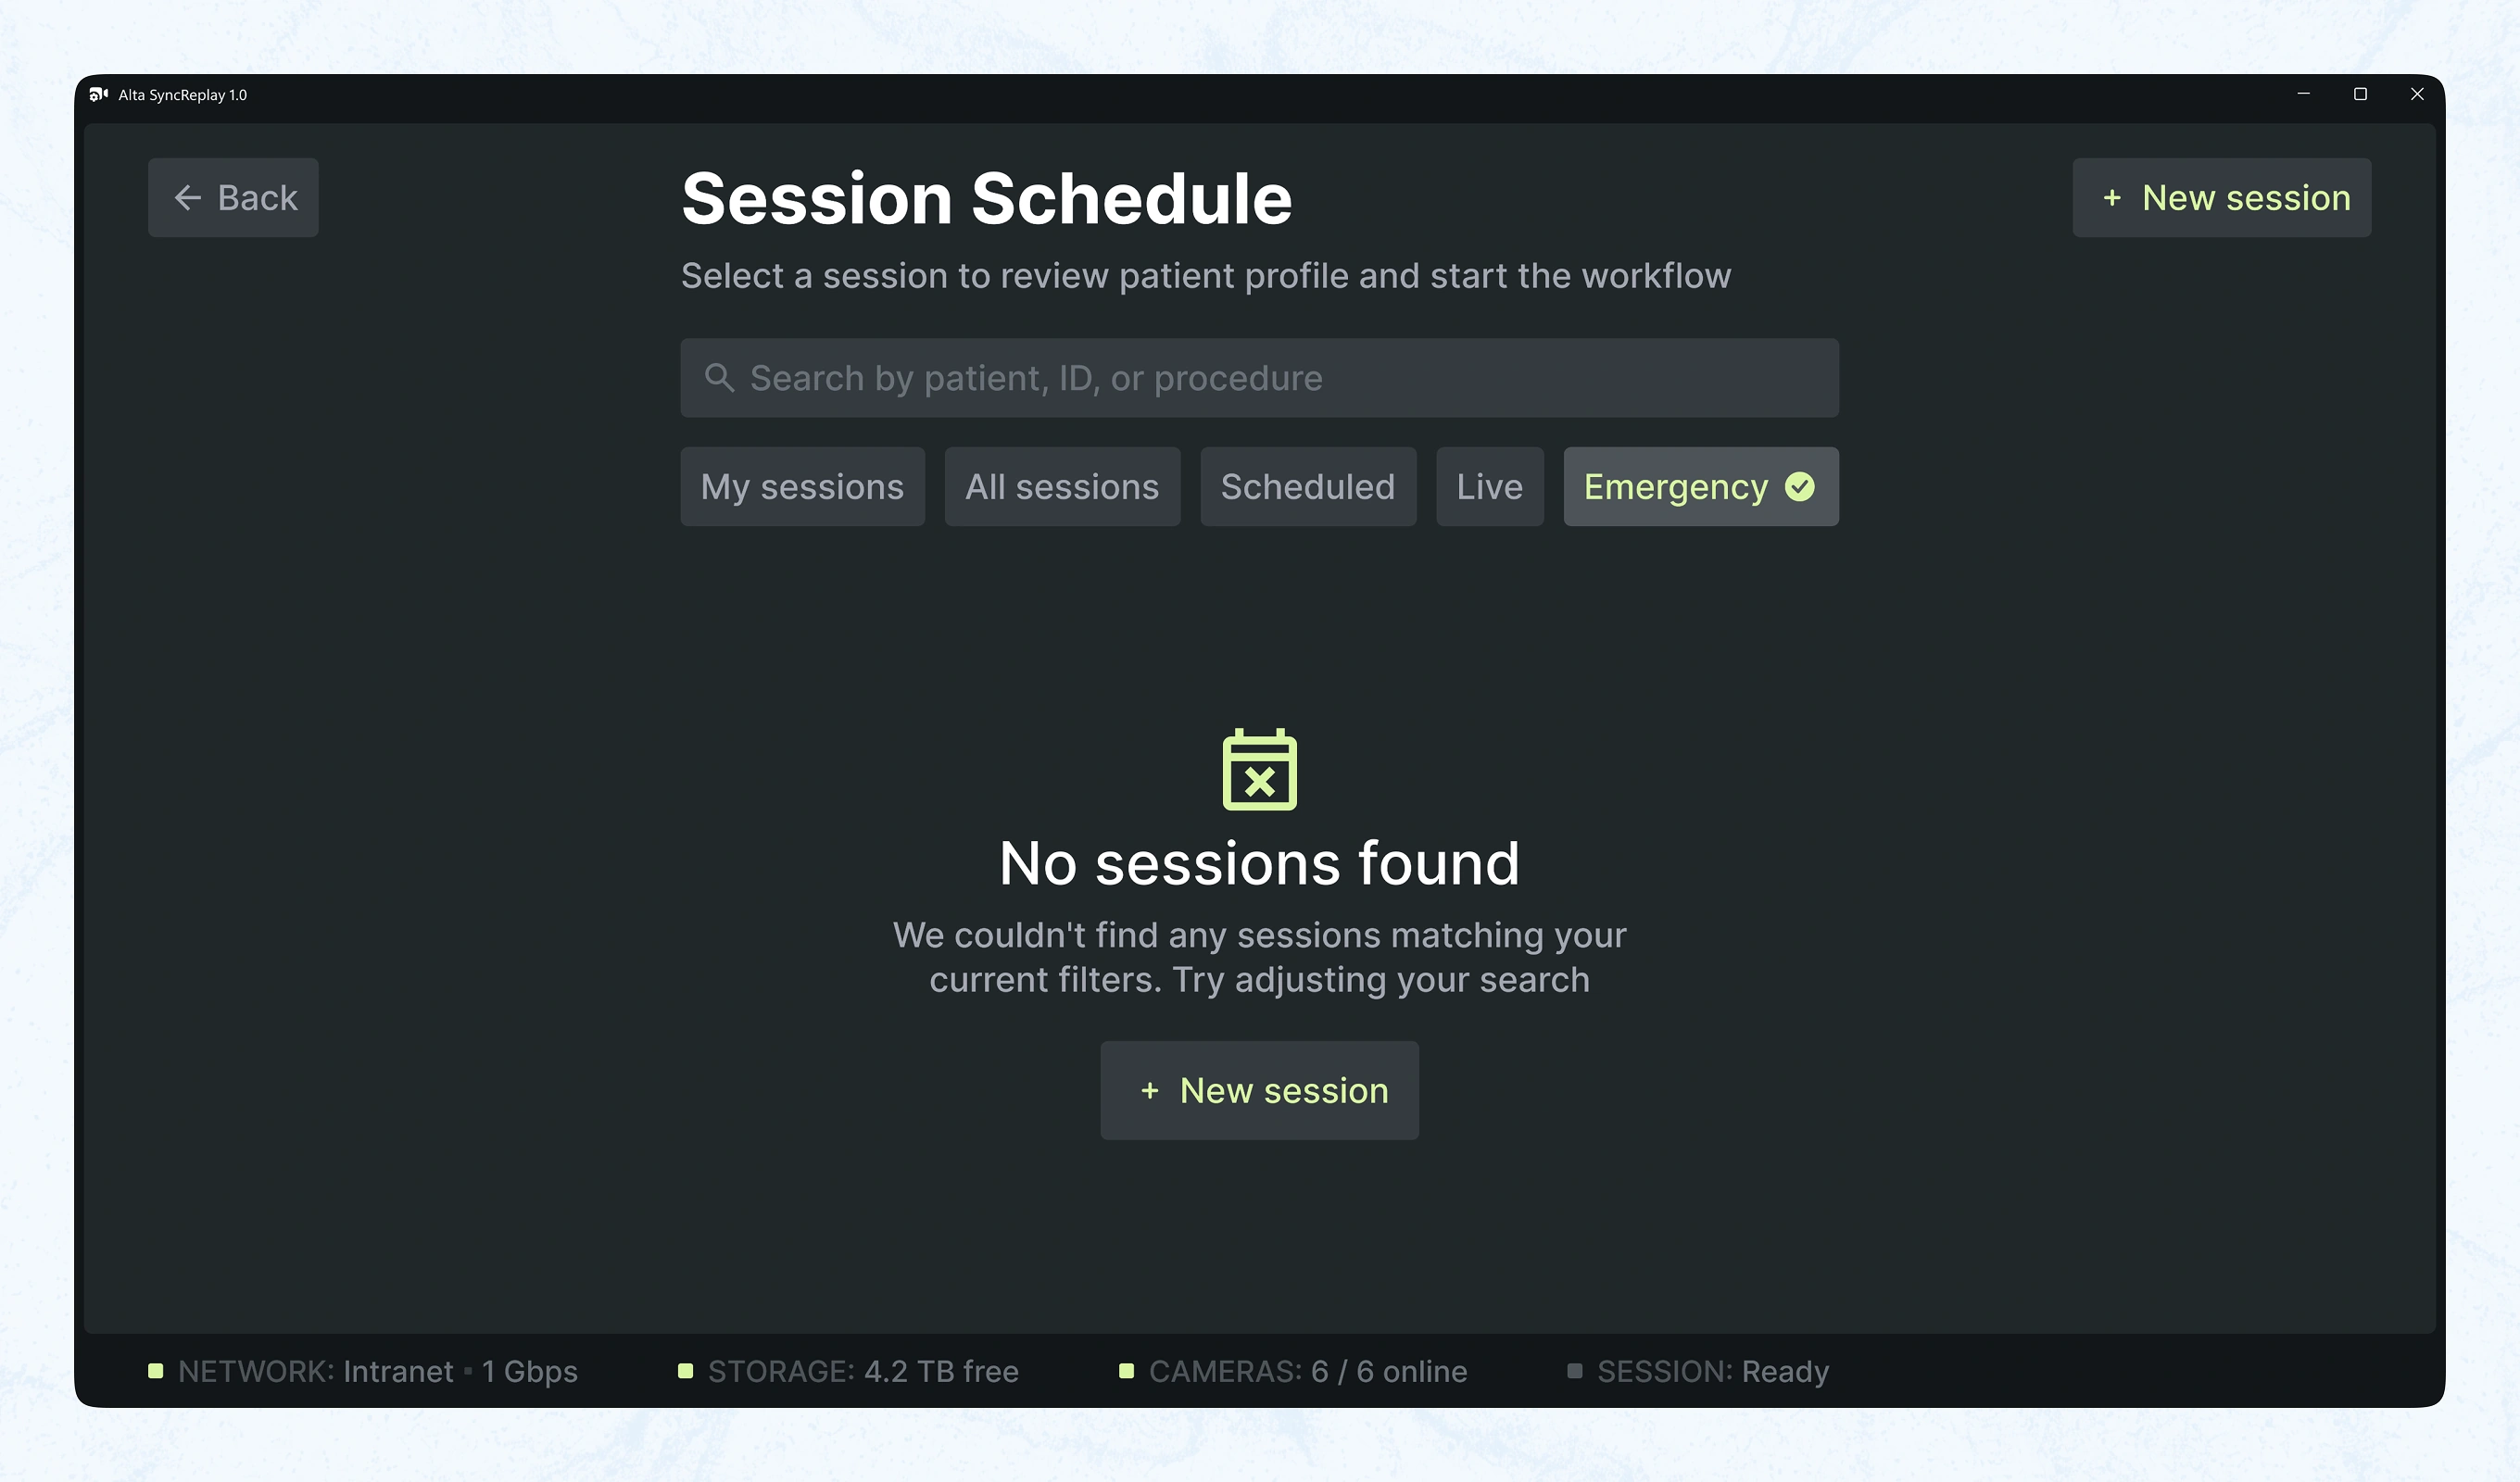
Guidance shown when a filter, like Emergency, returns no matching sessions. A clear message and a New Session shortcut prevent staff from mistaking an empty list for a system fault.
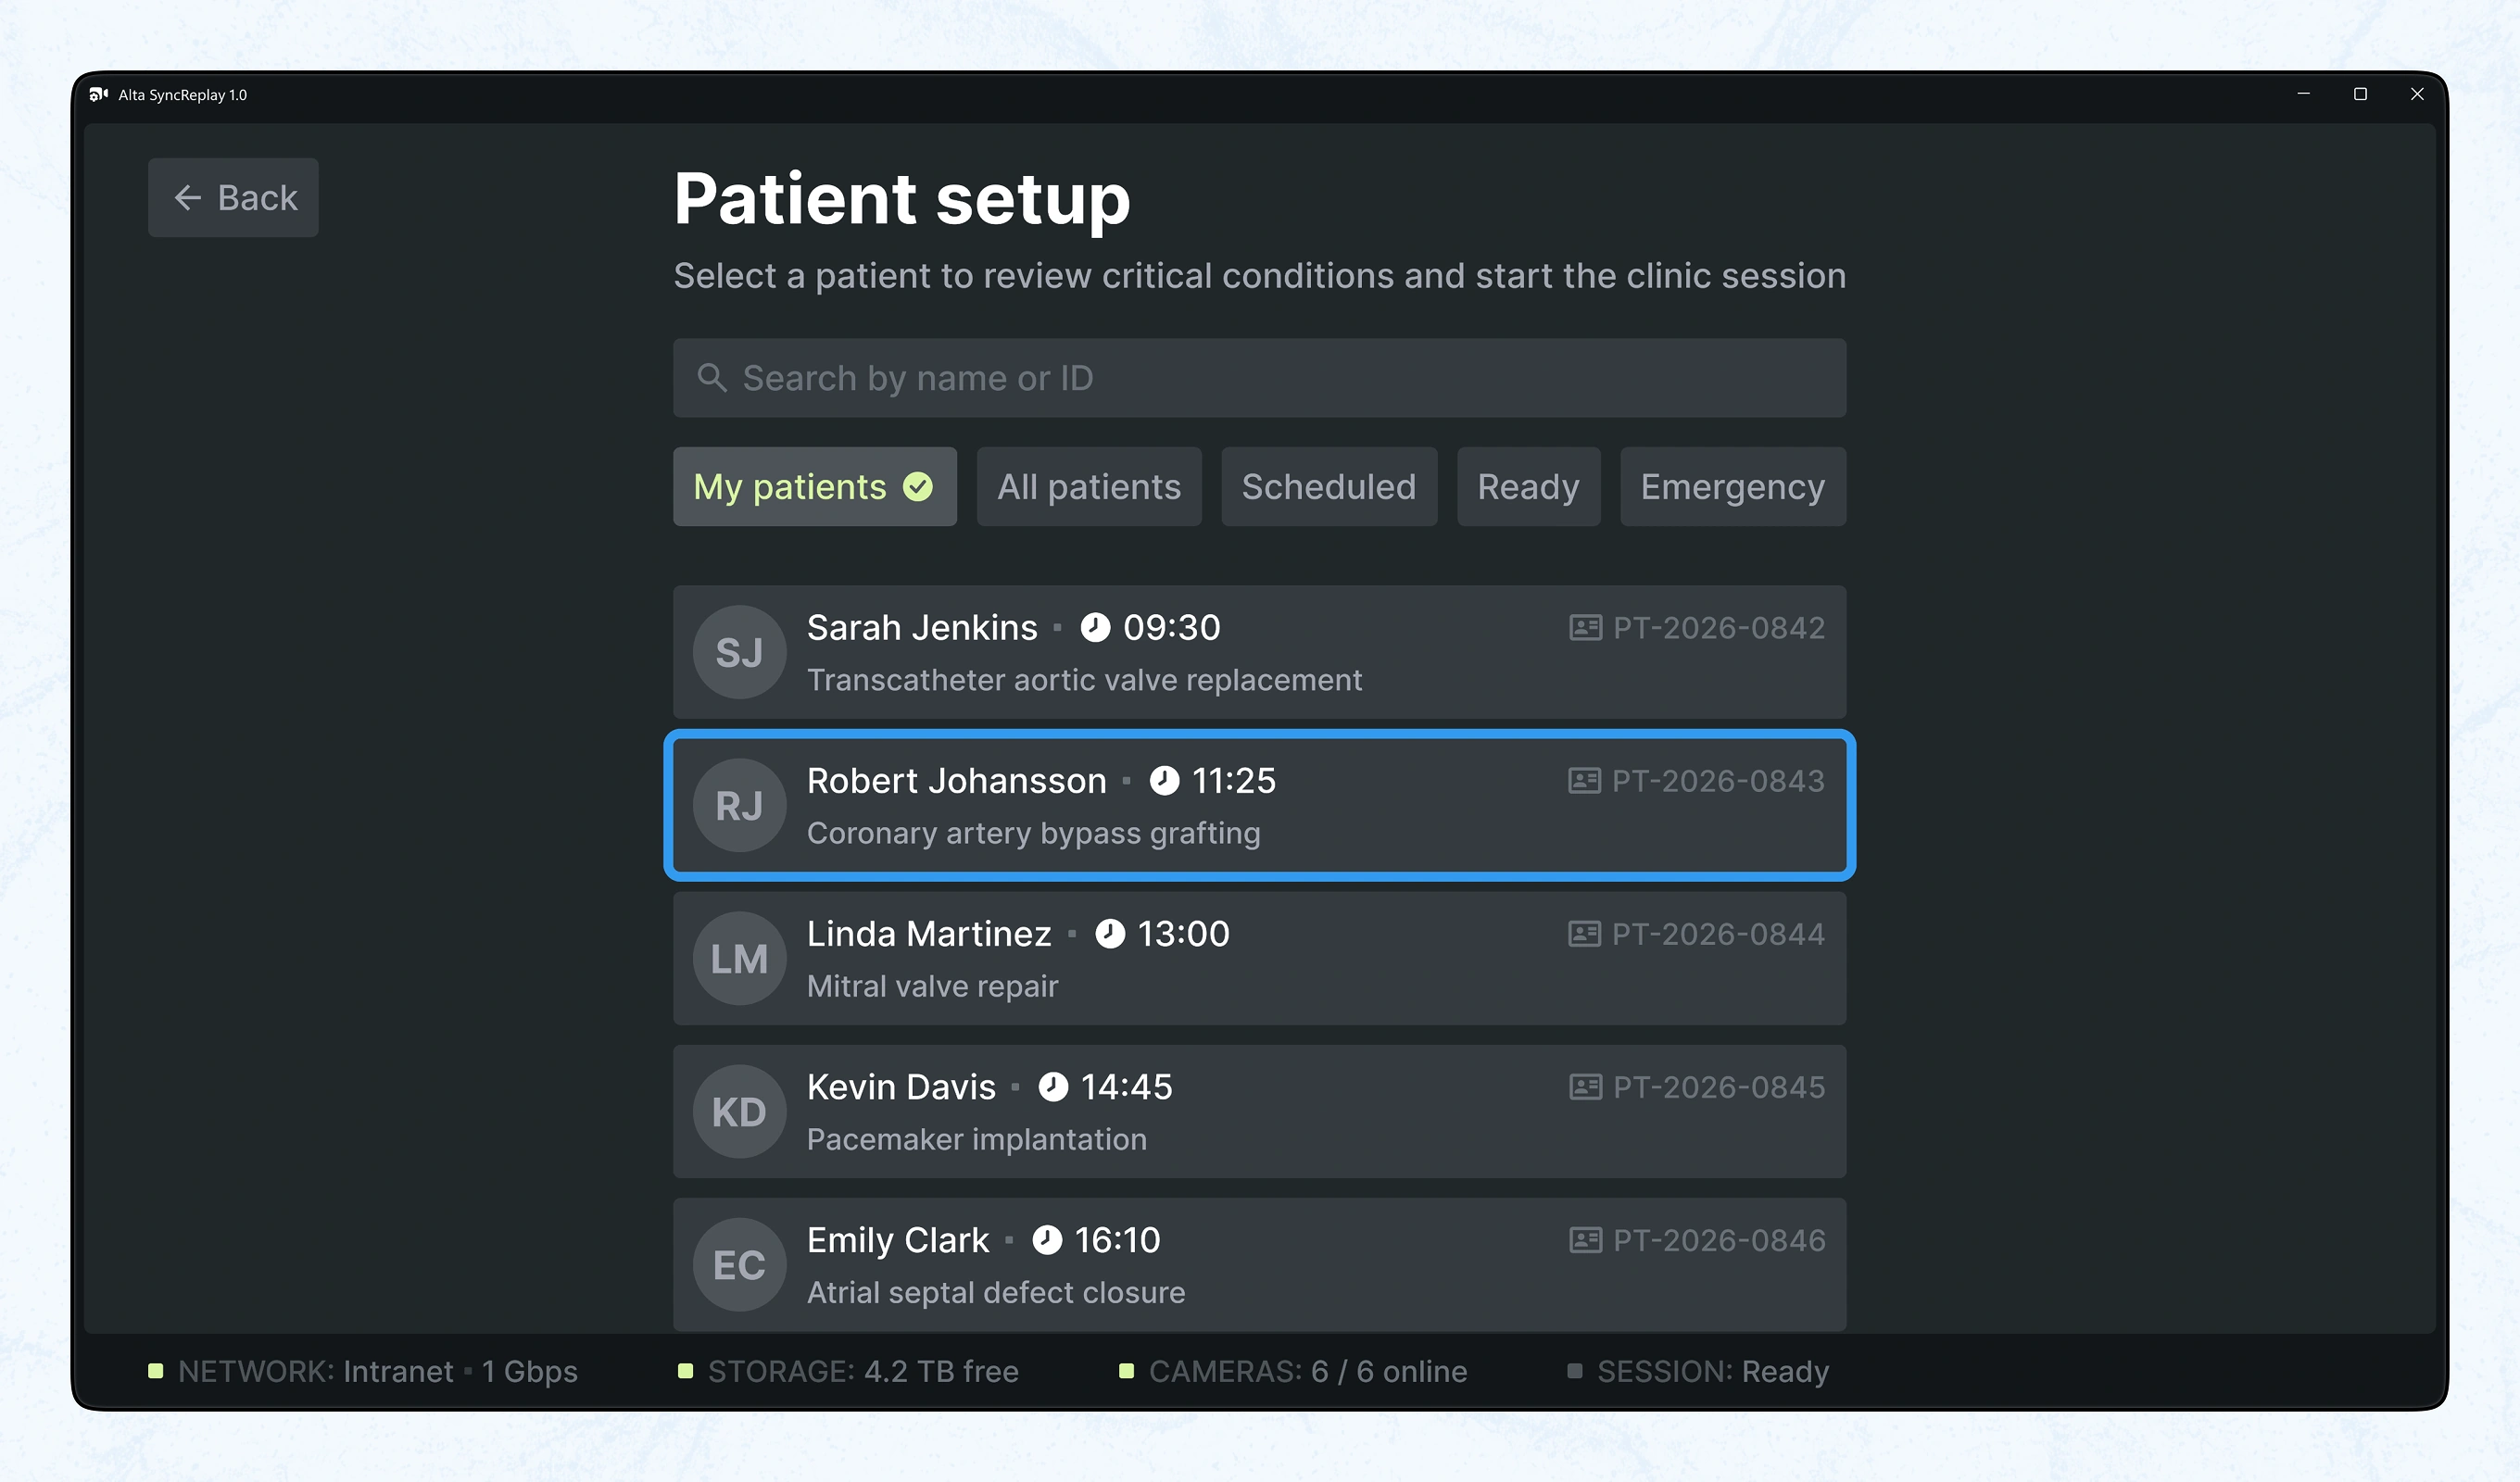
List of patients tied to upcoming procedures, searchable by name or ID before starting a clinic session. Each row shows appointment time, patient ID, and the planned procedure at a glance.
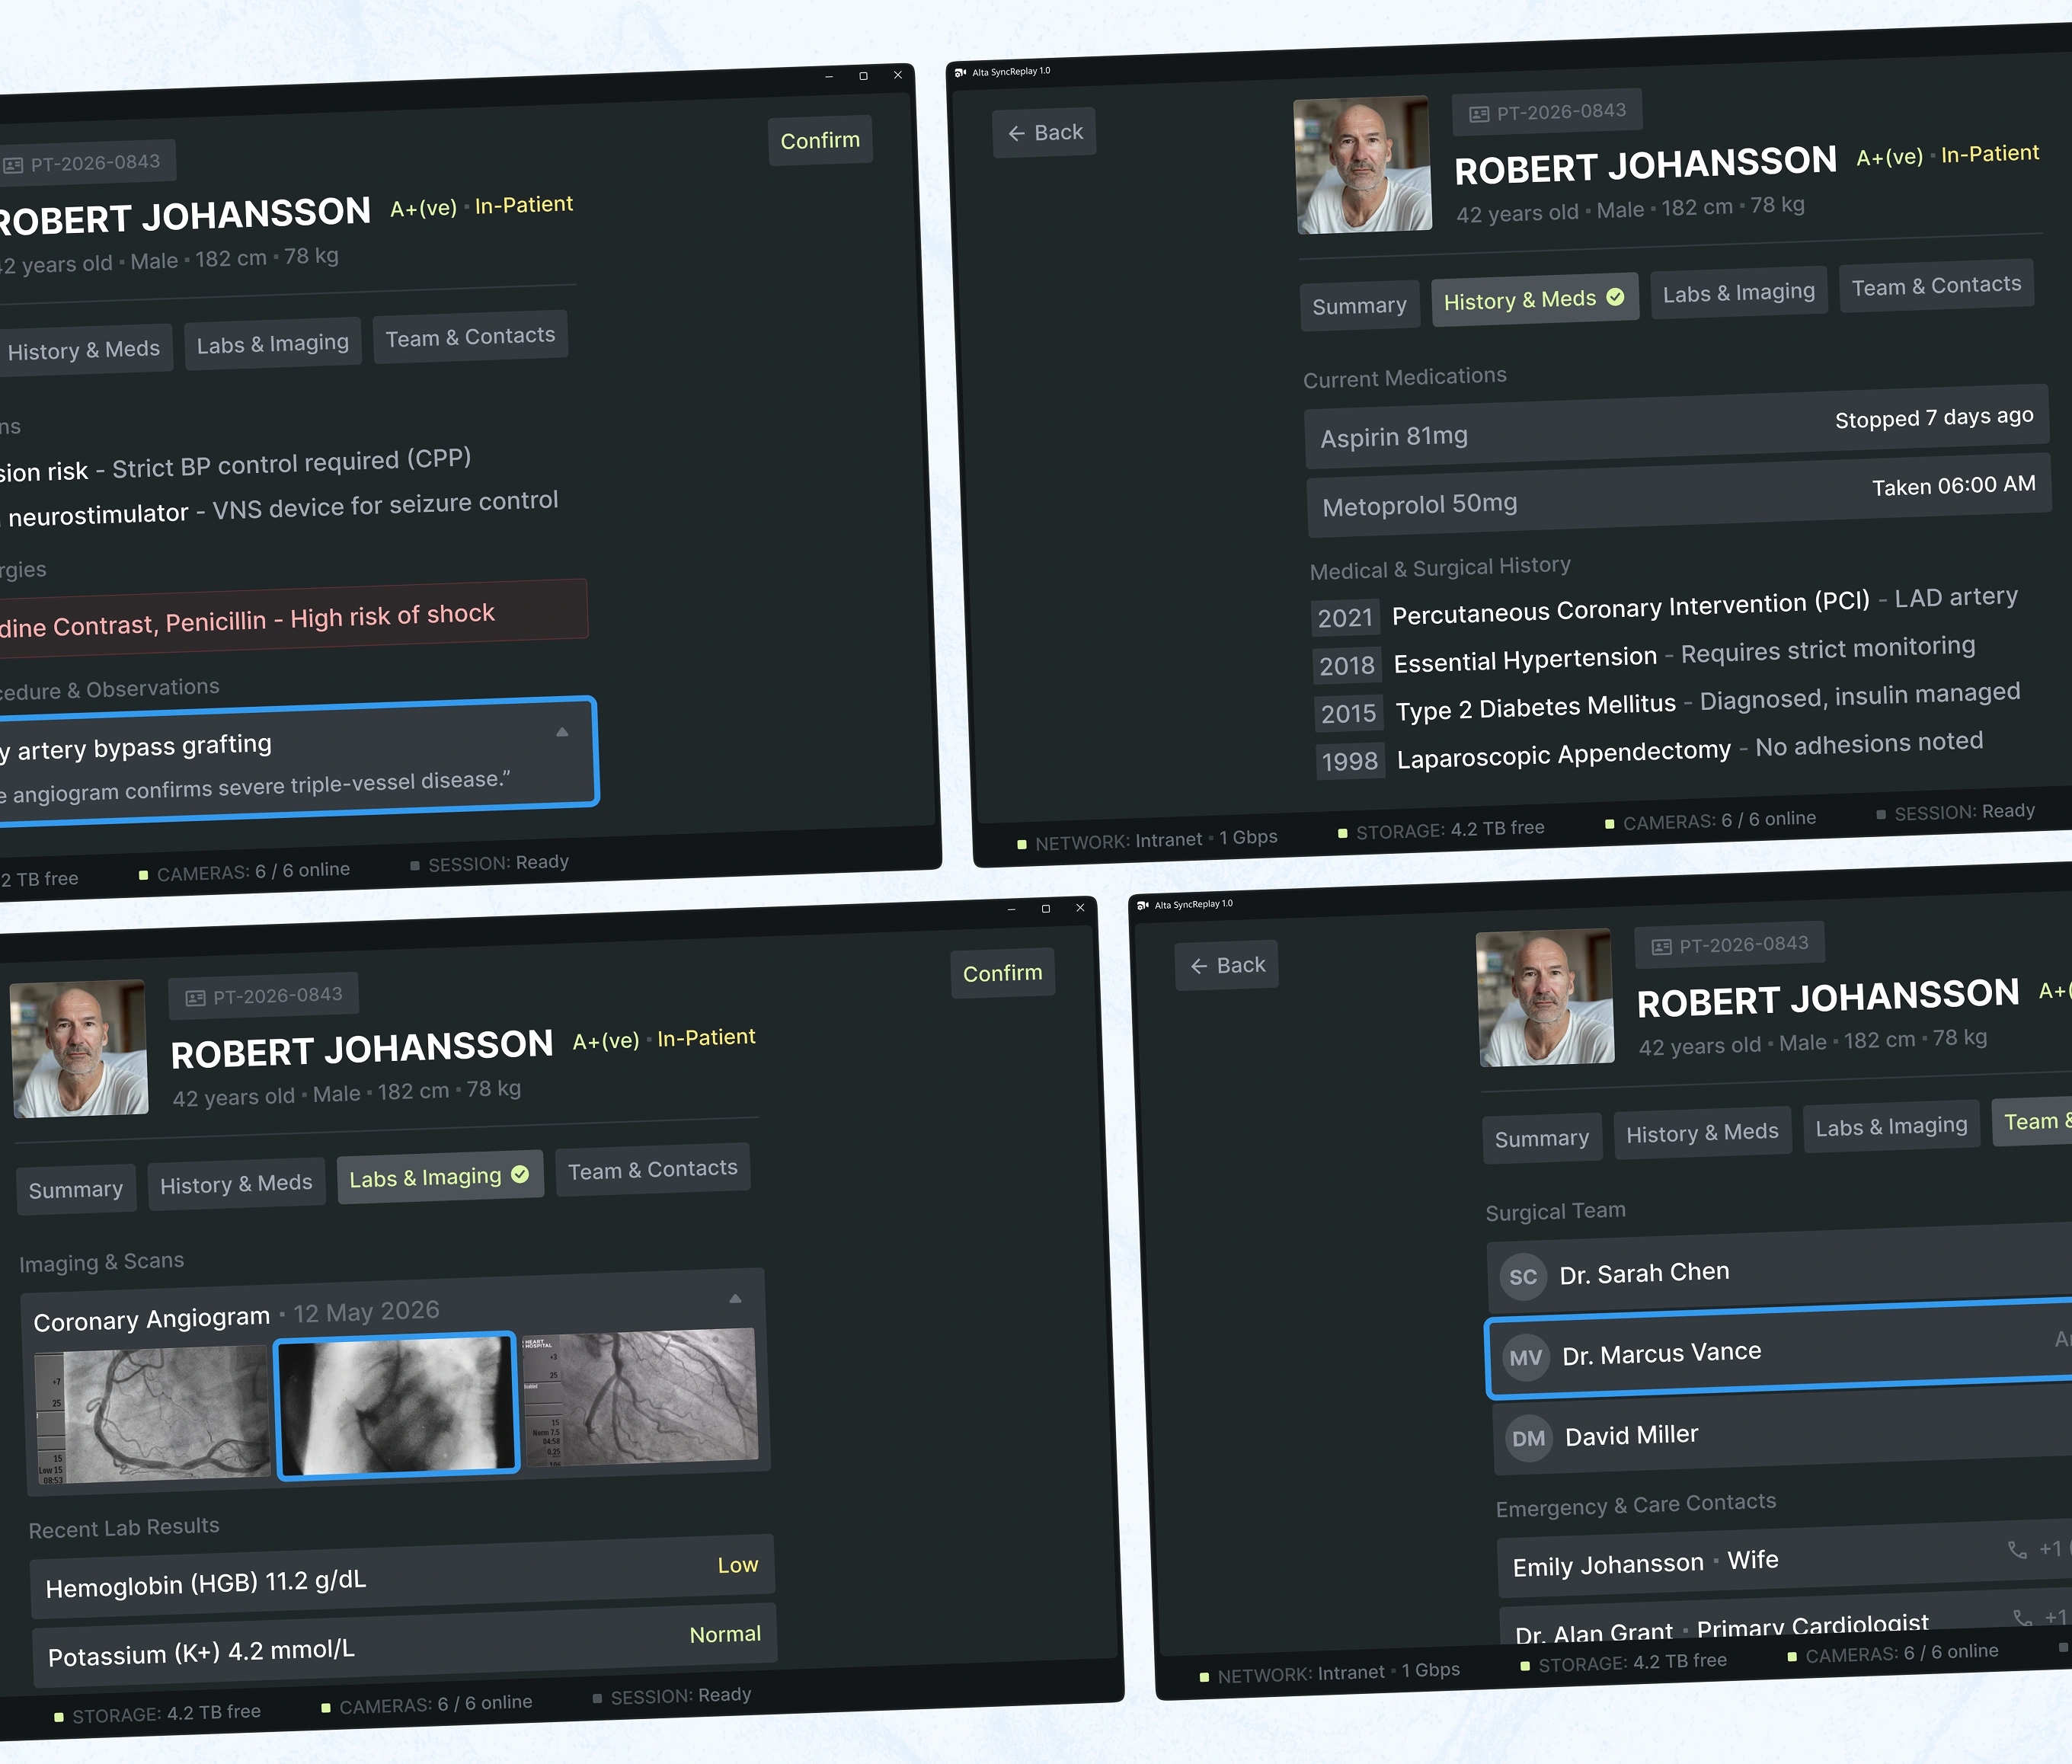
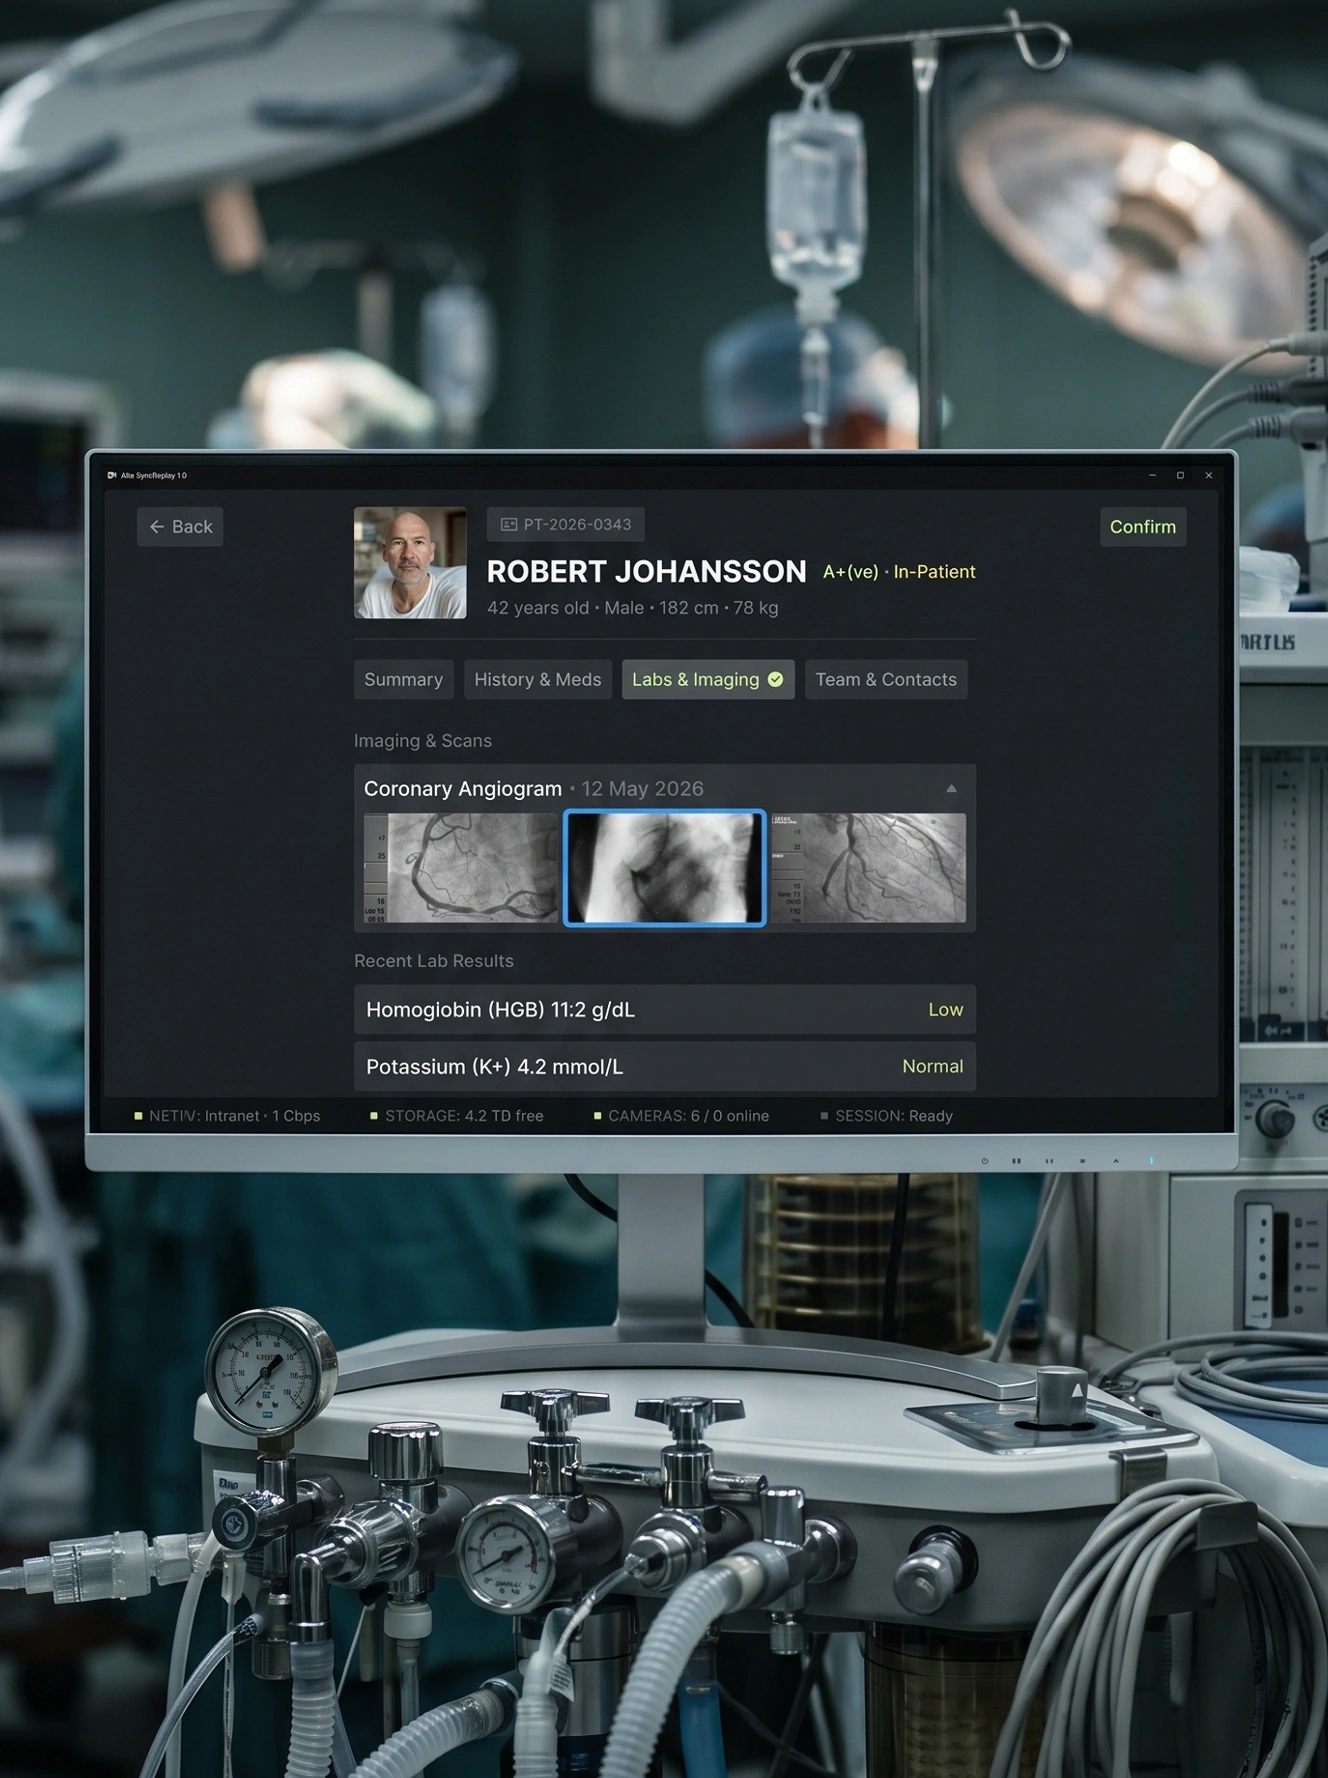
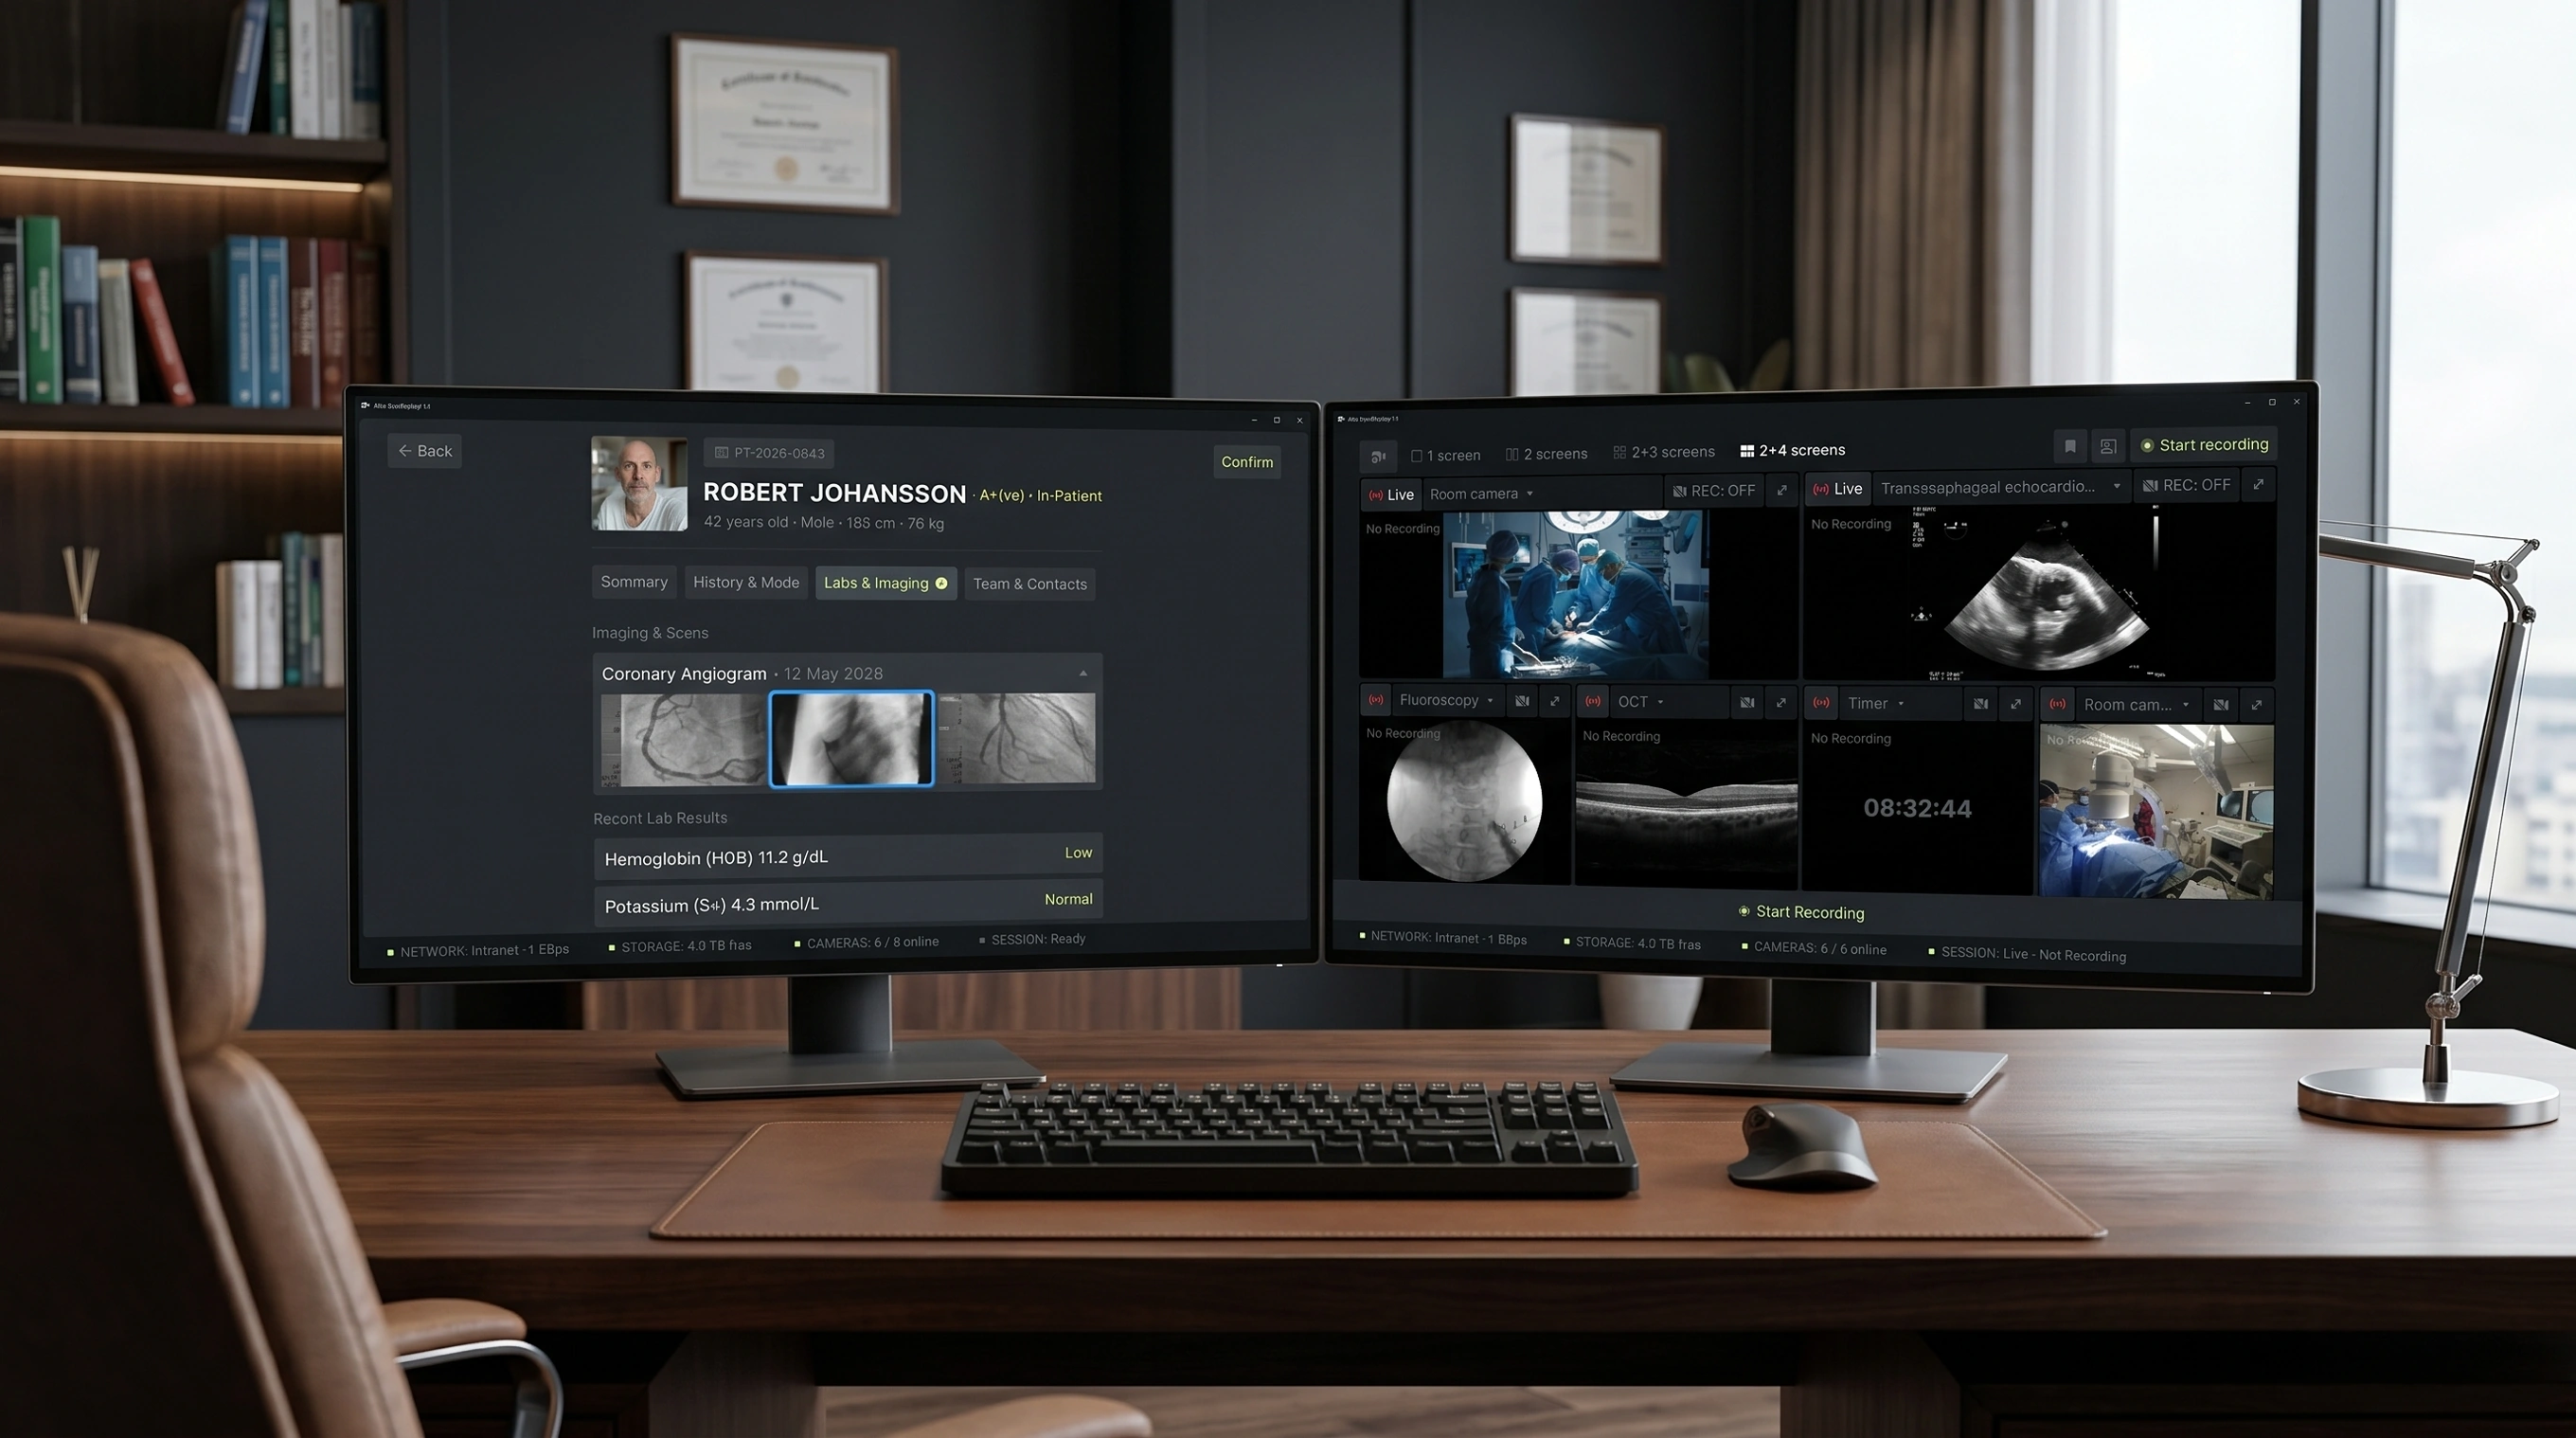
Full clinical record for one patient, split into Summary, History & Meds, Labs & Imaging, and Team & Contacts tabs. Allergy warnings, current medications, and imaging results surface directly in the flow that supports surgical decisions.
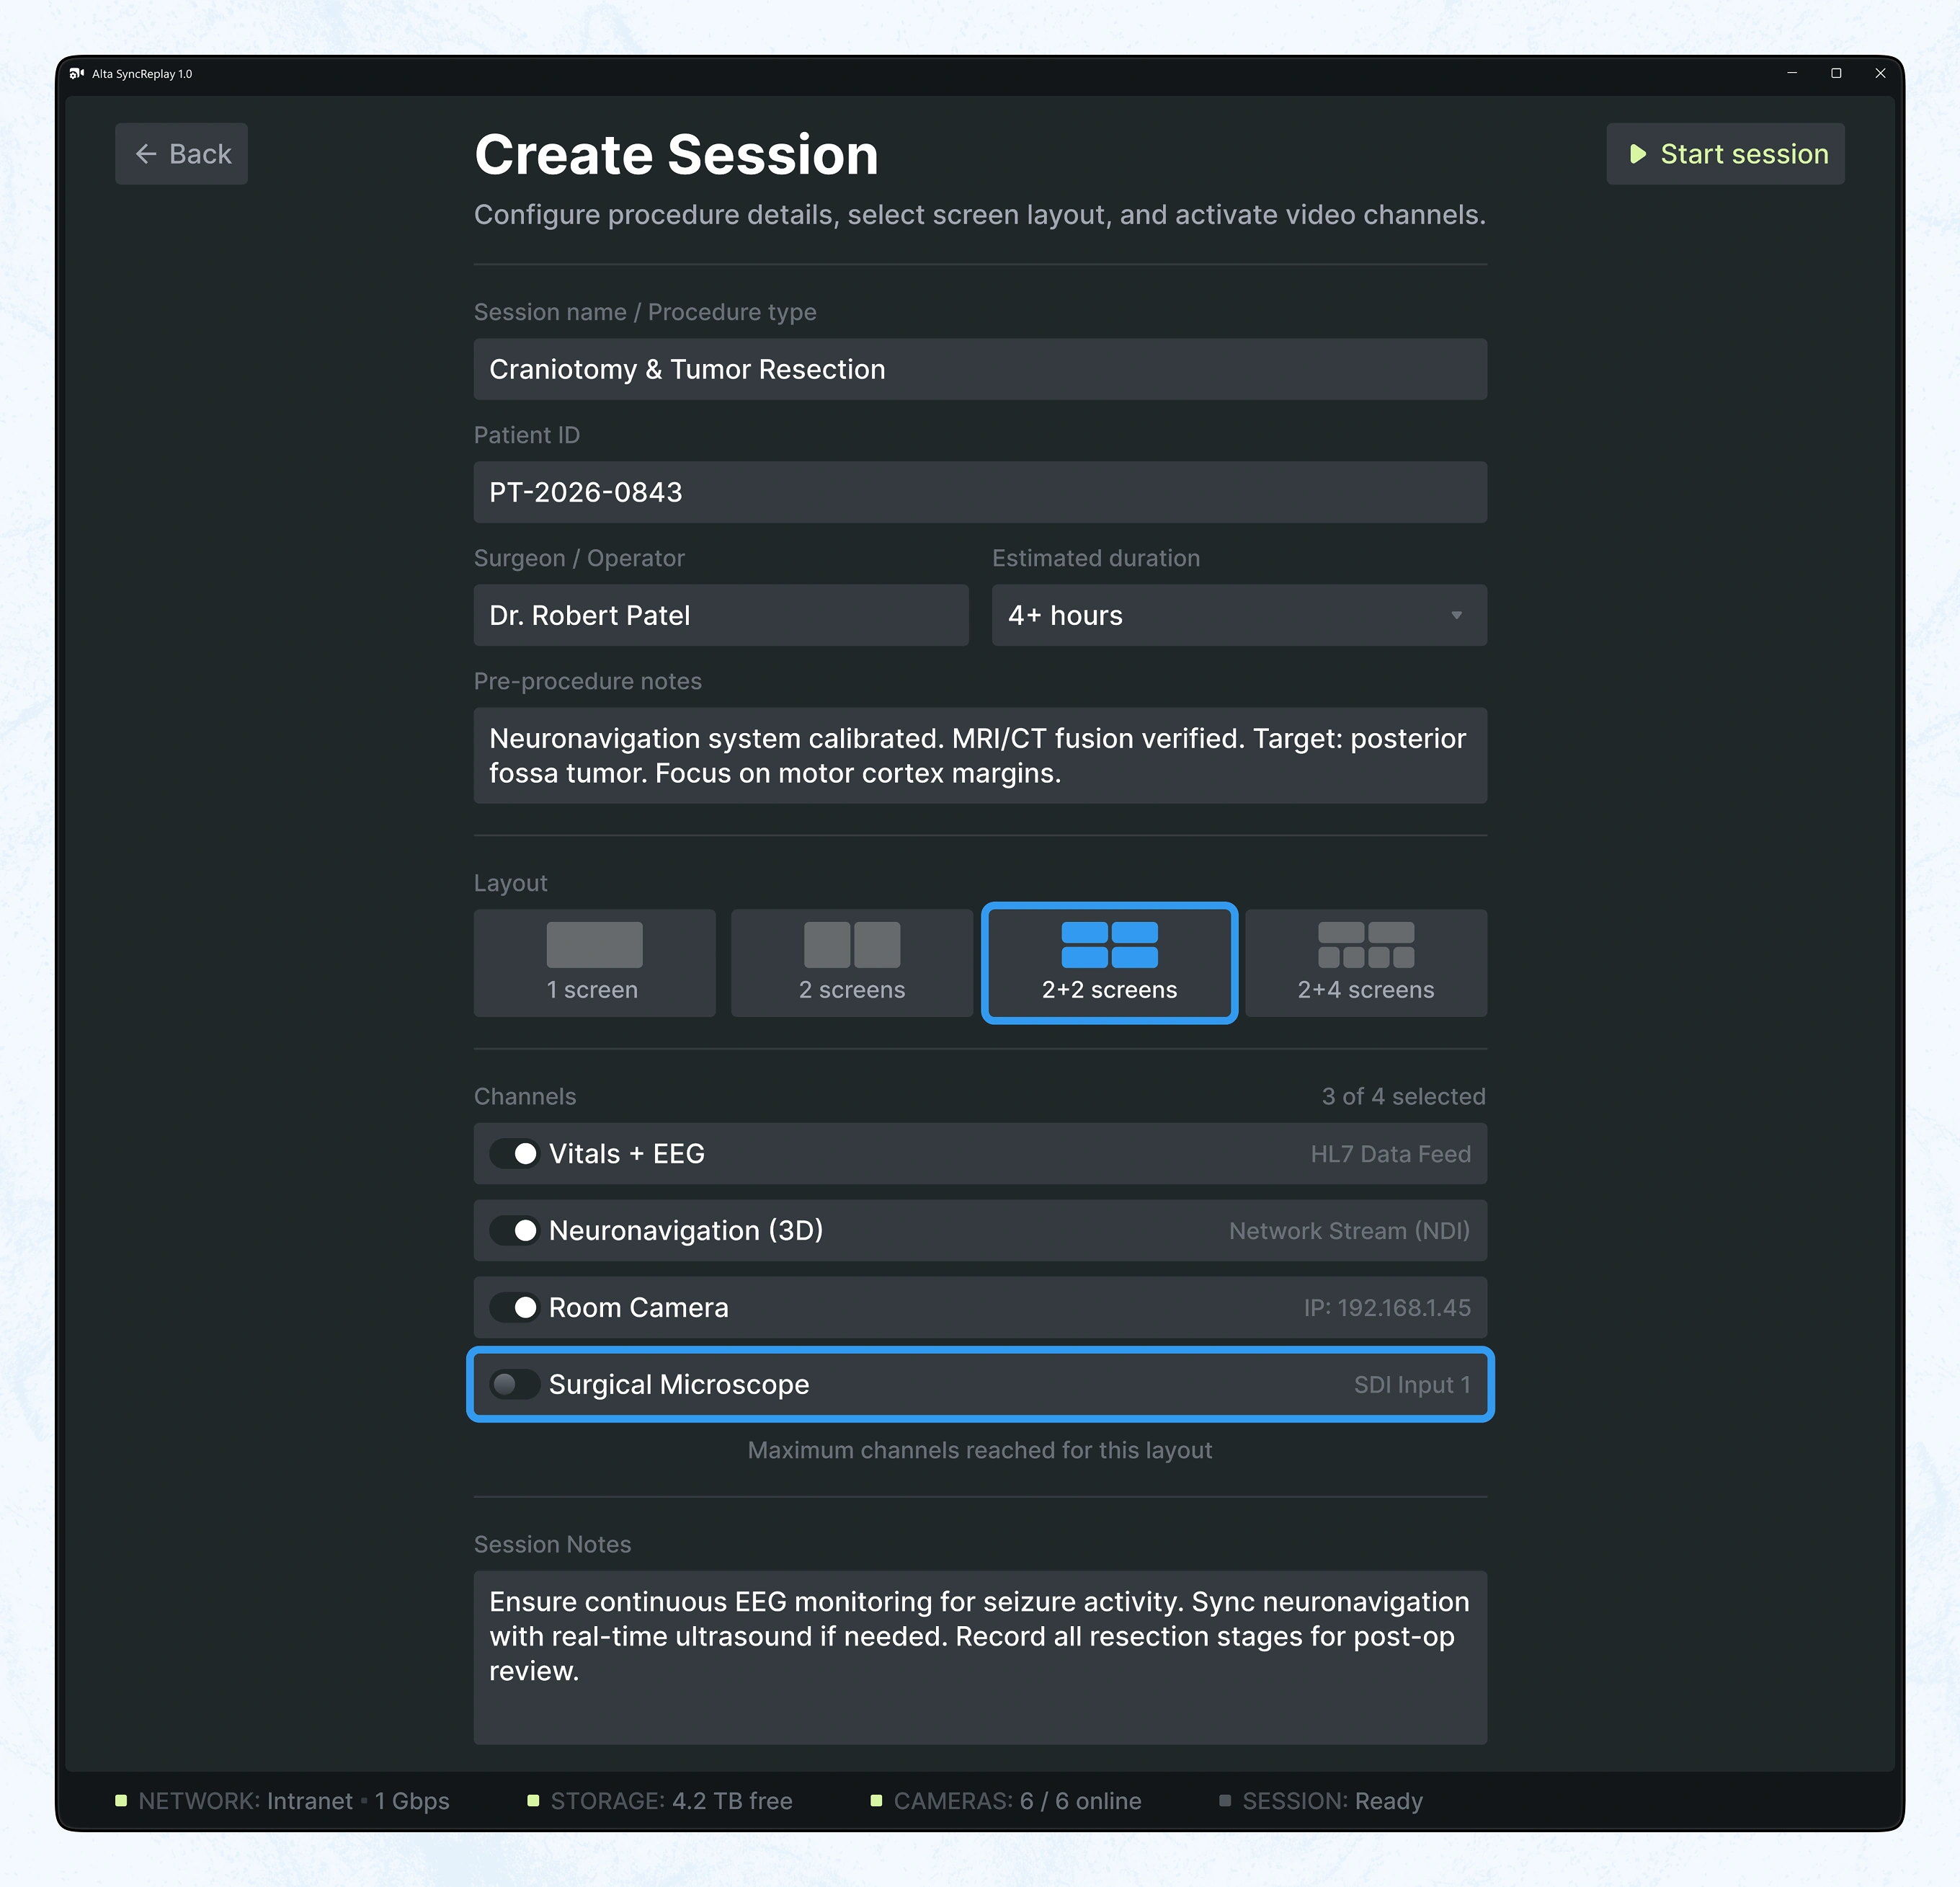
Form for configuring a new procedure: patient ID, surgeon, estimated duration, and pre-procedure notes. Layout options (1 to 2+4 screens) and per-channel toggles cap active feeds once a layout's limit is reached.
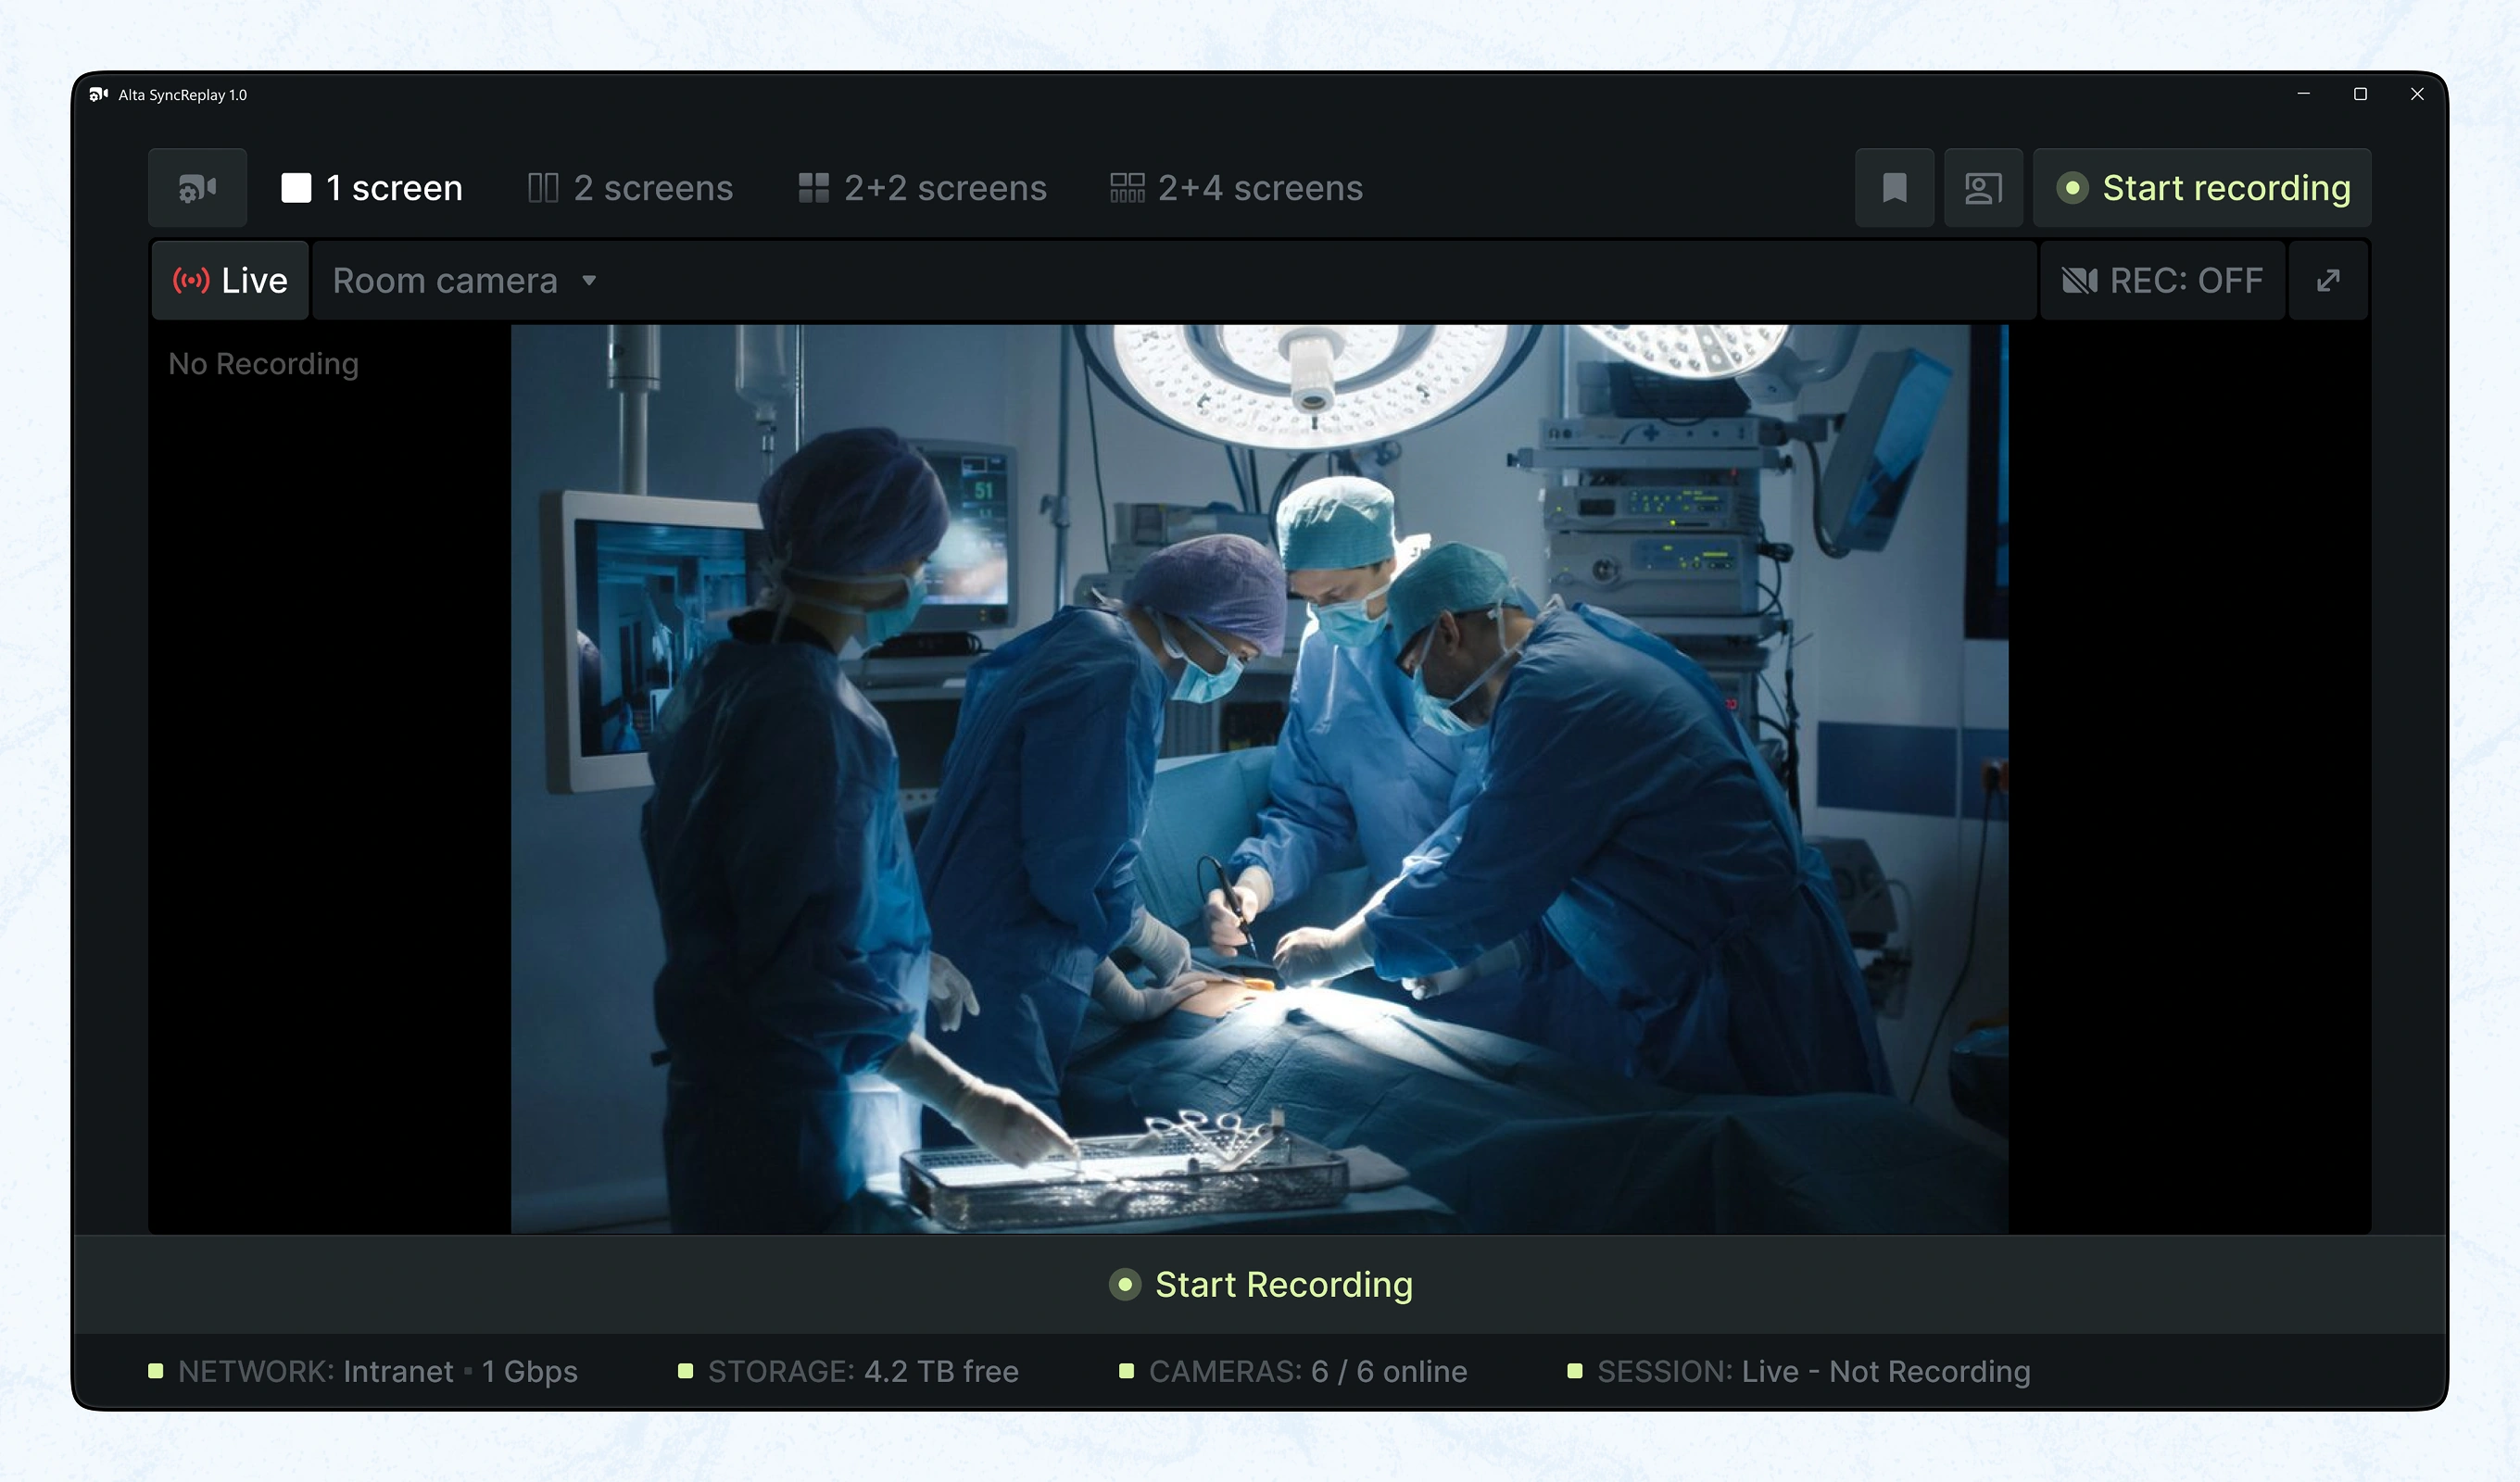
Default single-camera view once a session starts, before recording begins. A persistent status bar tracks network, storage, and camera health so staff can confirm readiness at a glance.
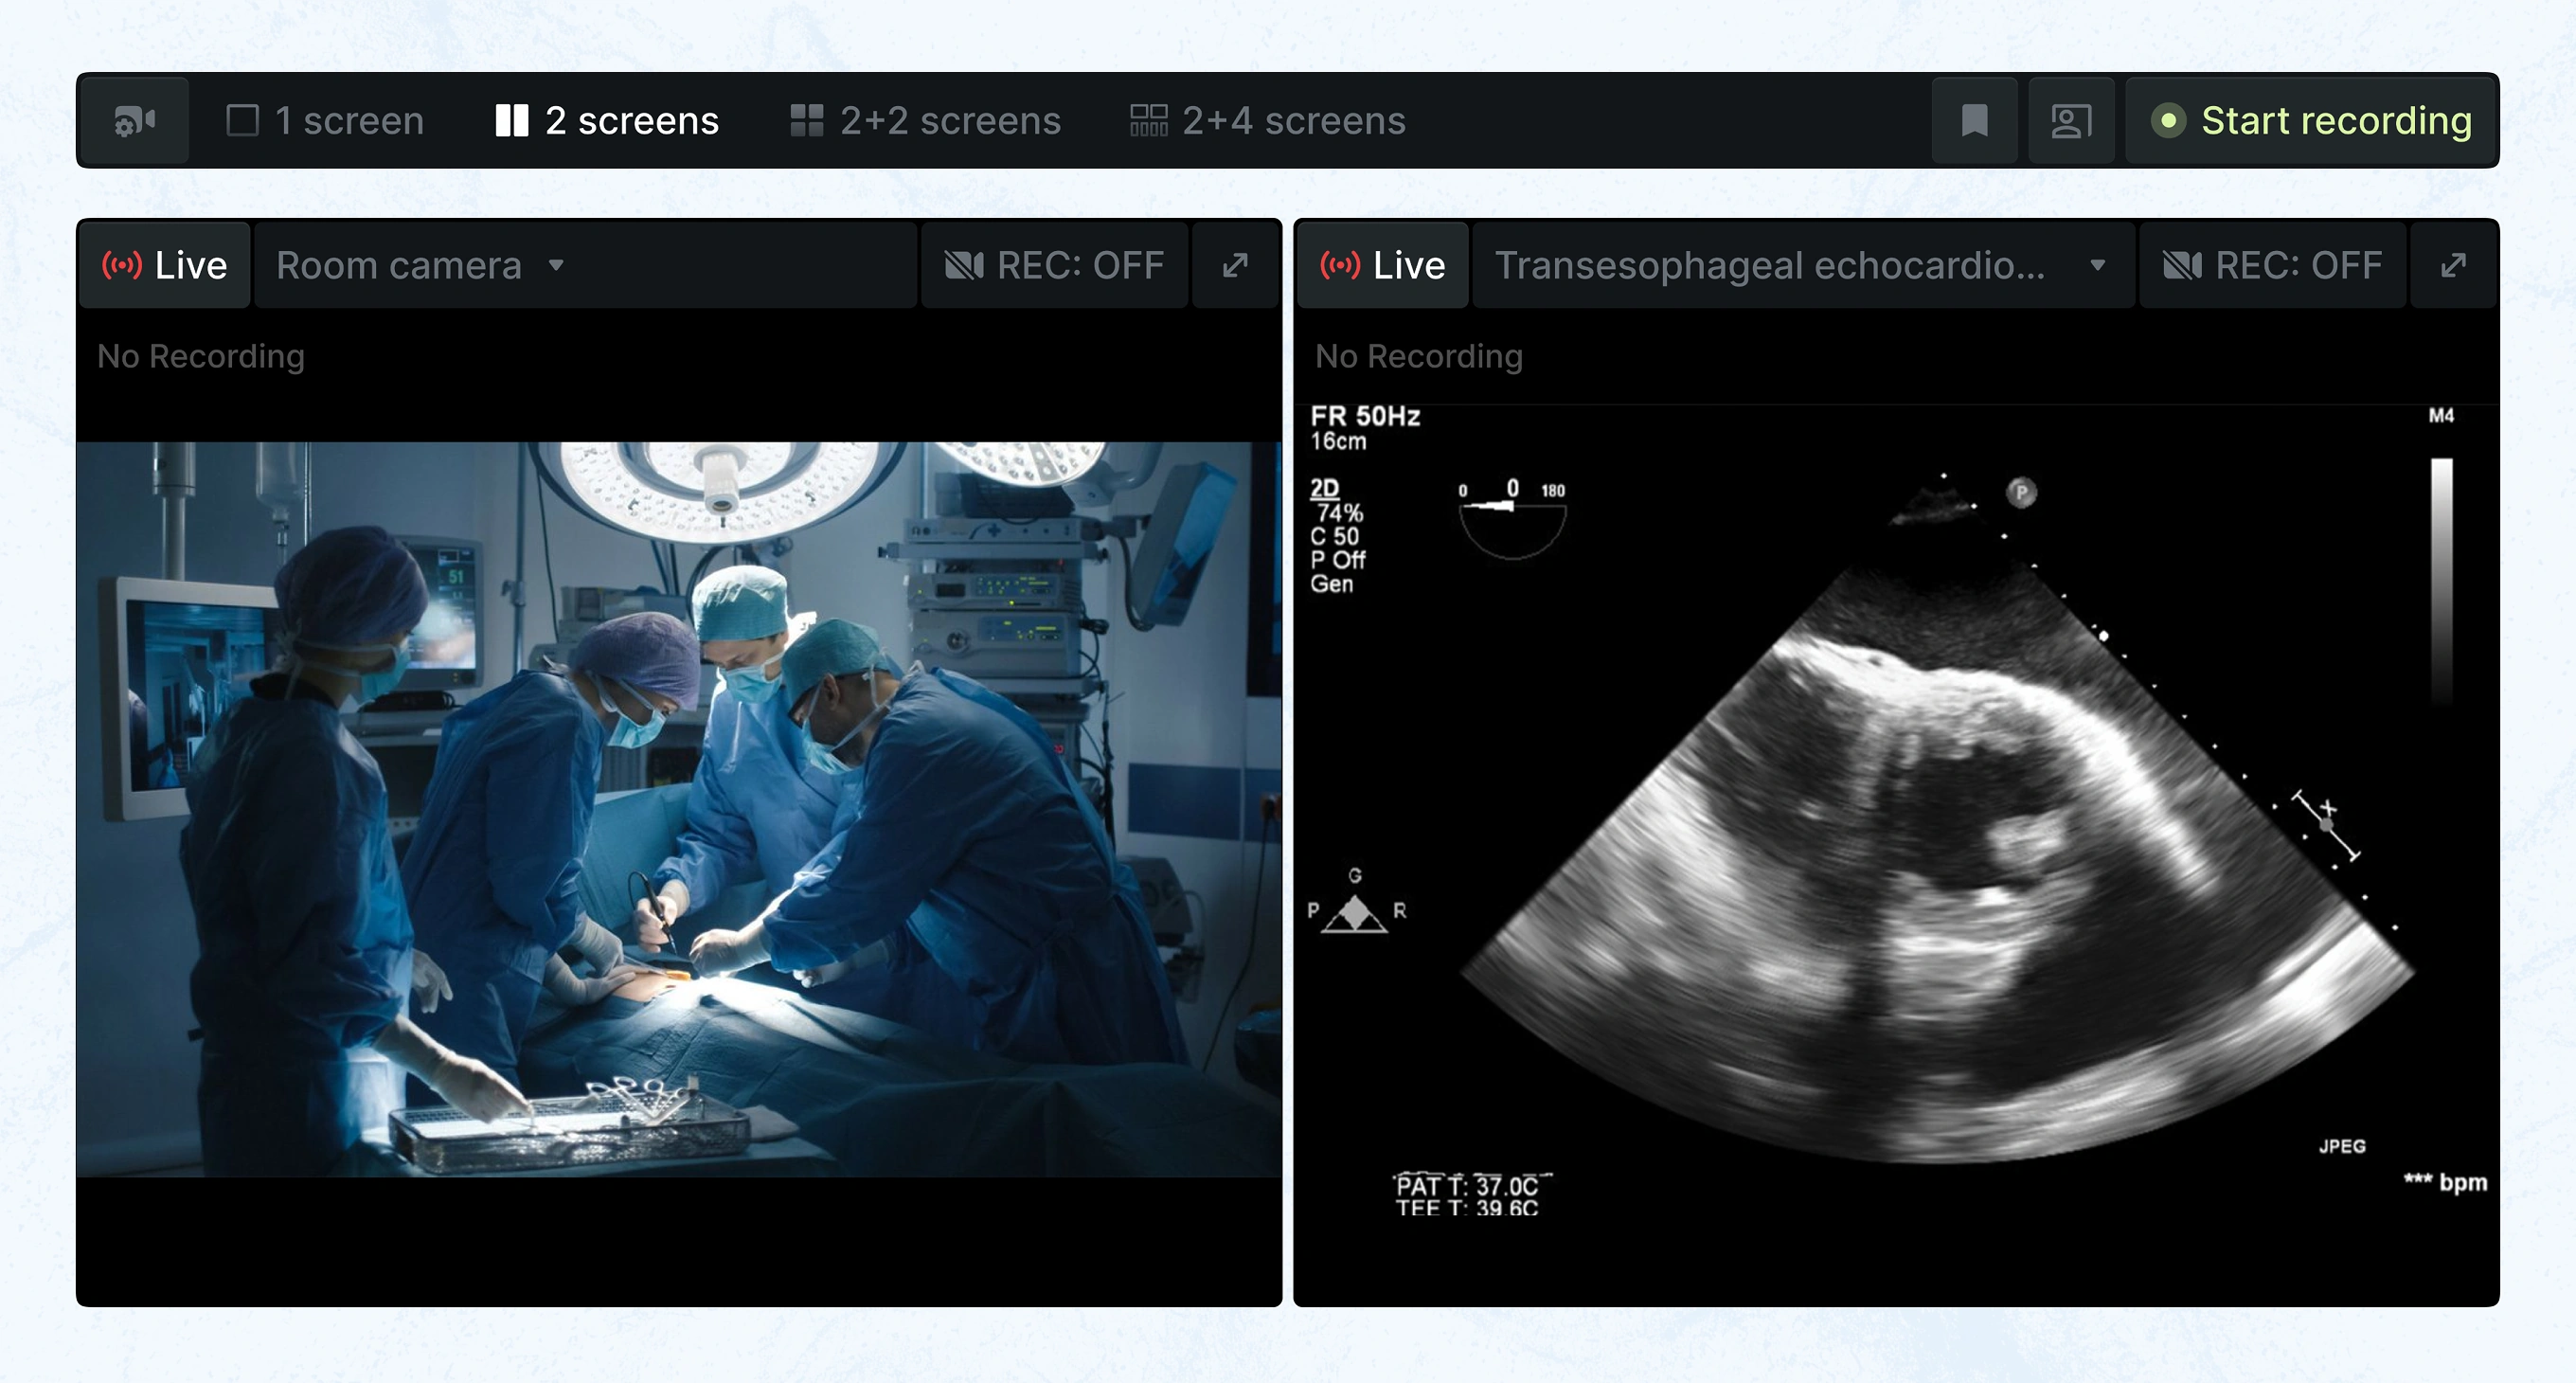
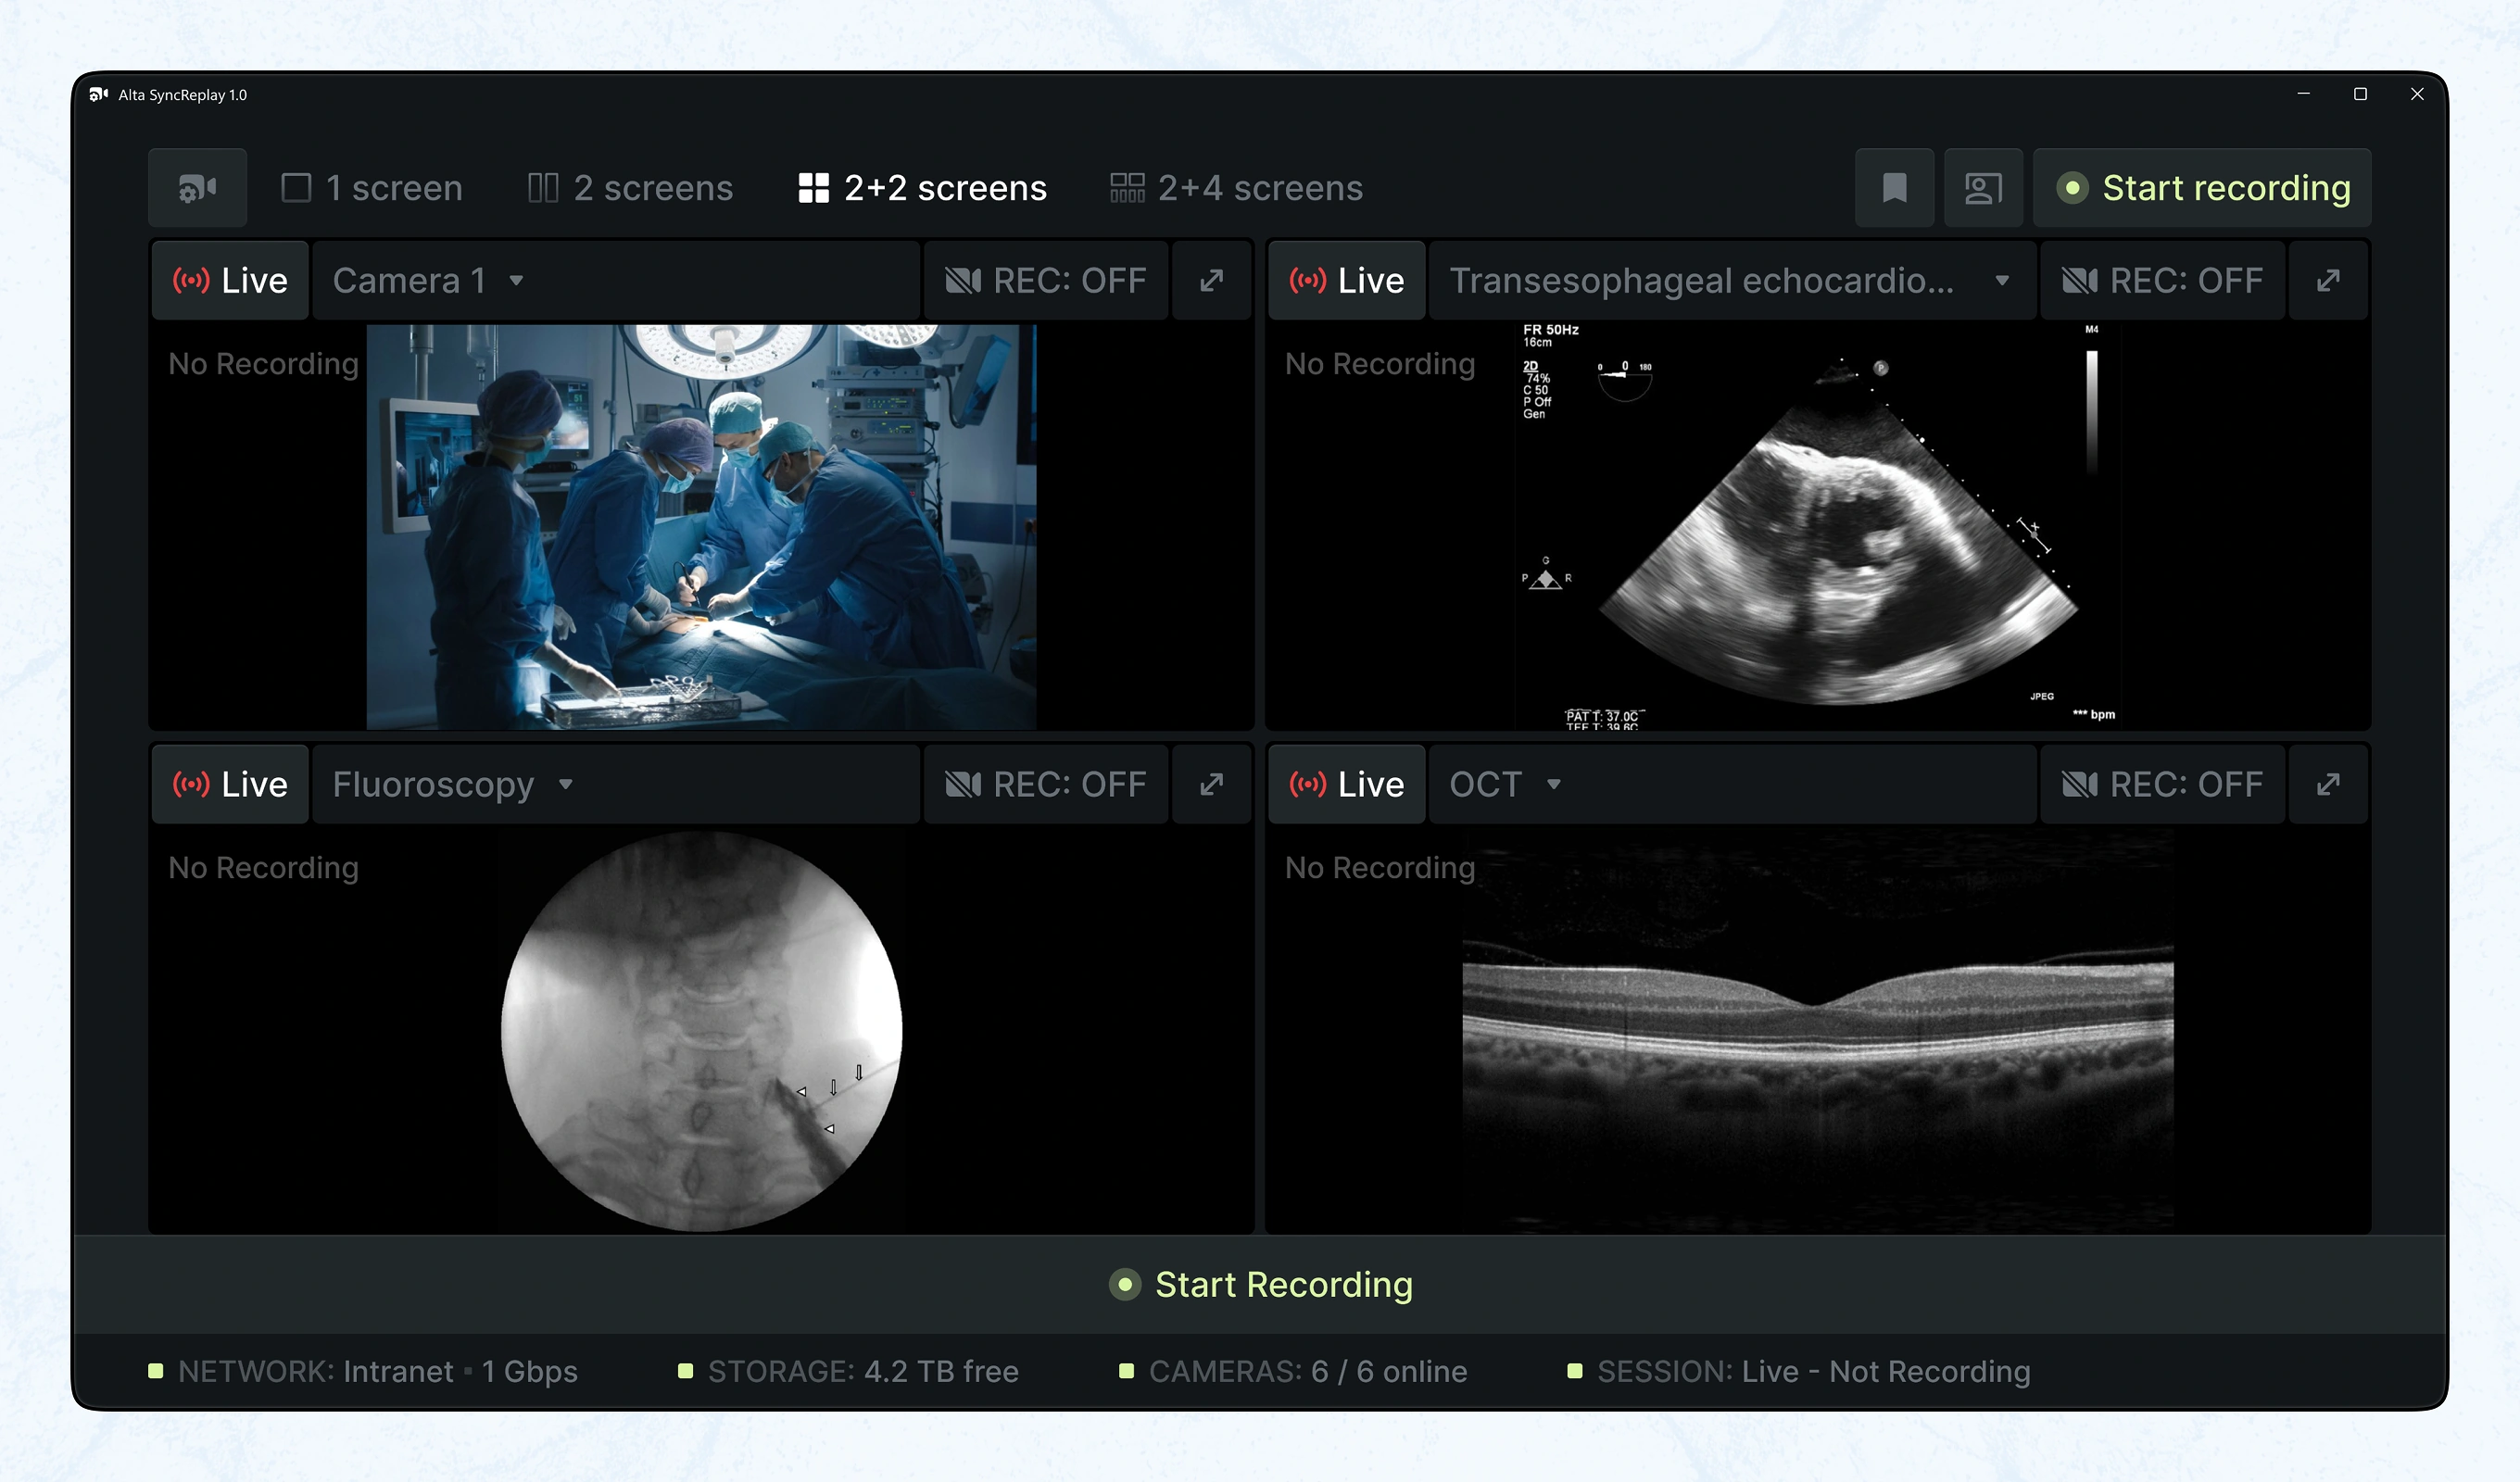
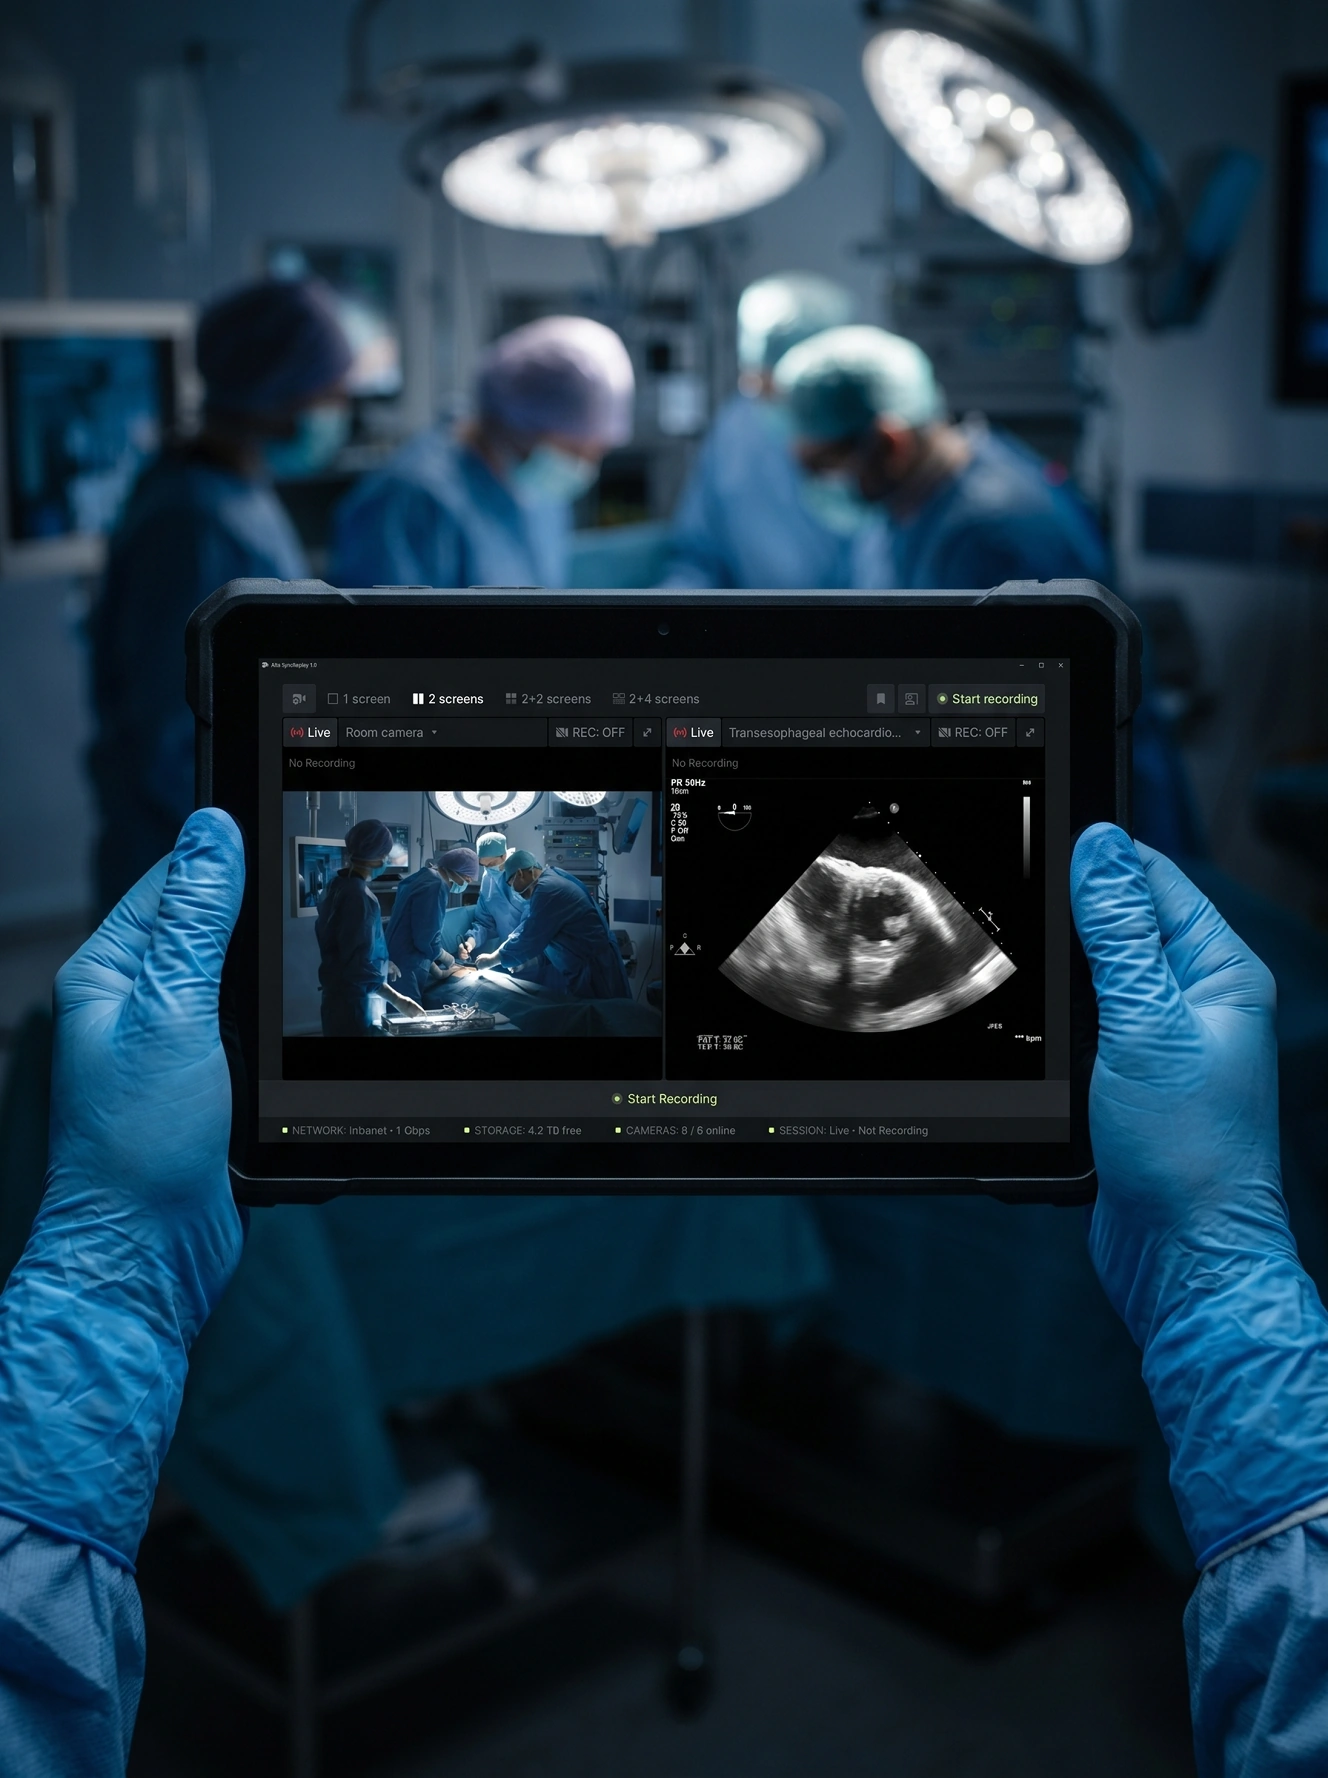
Same session shown at three grid densities: 2, 2+2, and 2+4 screens, each built from the same design system components. Adding a layout pulls in more sources, room camera, echocardiography, fluoroscopy, and OCT, without leaving the live view.
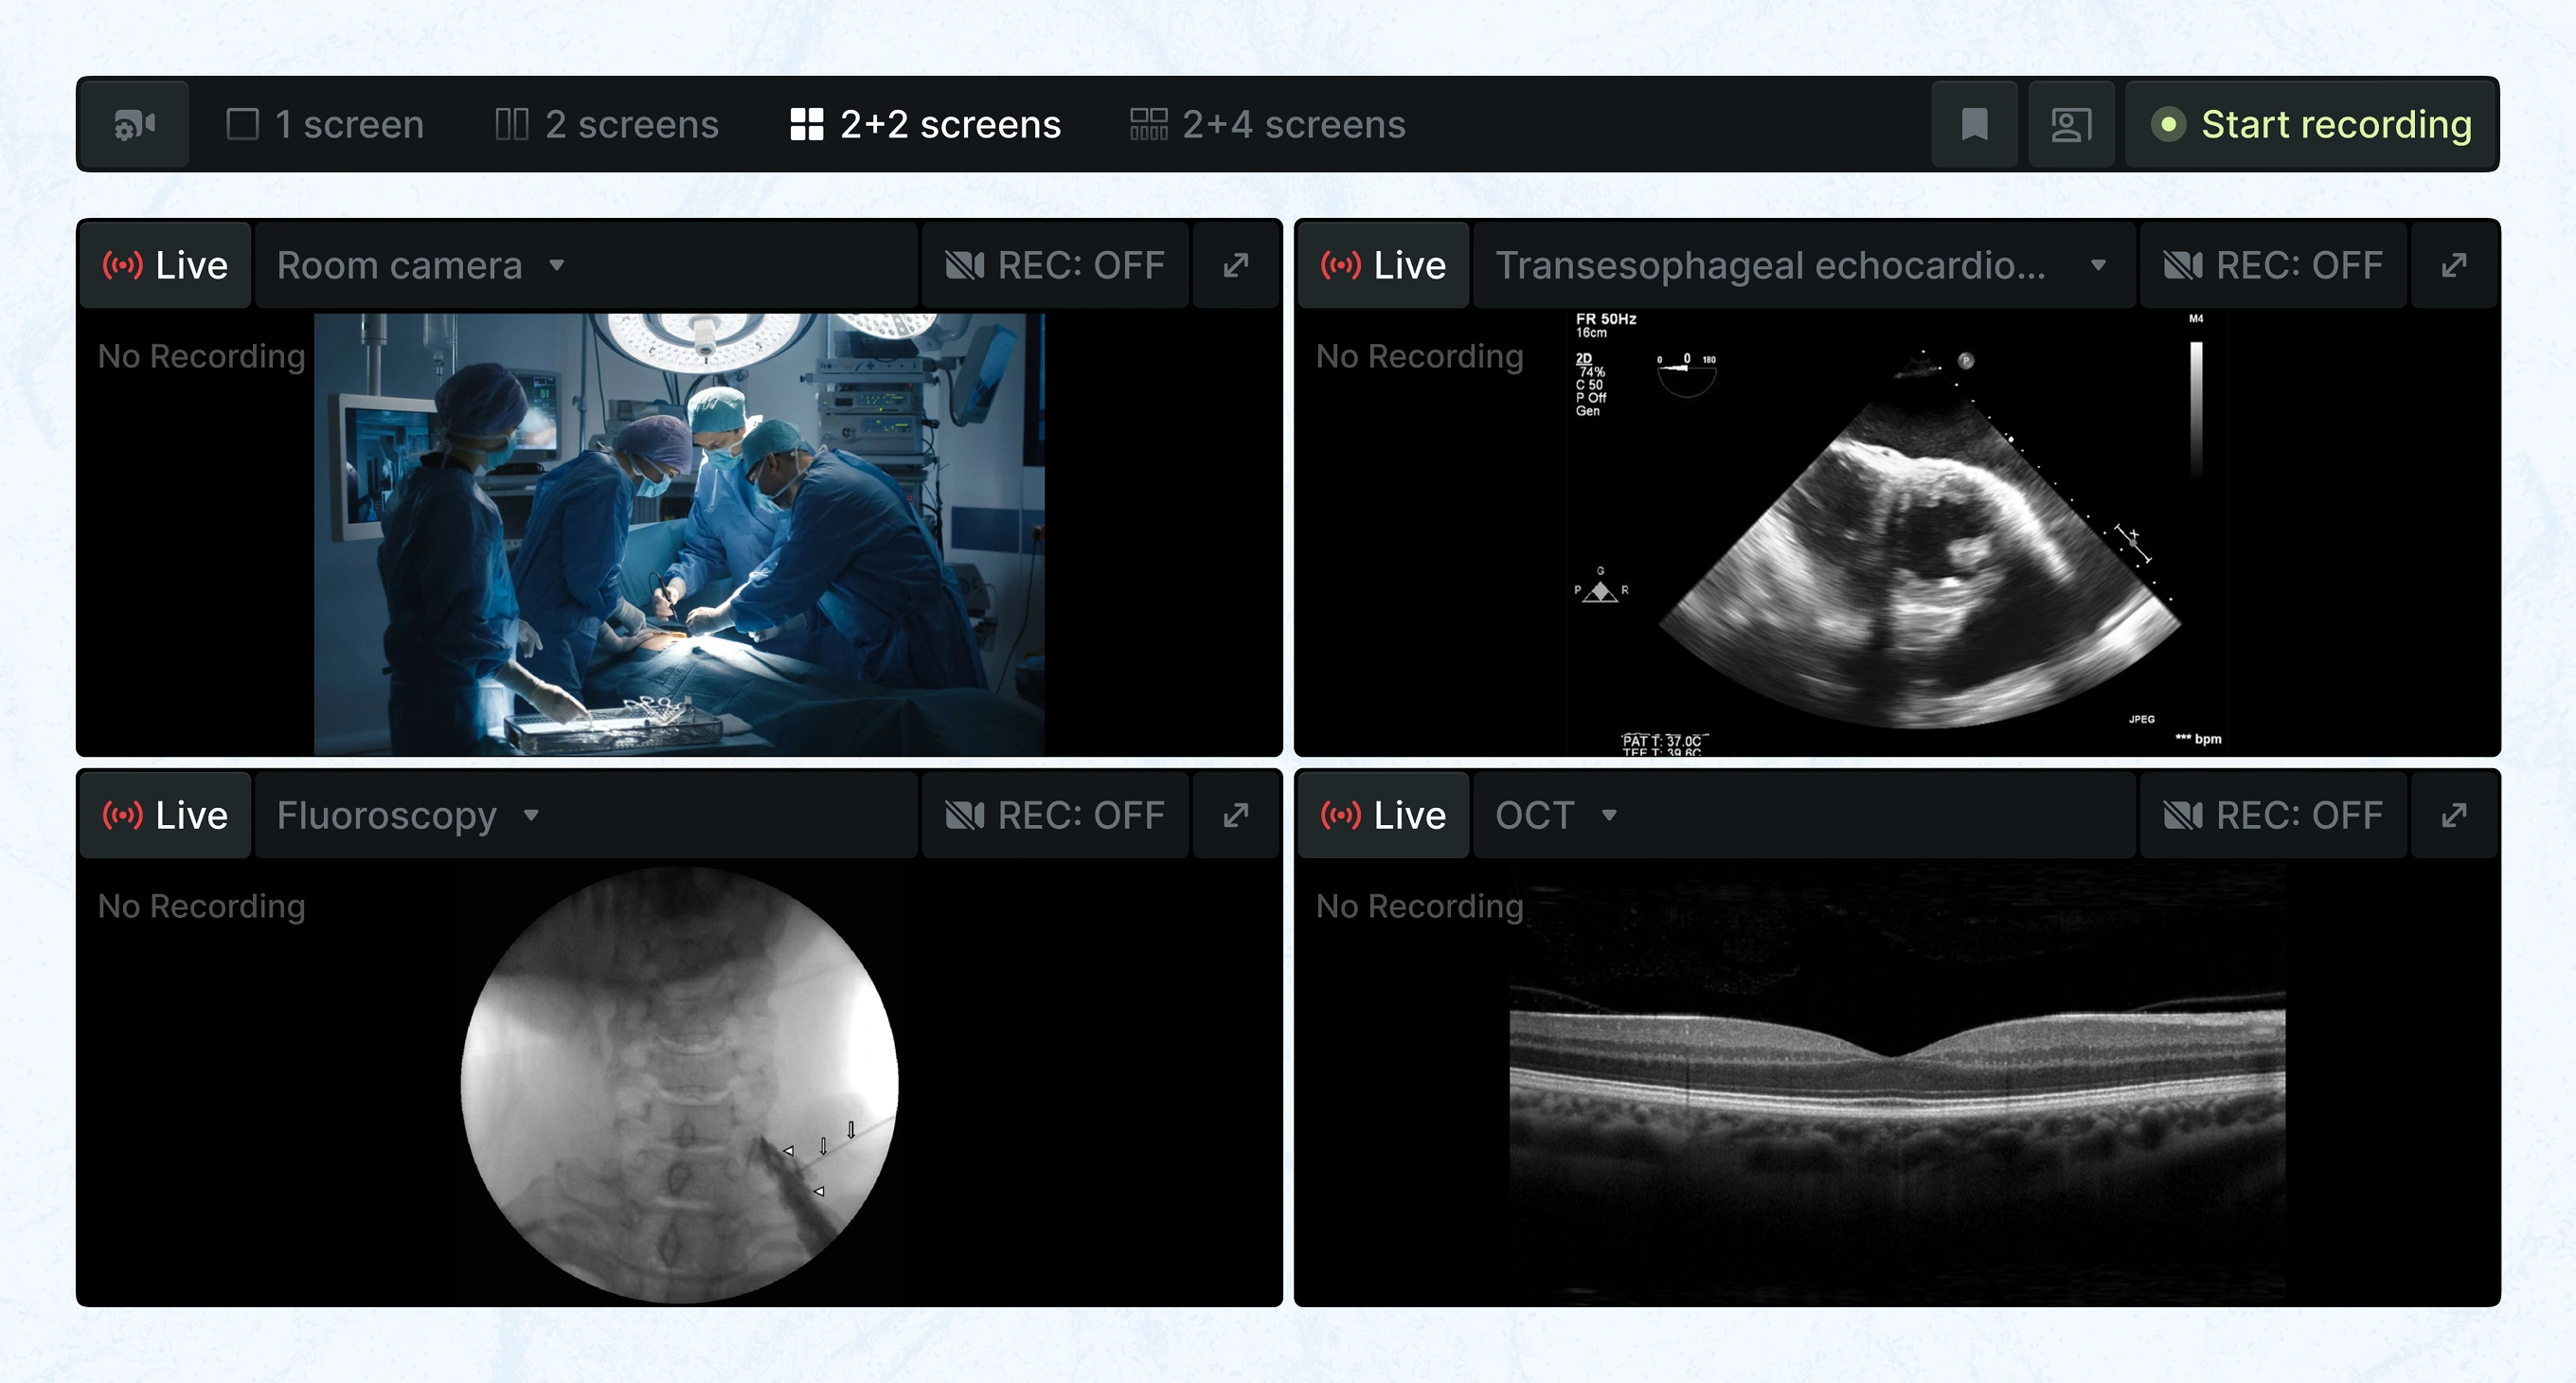
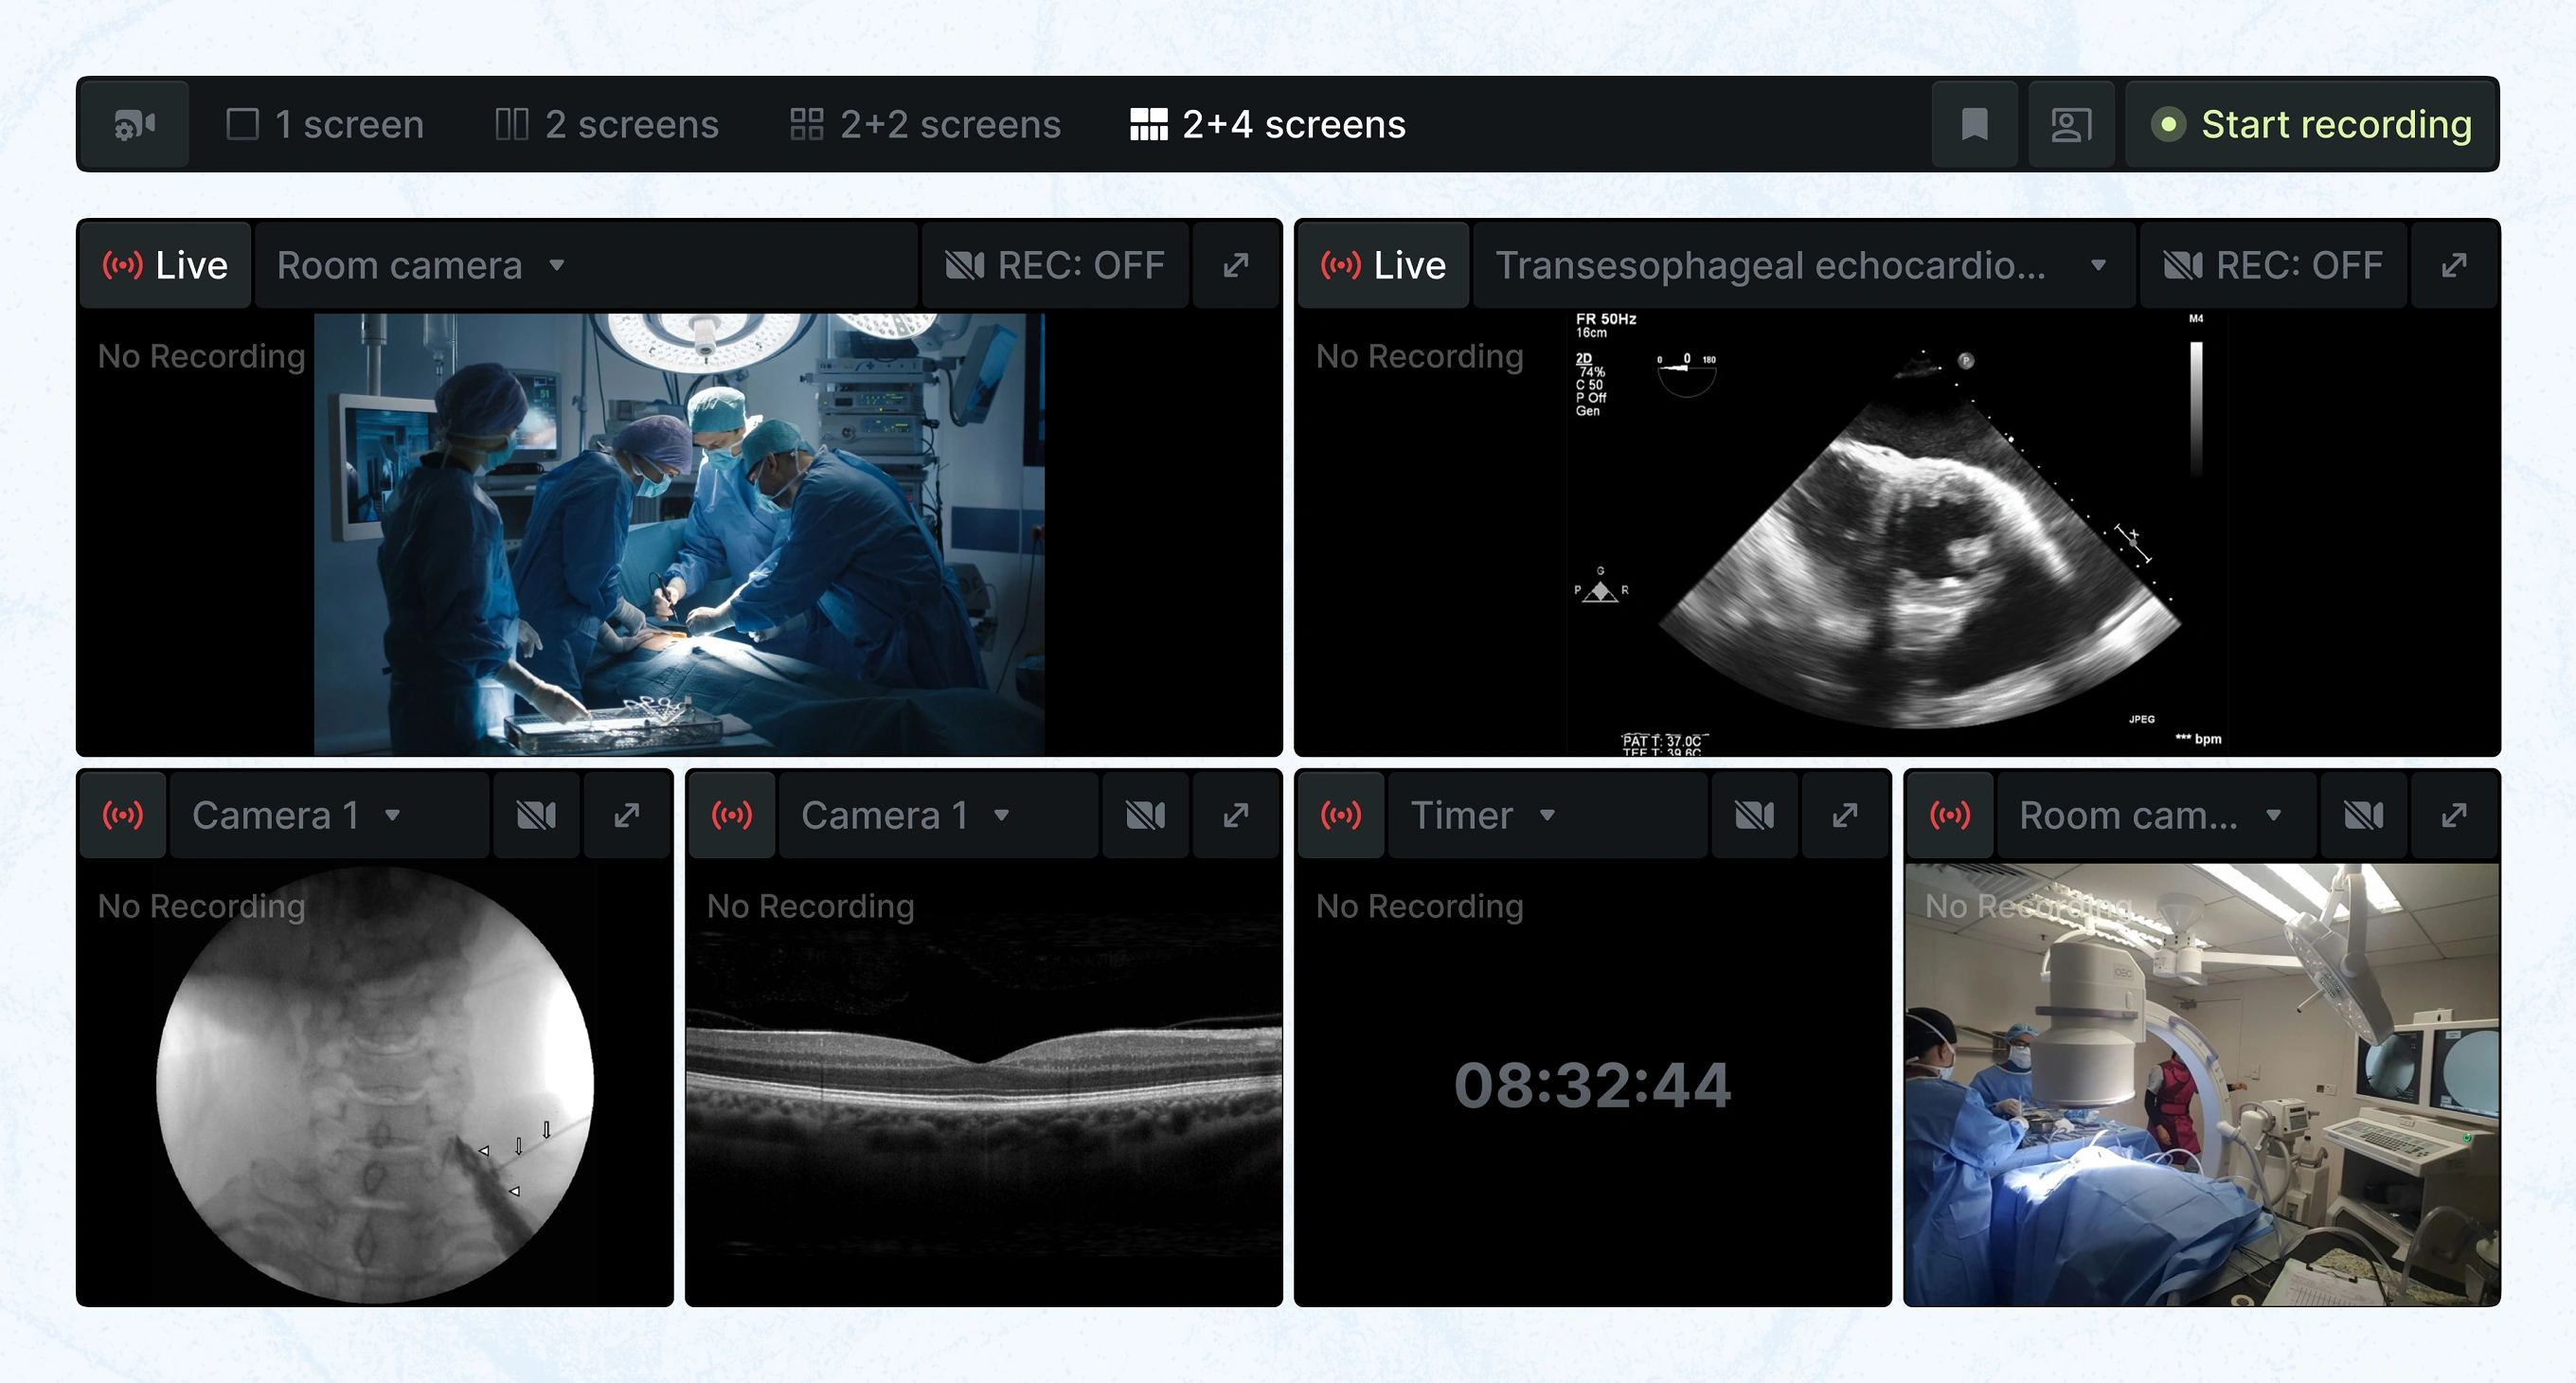
All four sources, camera, echocardiography, fluoroscopy, and OCT, are live but marked REC: OFF until the team chooses to capture. Separating live viewing from recording avoids accidental captures during setup.
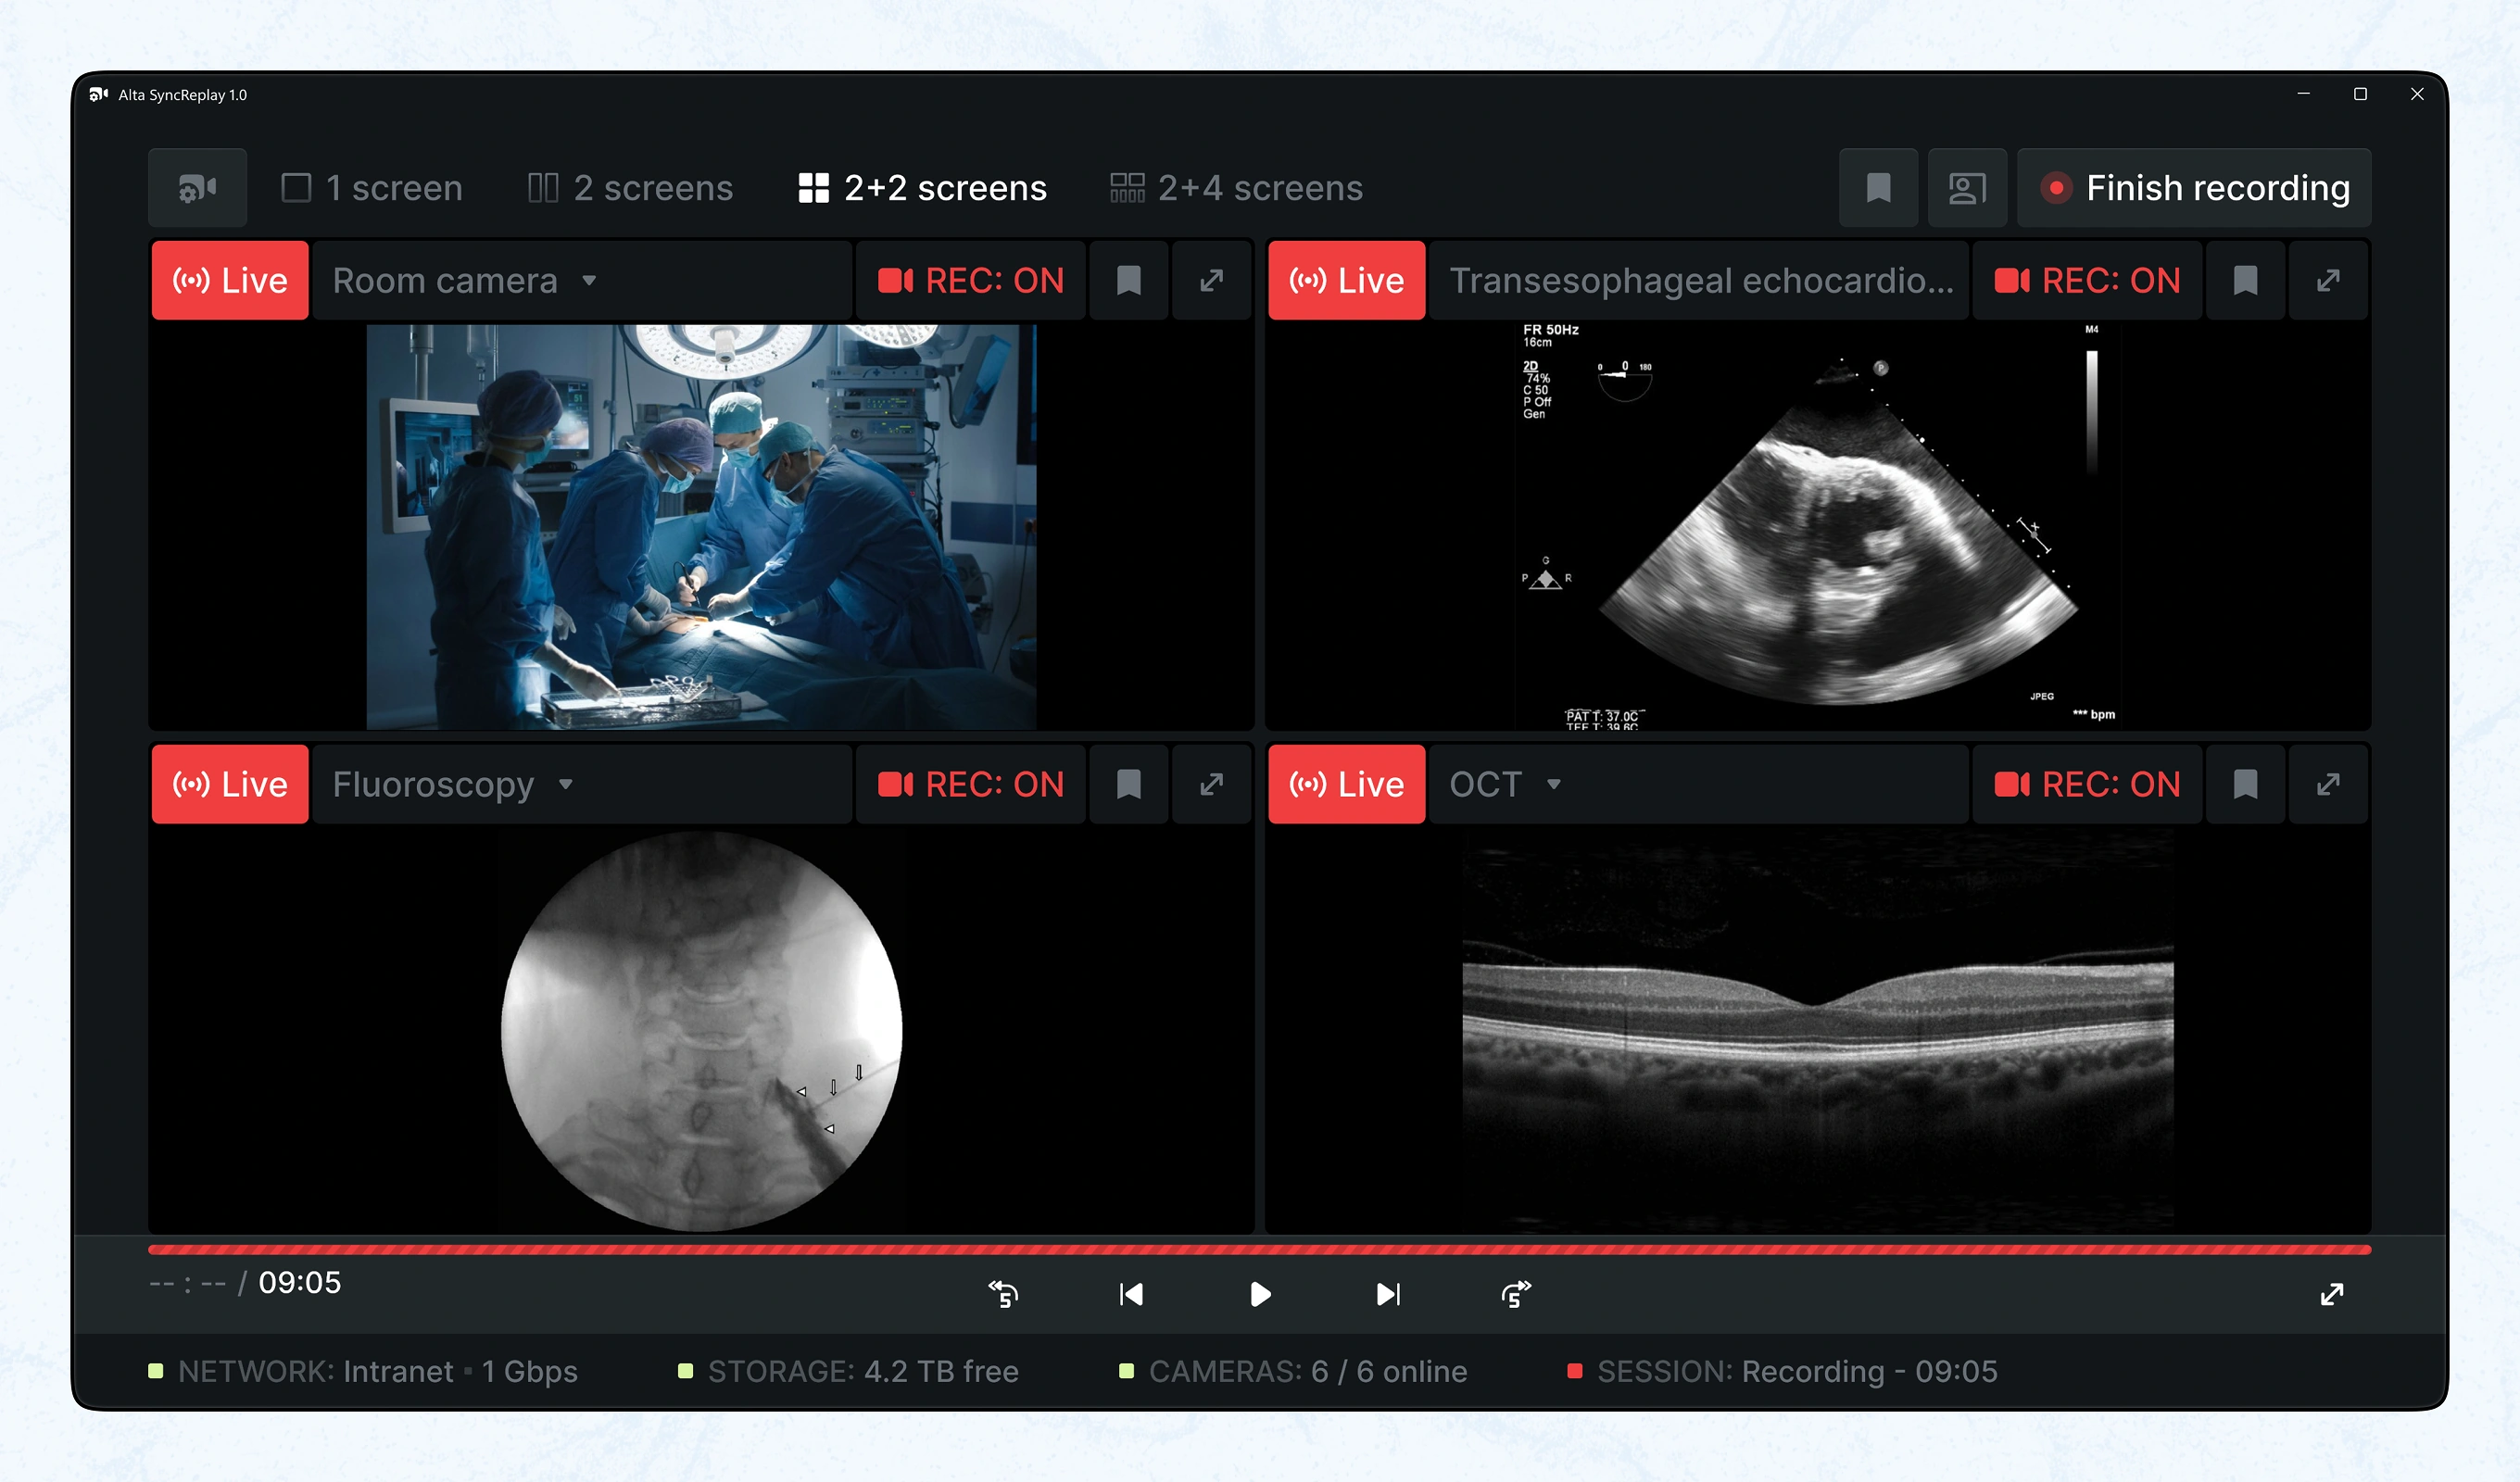
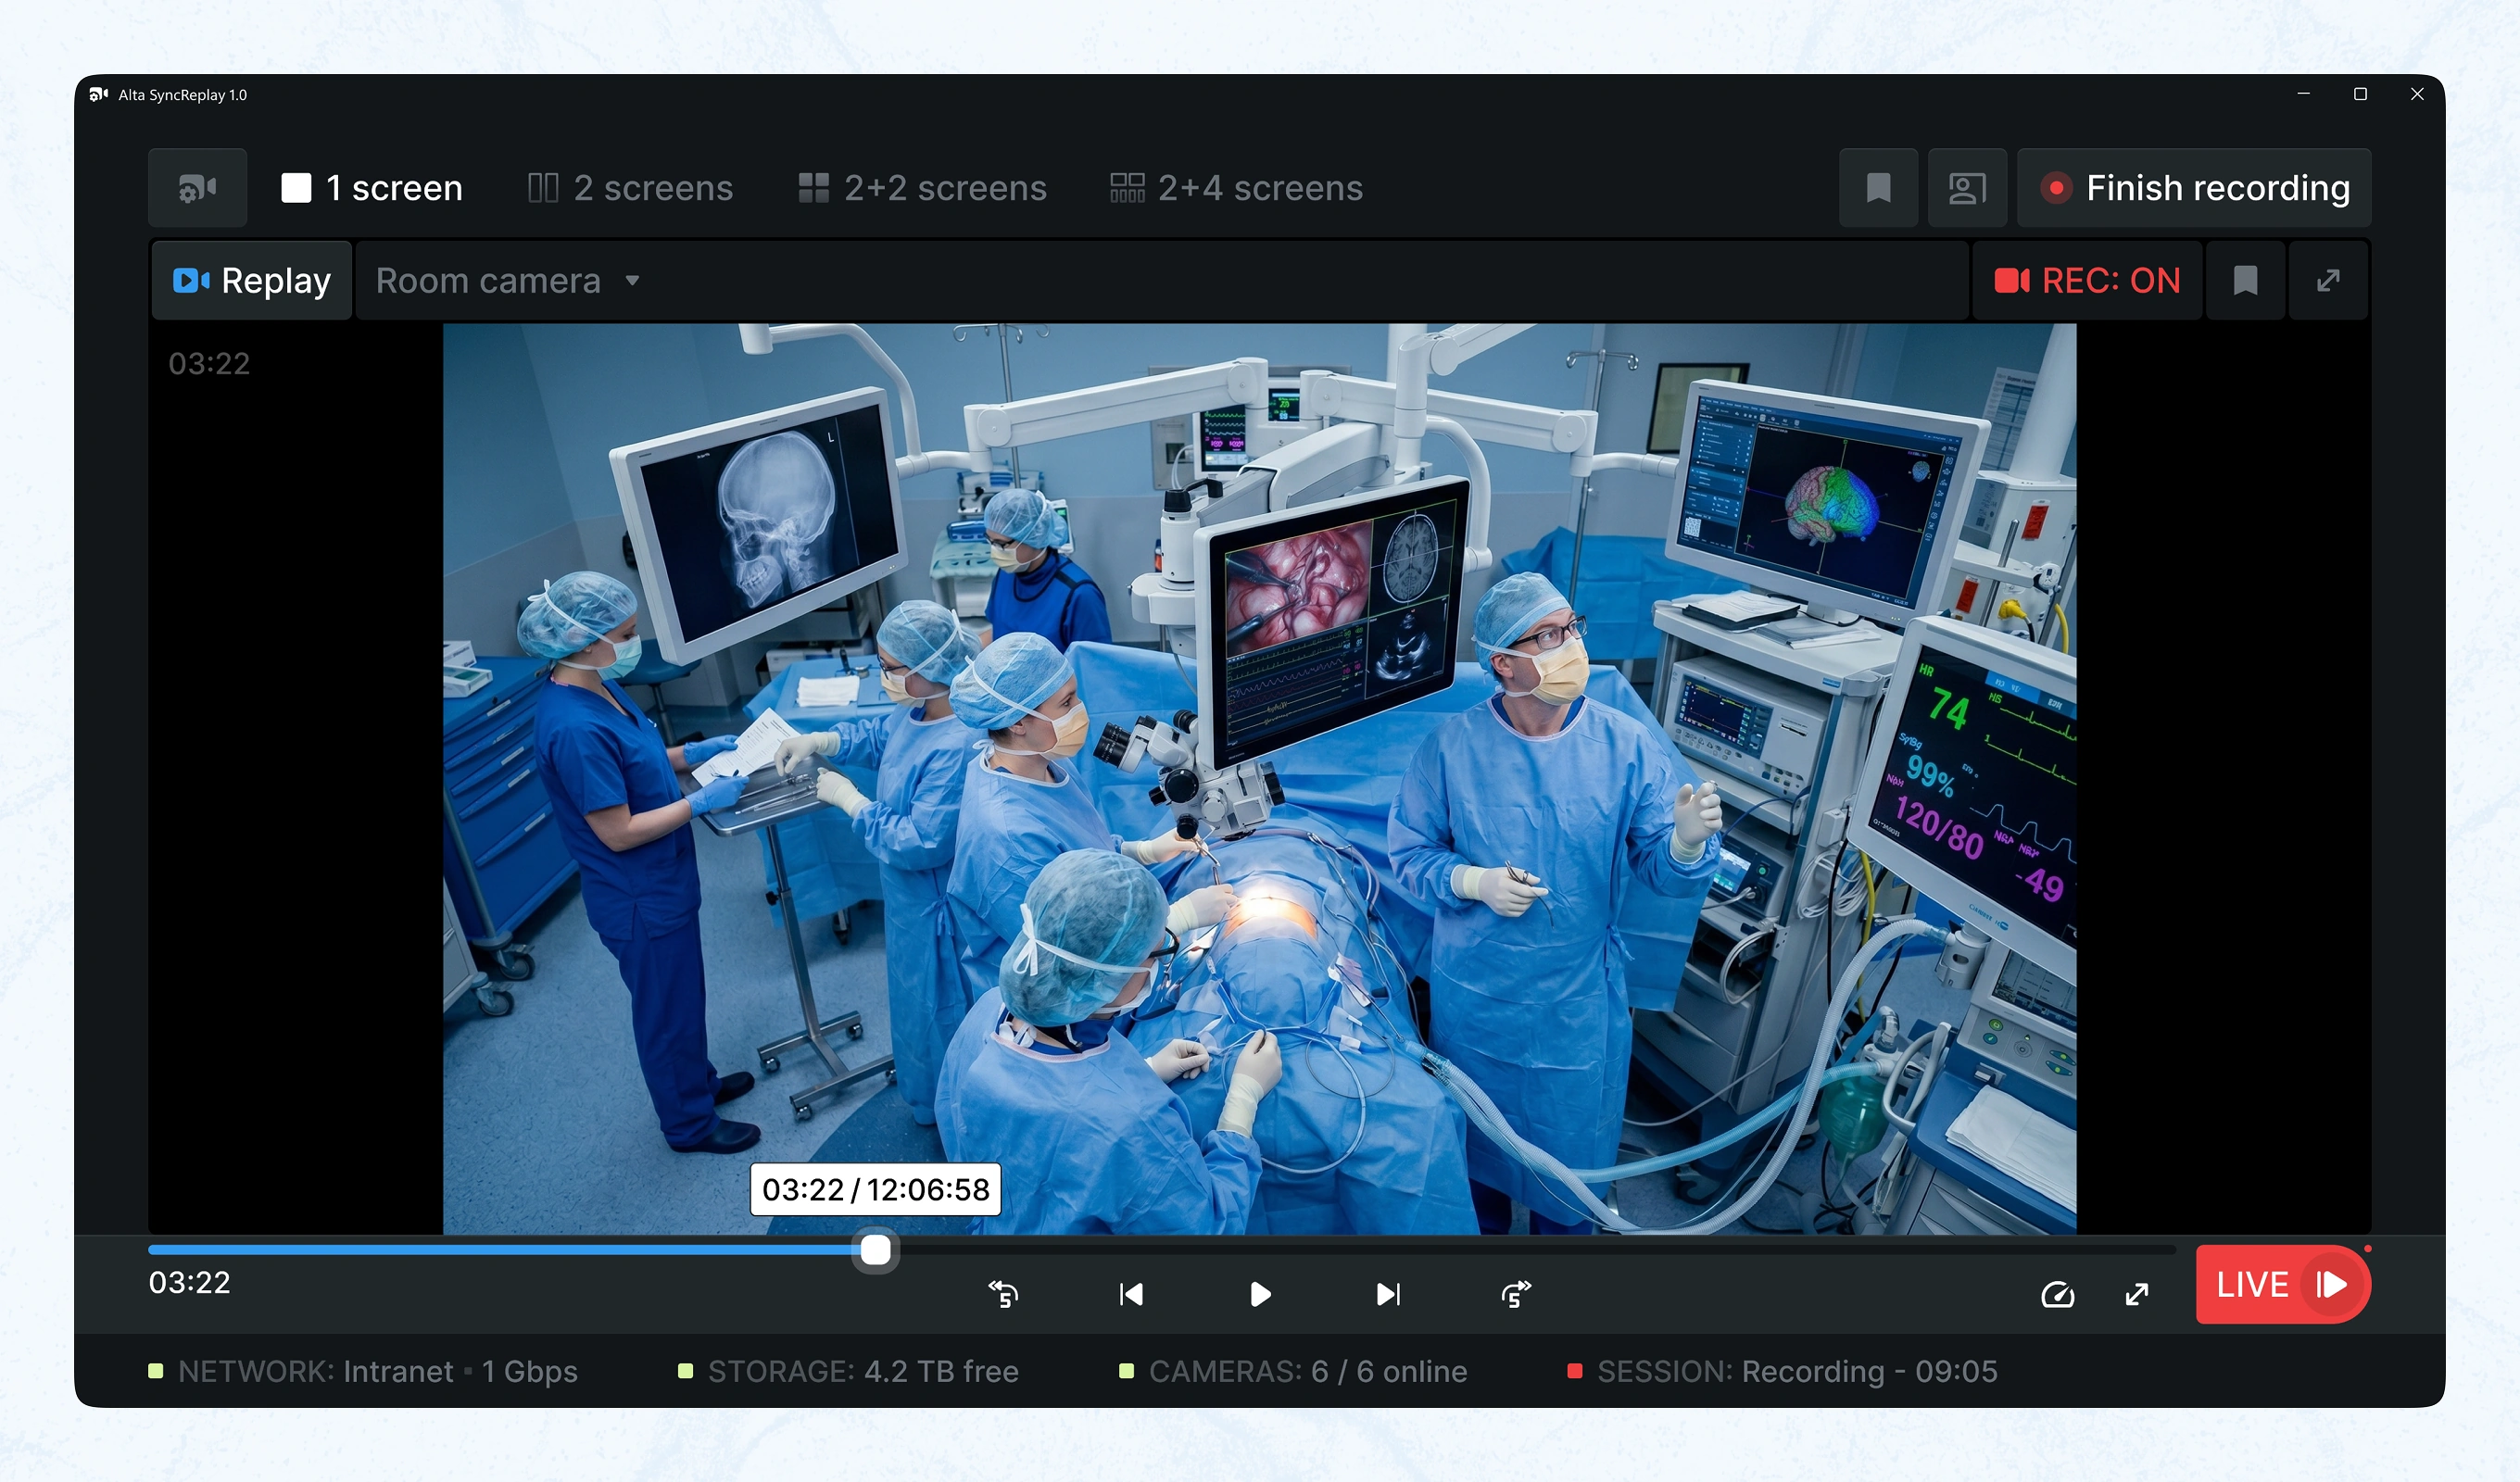
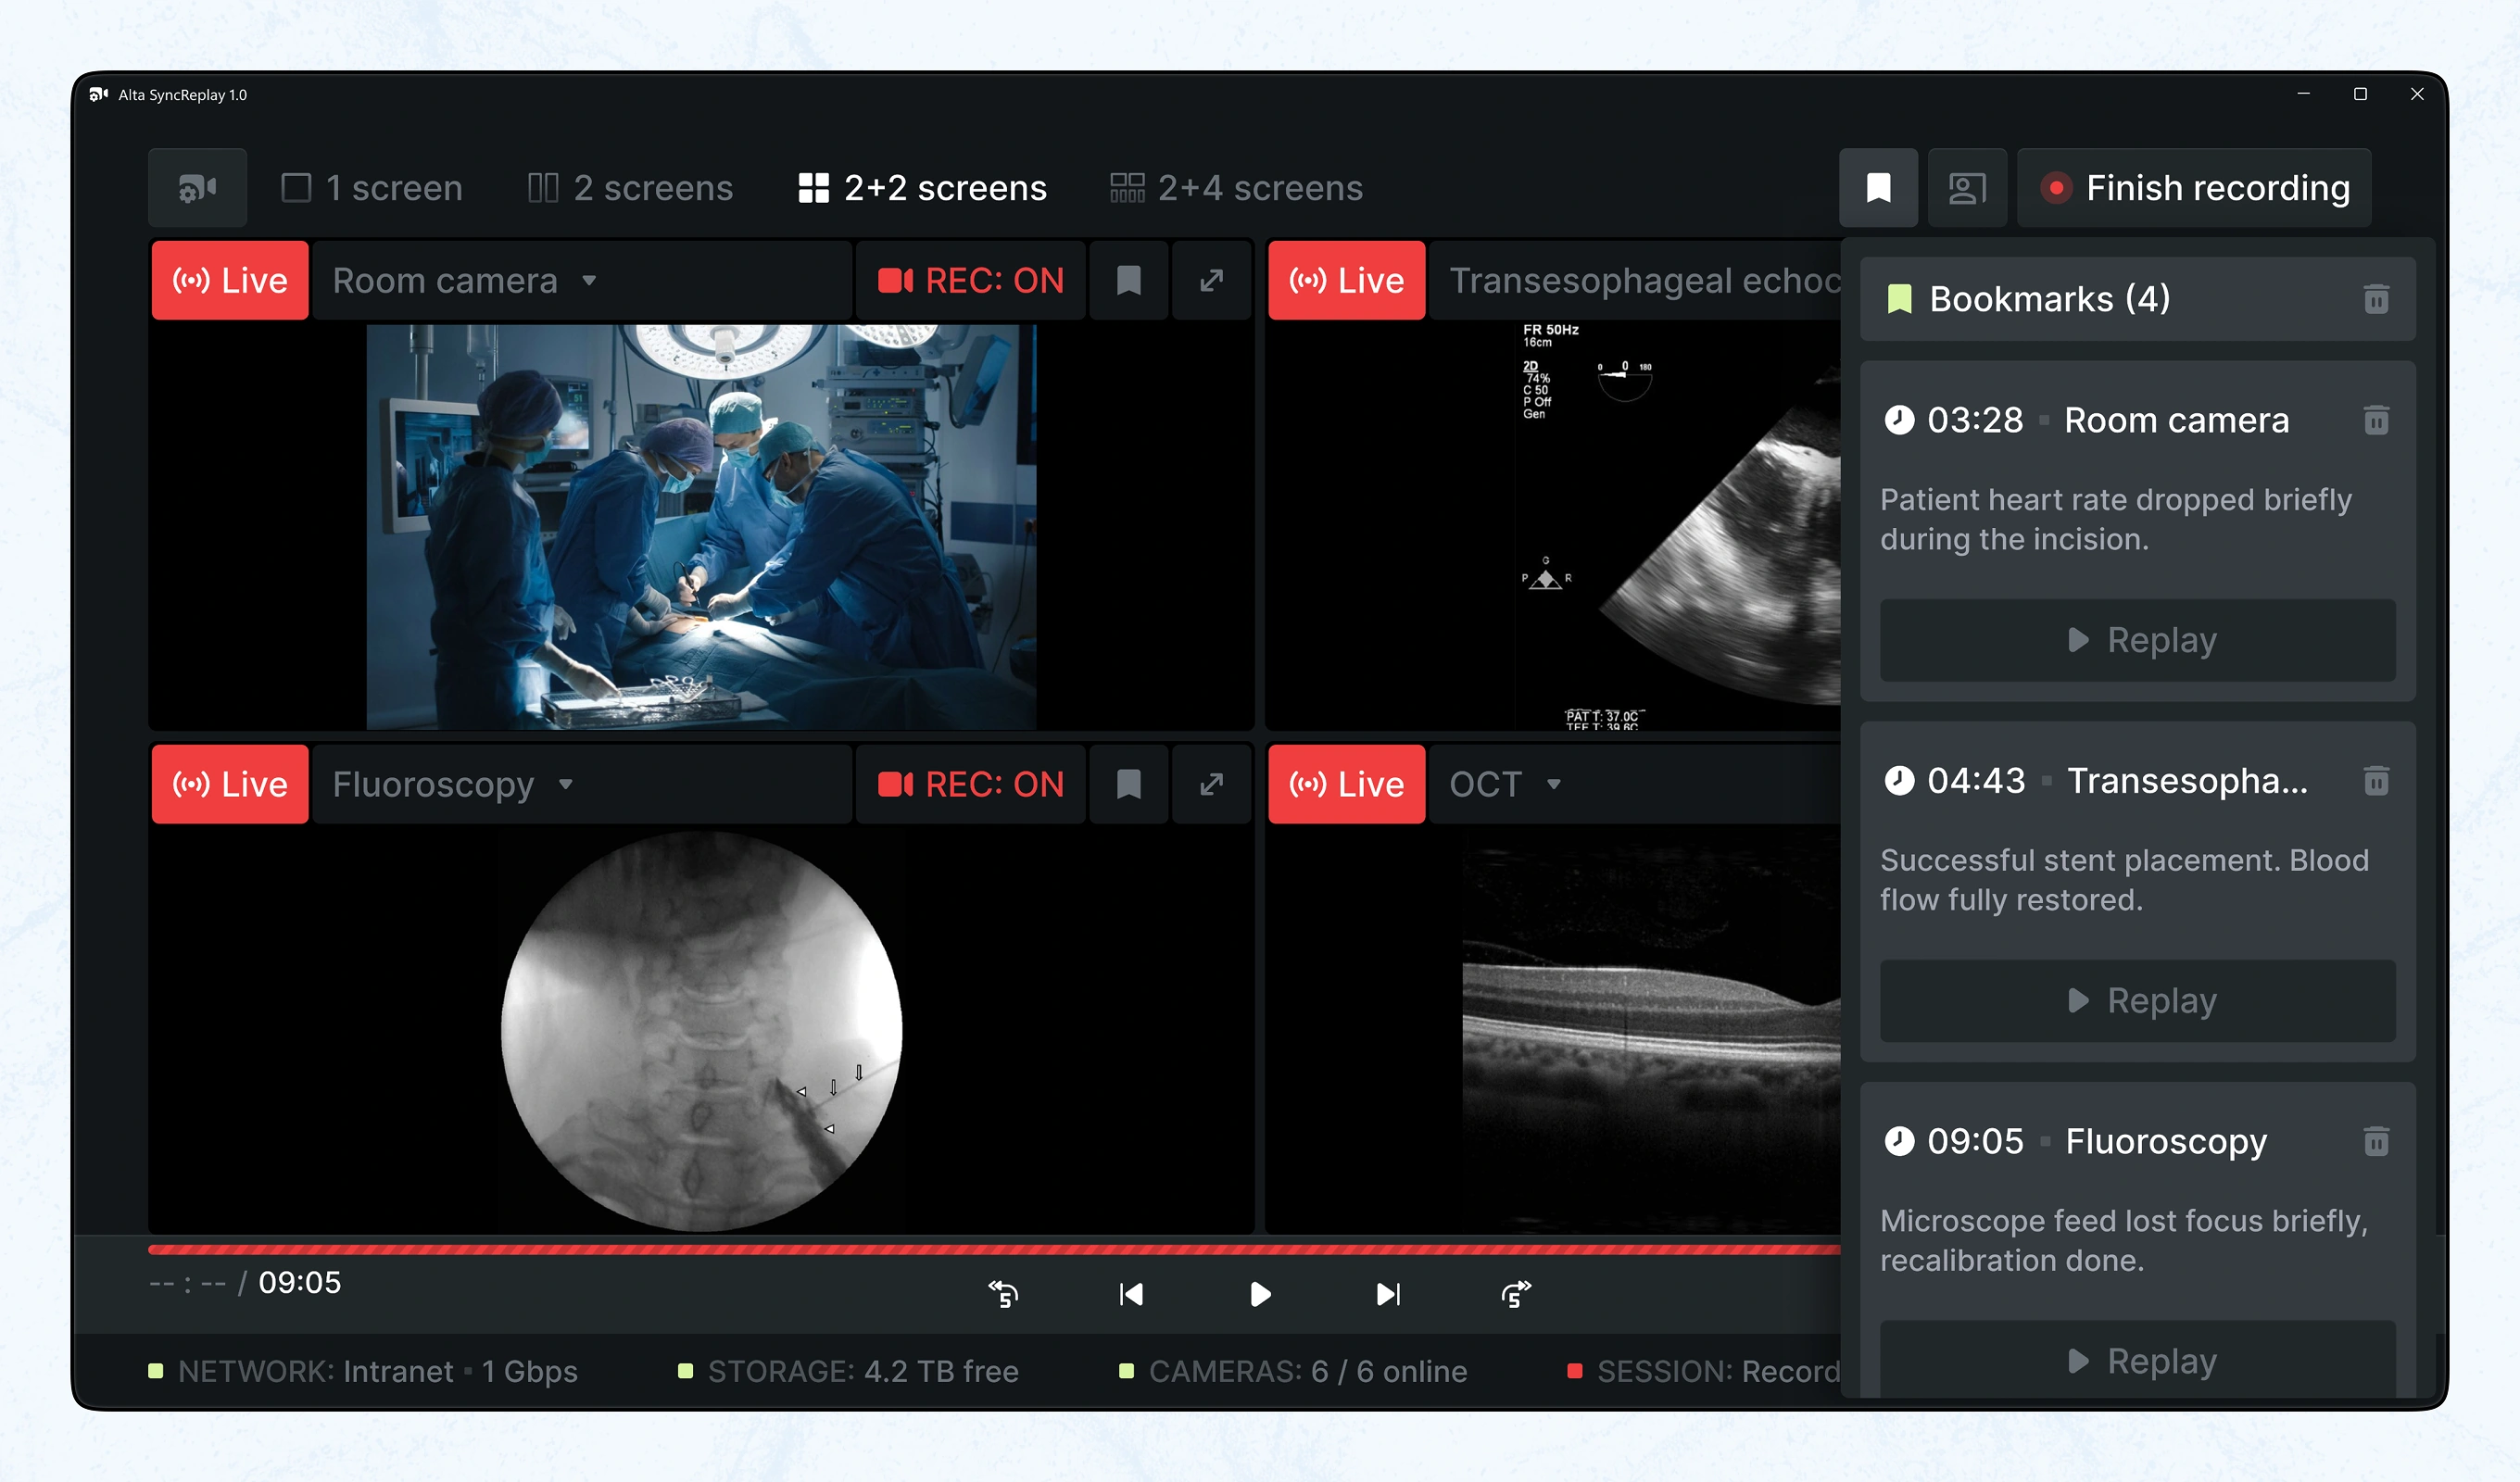
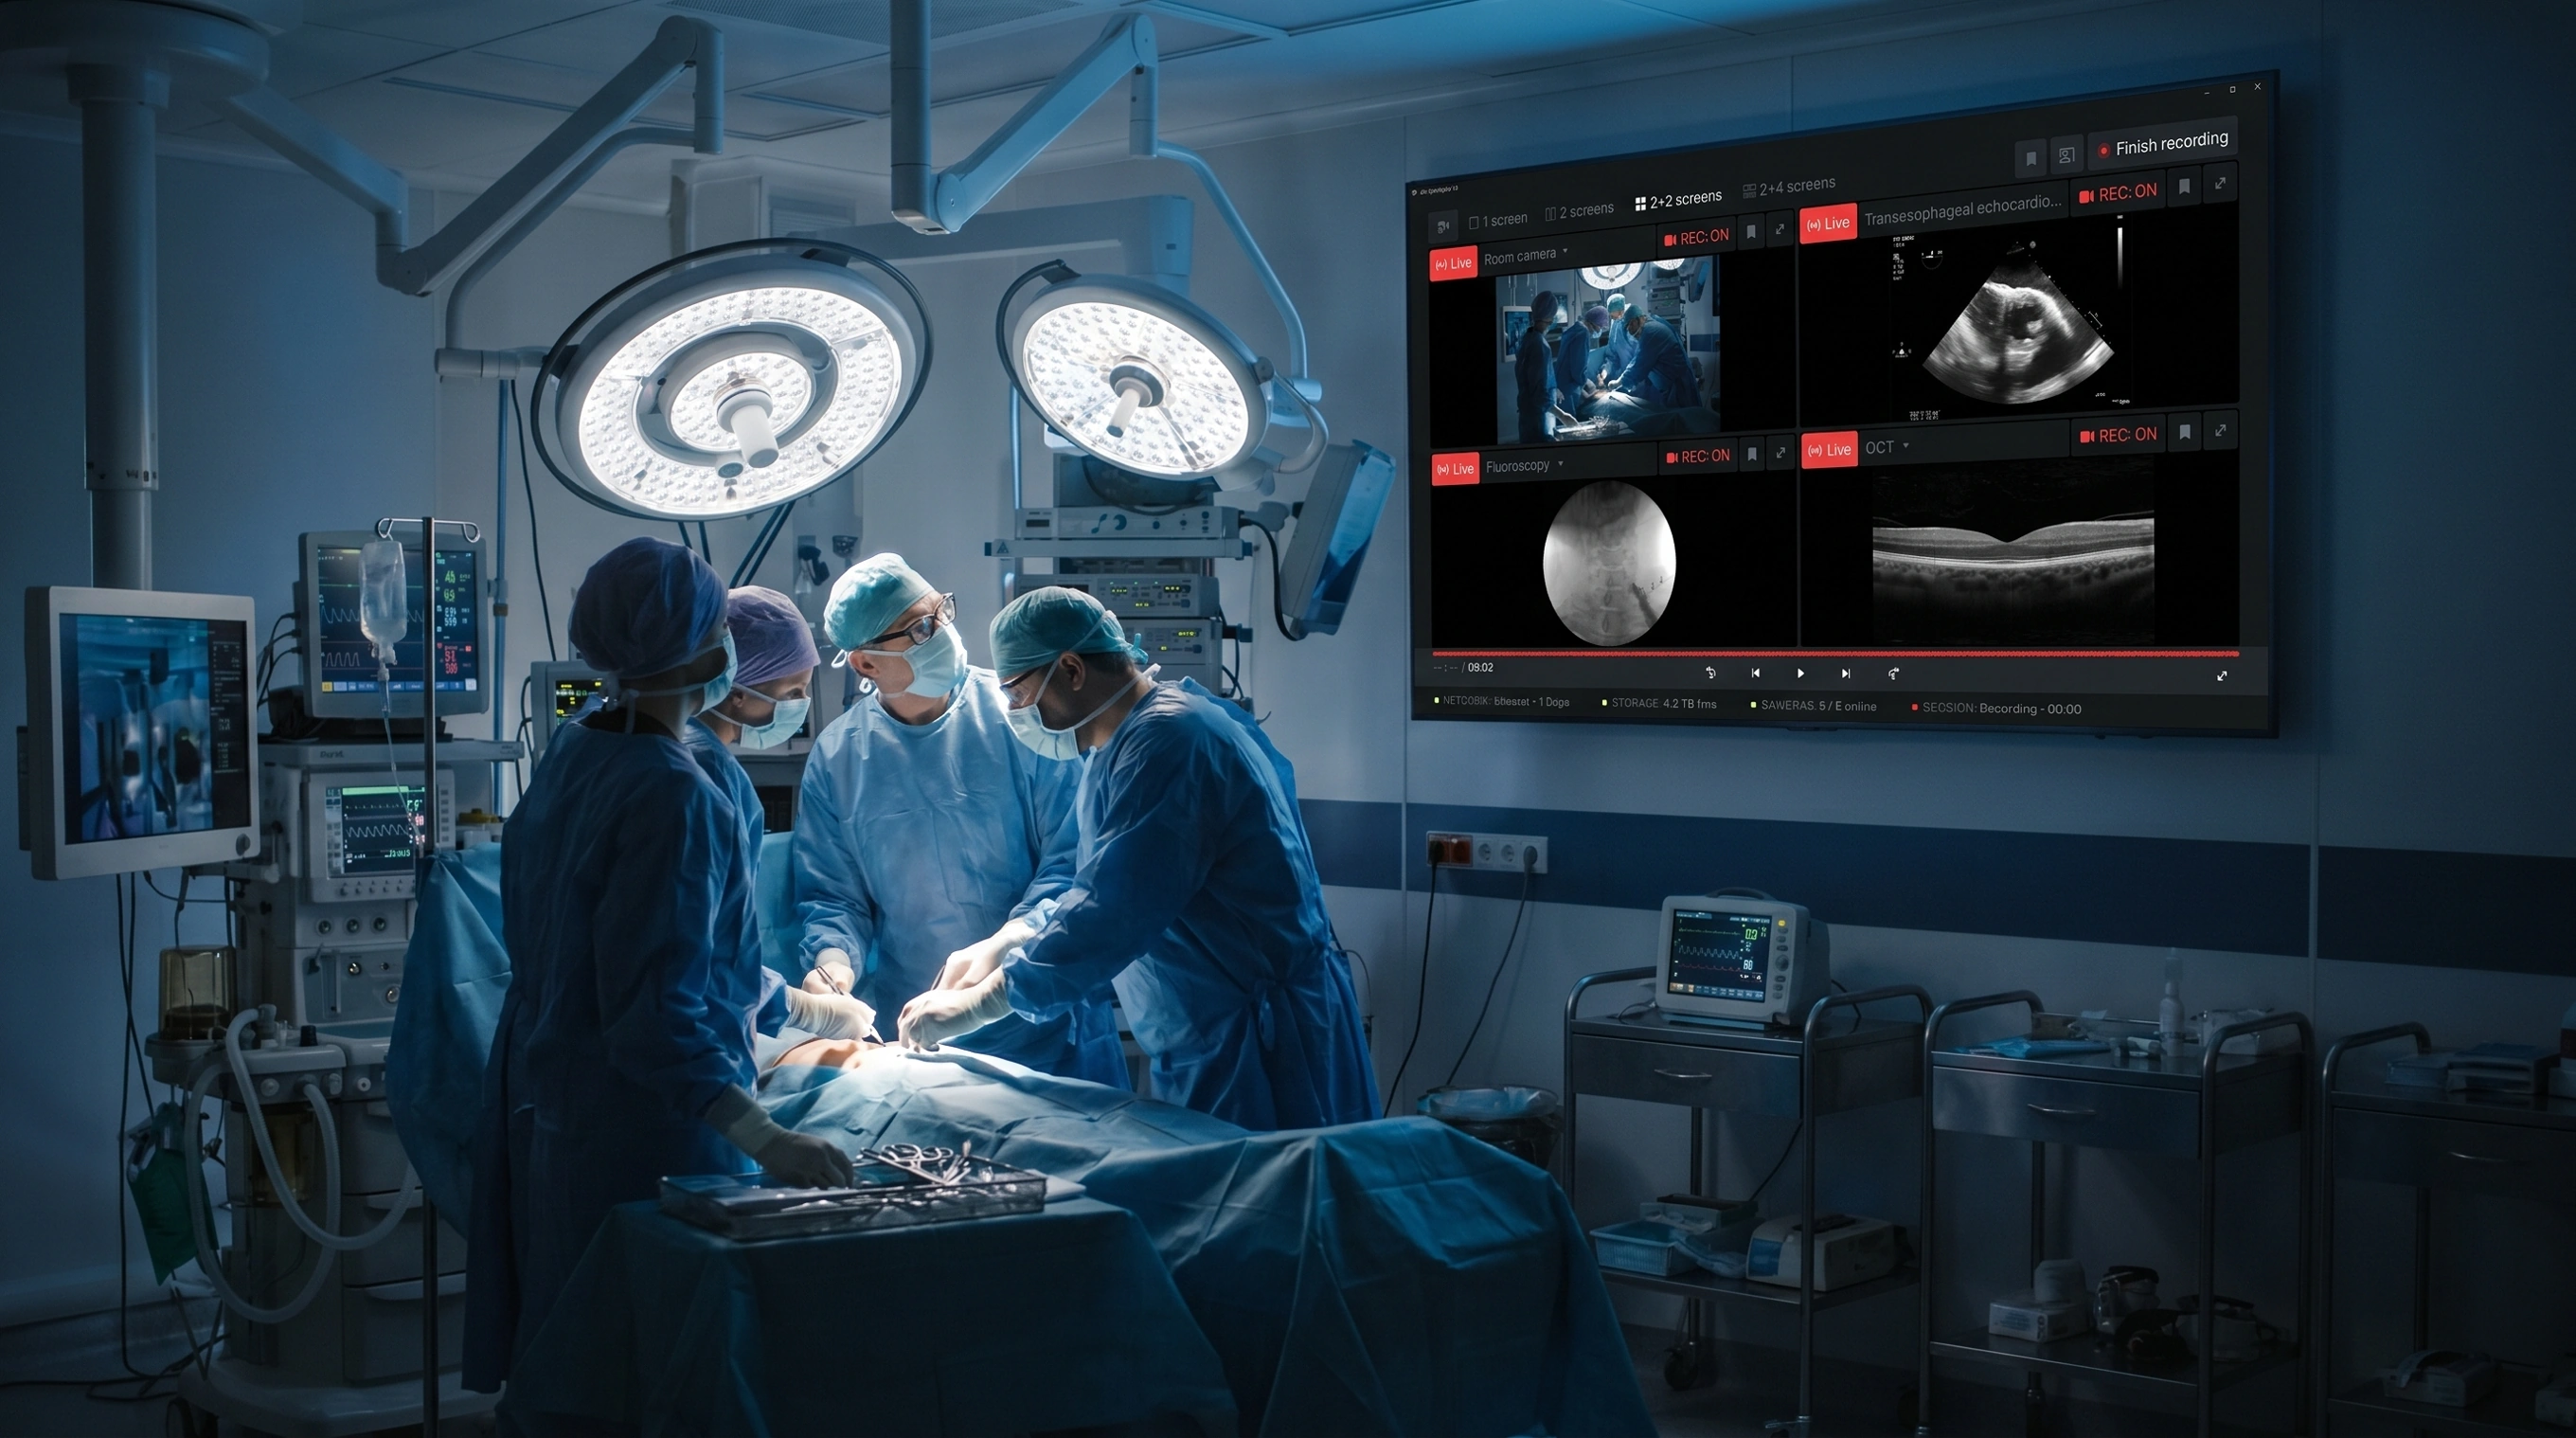
Once capture starts, every tile switches to REC: ON with a shared timer and per-feed bookmark icons. High-contrast red states make recording status readable at a glance, even from across the room.
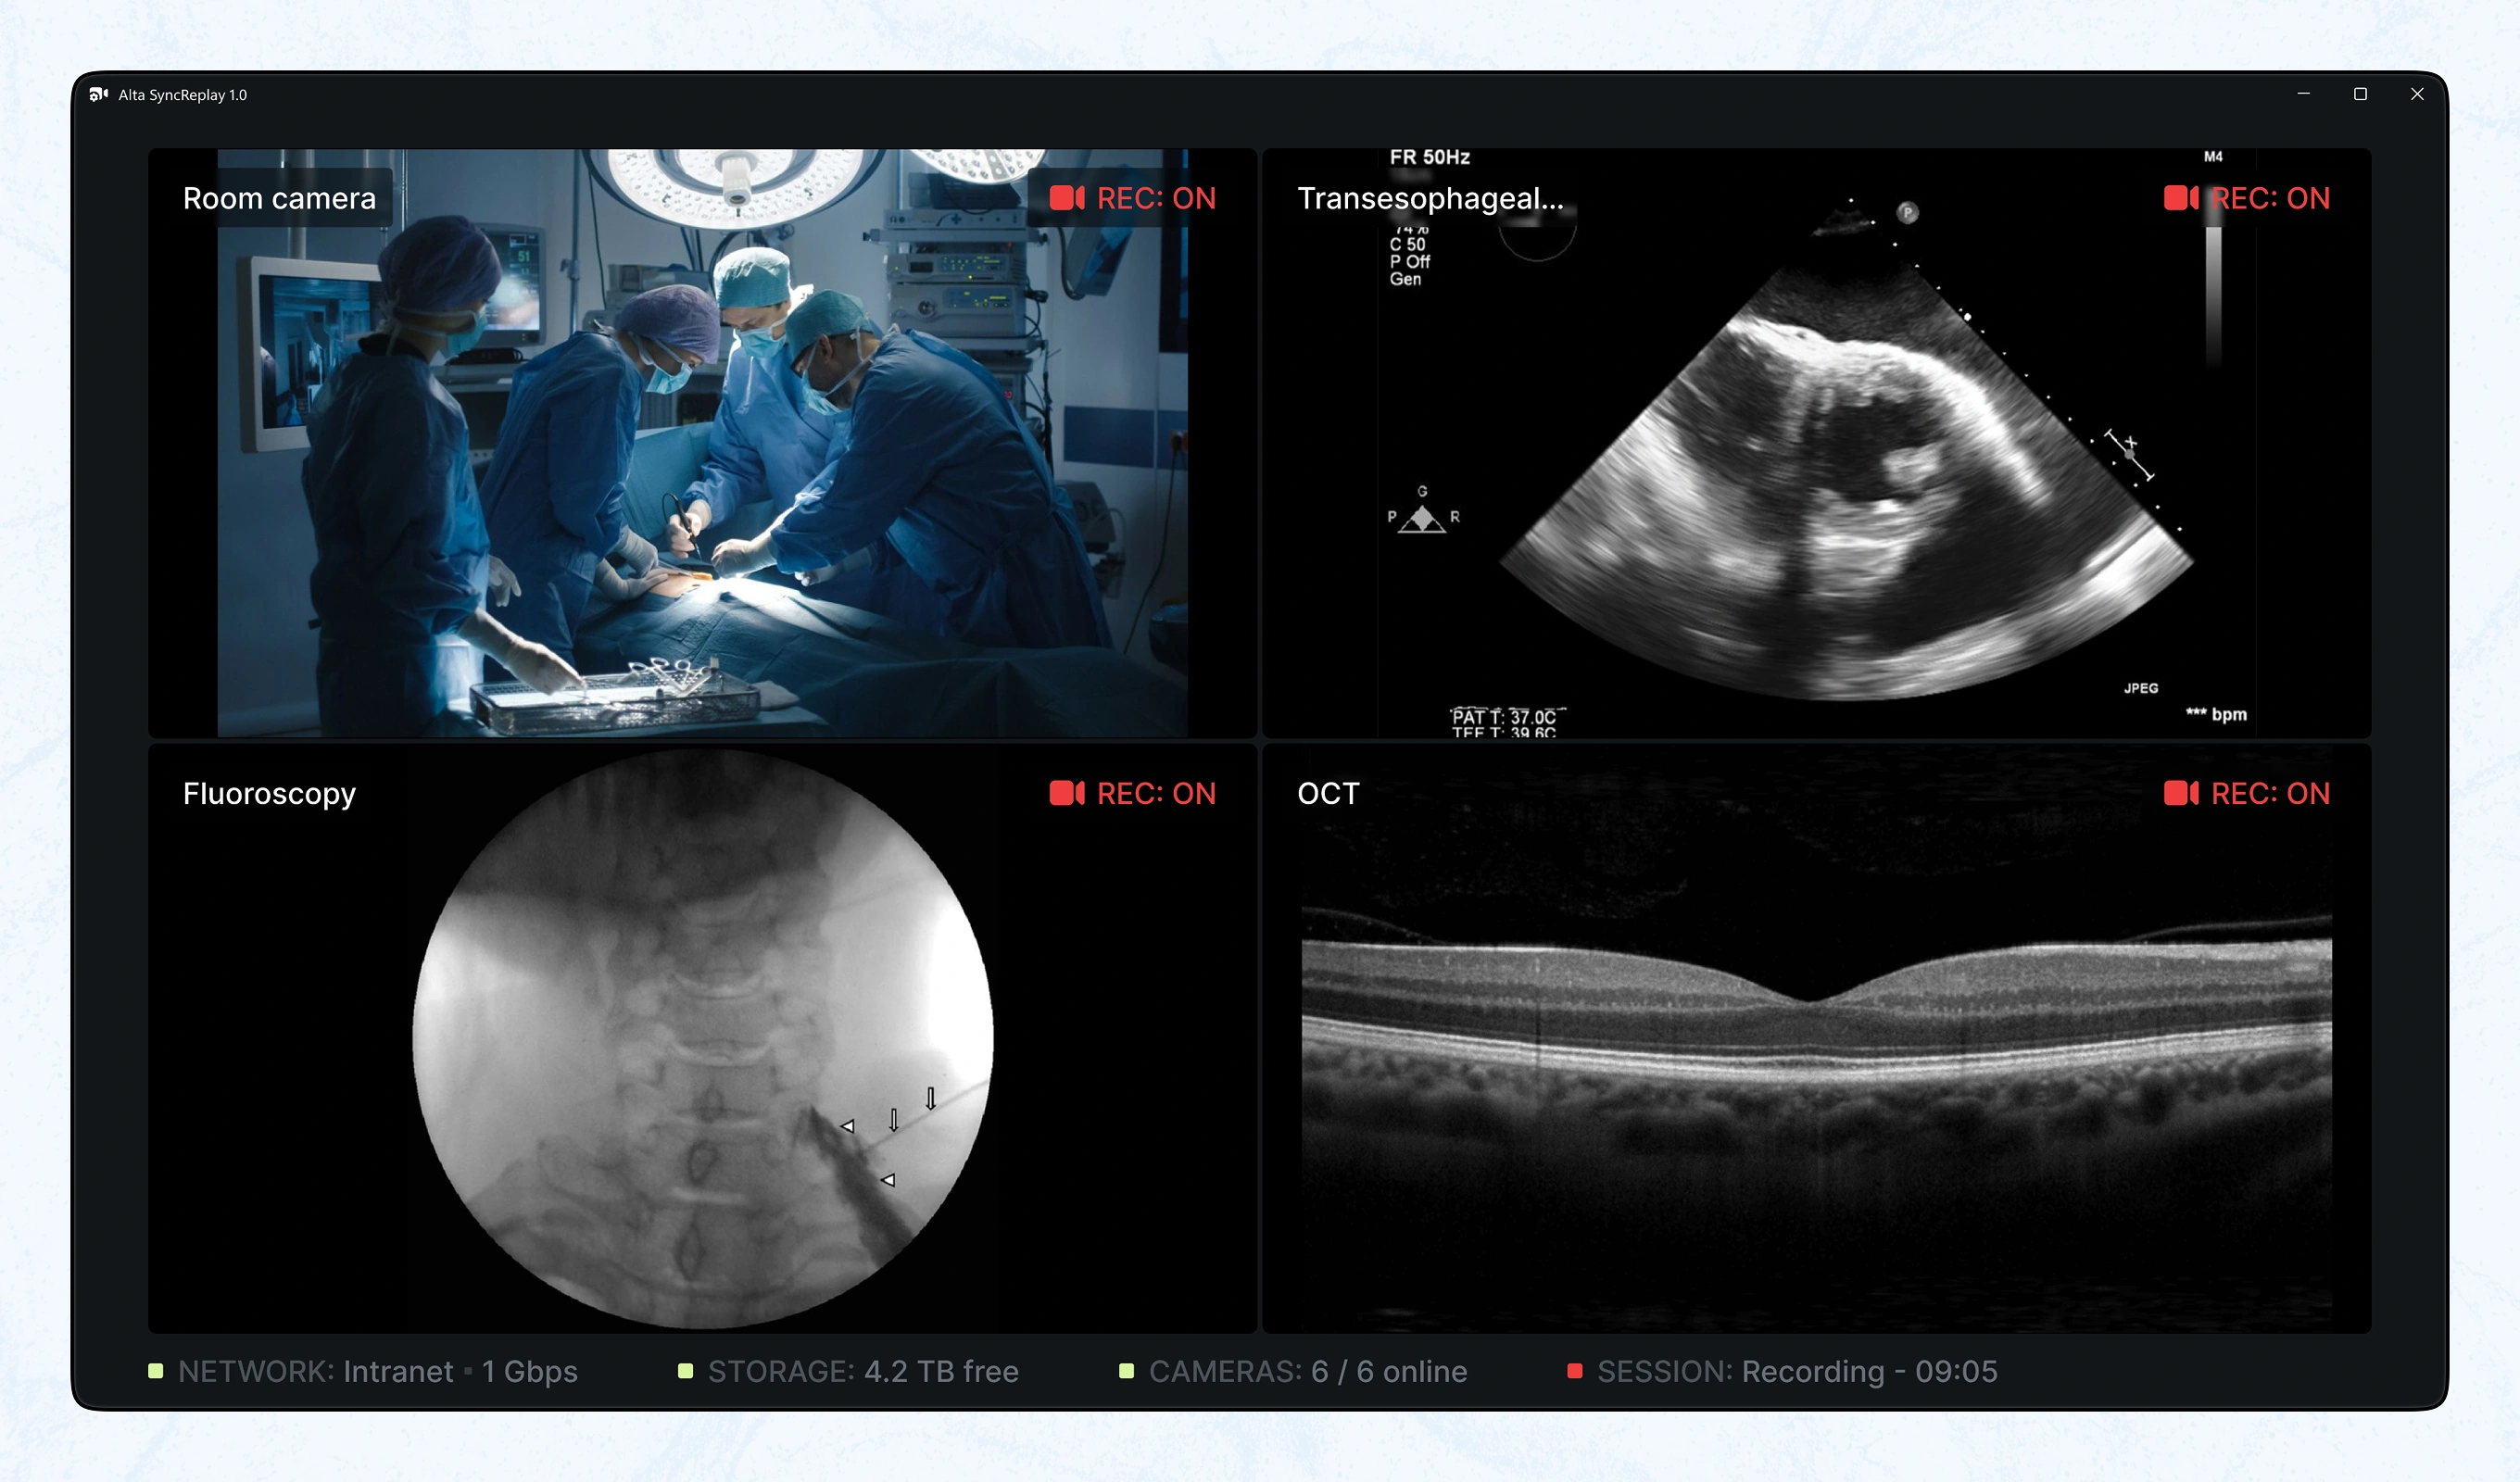
Same four sources stripped of toolbar and dropdown controls, sized for an OR wall monitor rather than a workstation. Removing on-screen controls suits a display nobody touches mid-procedure, while feeds stay legible on tablets and laptops nearby.
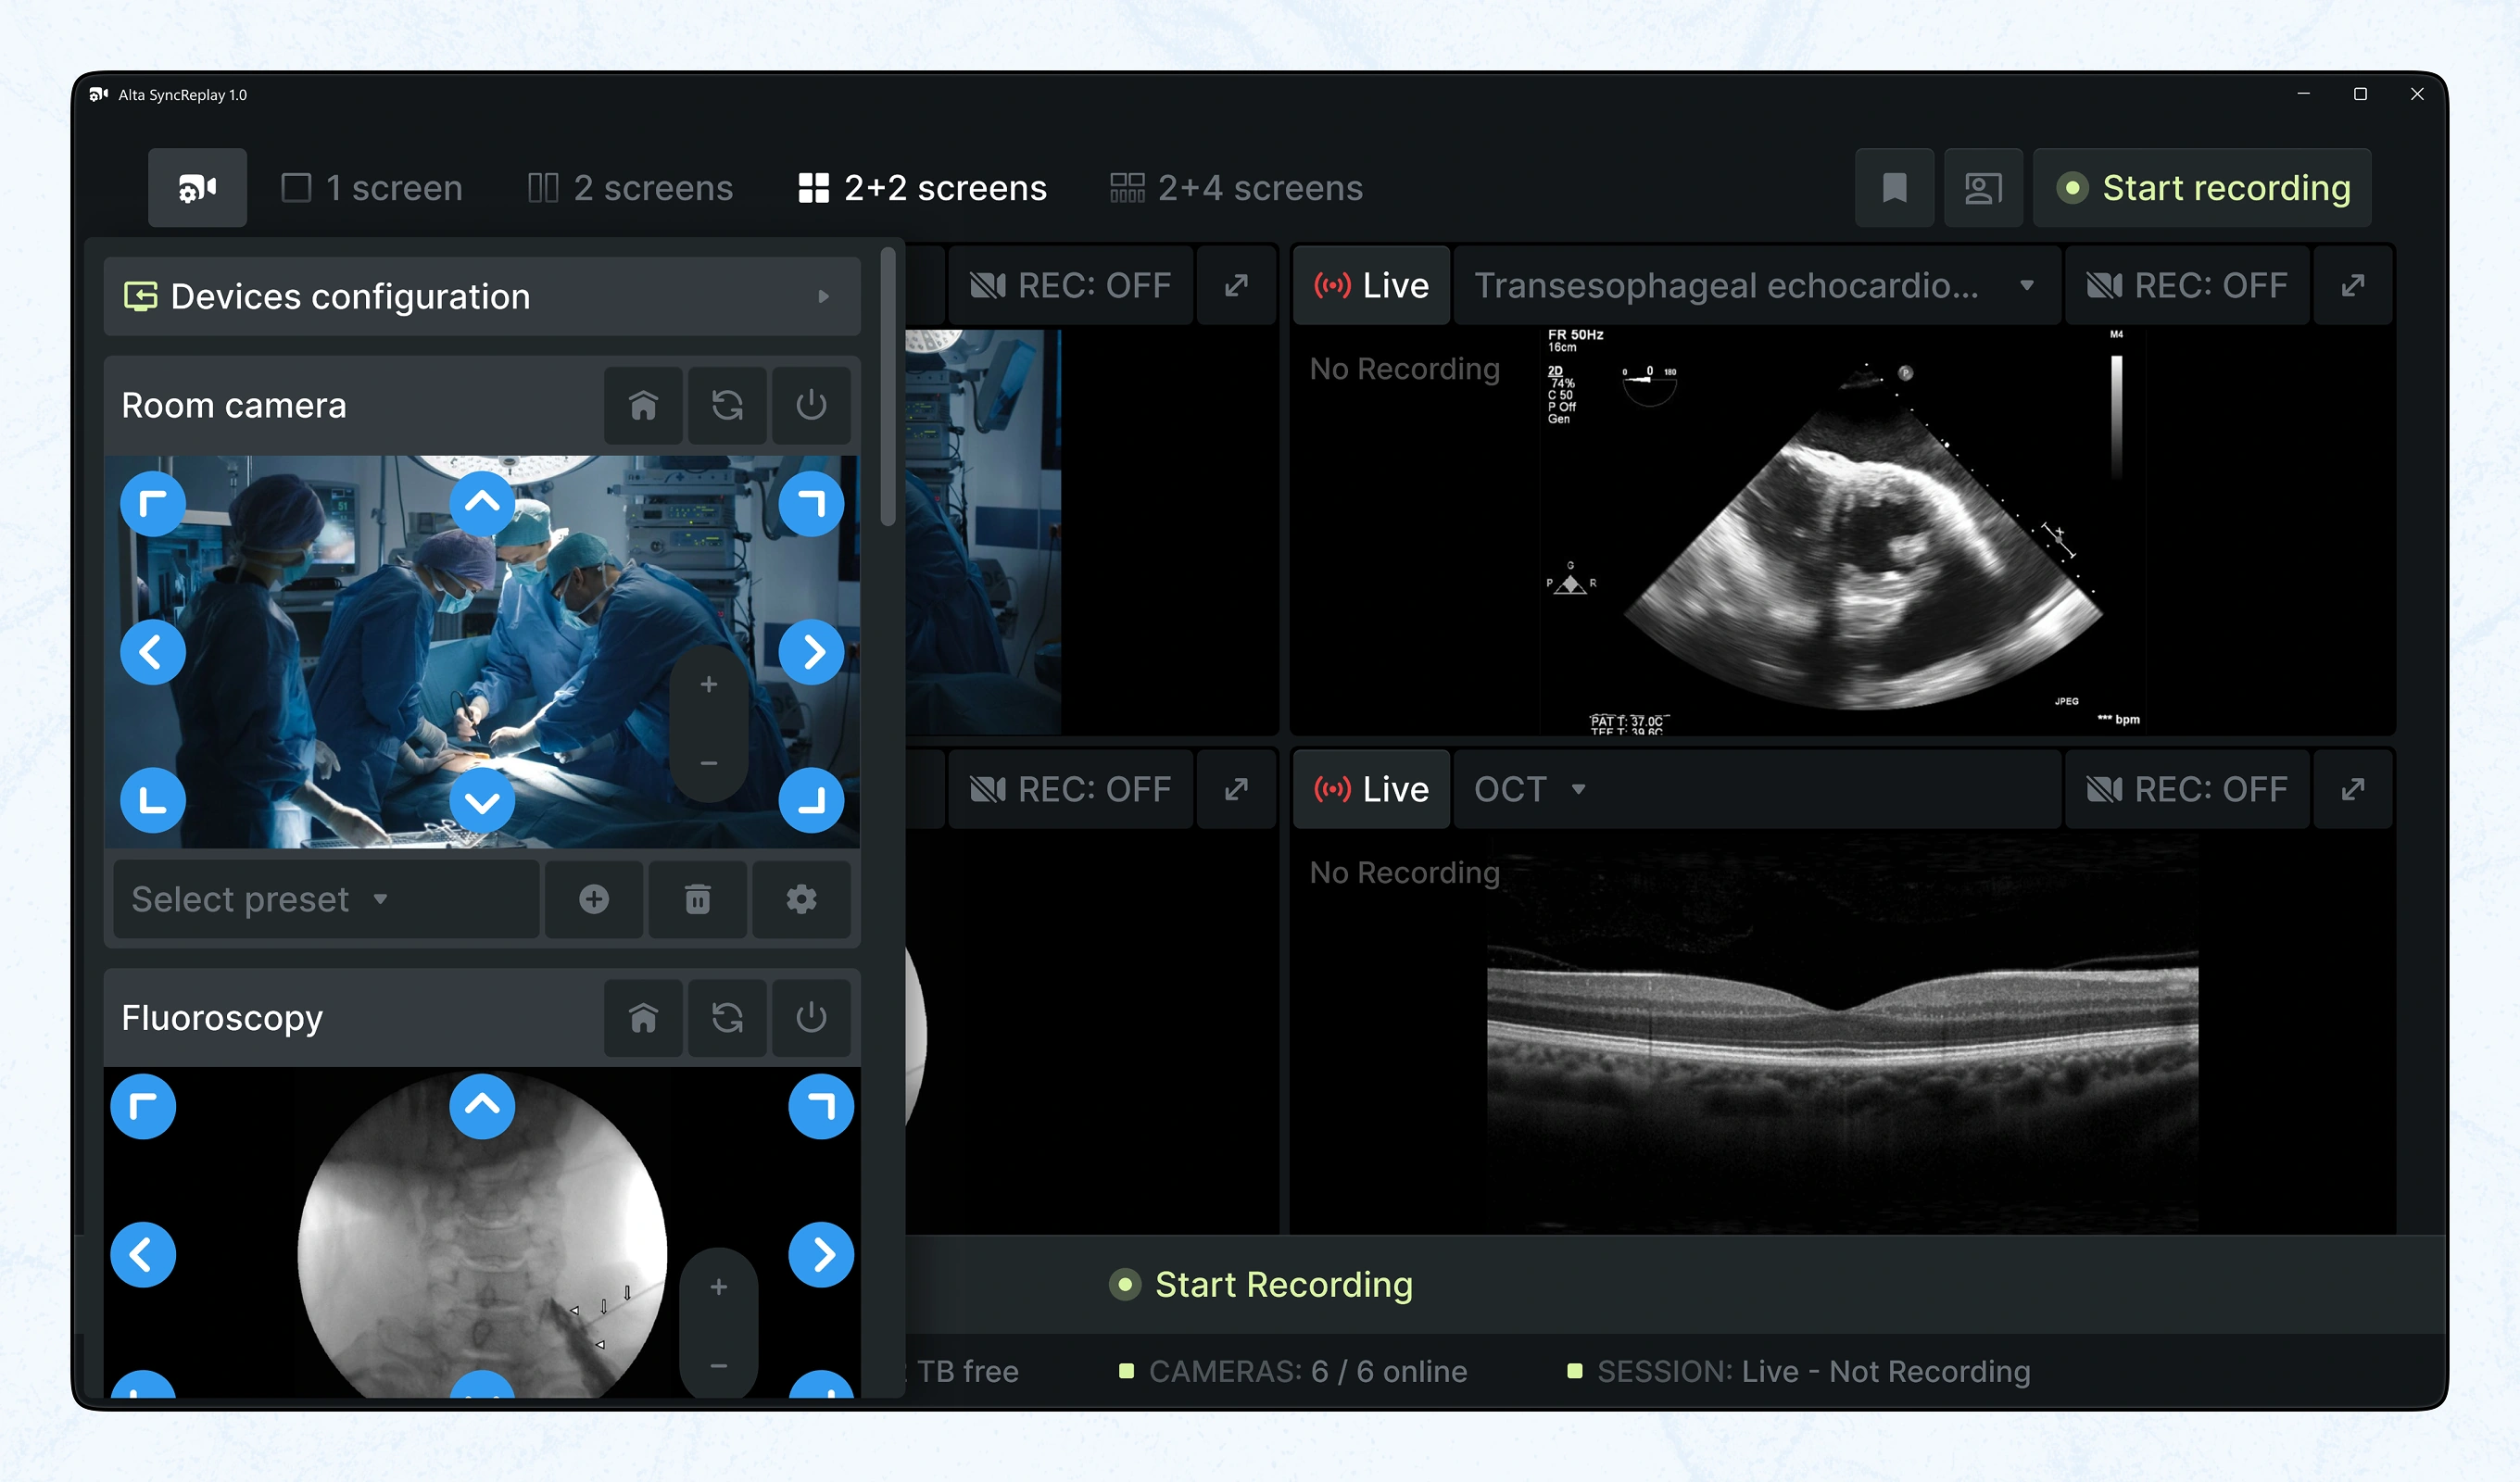
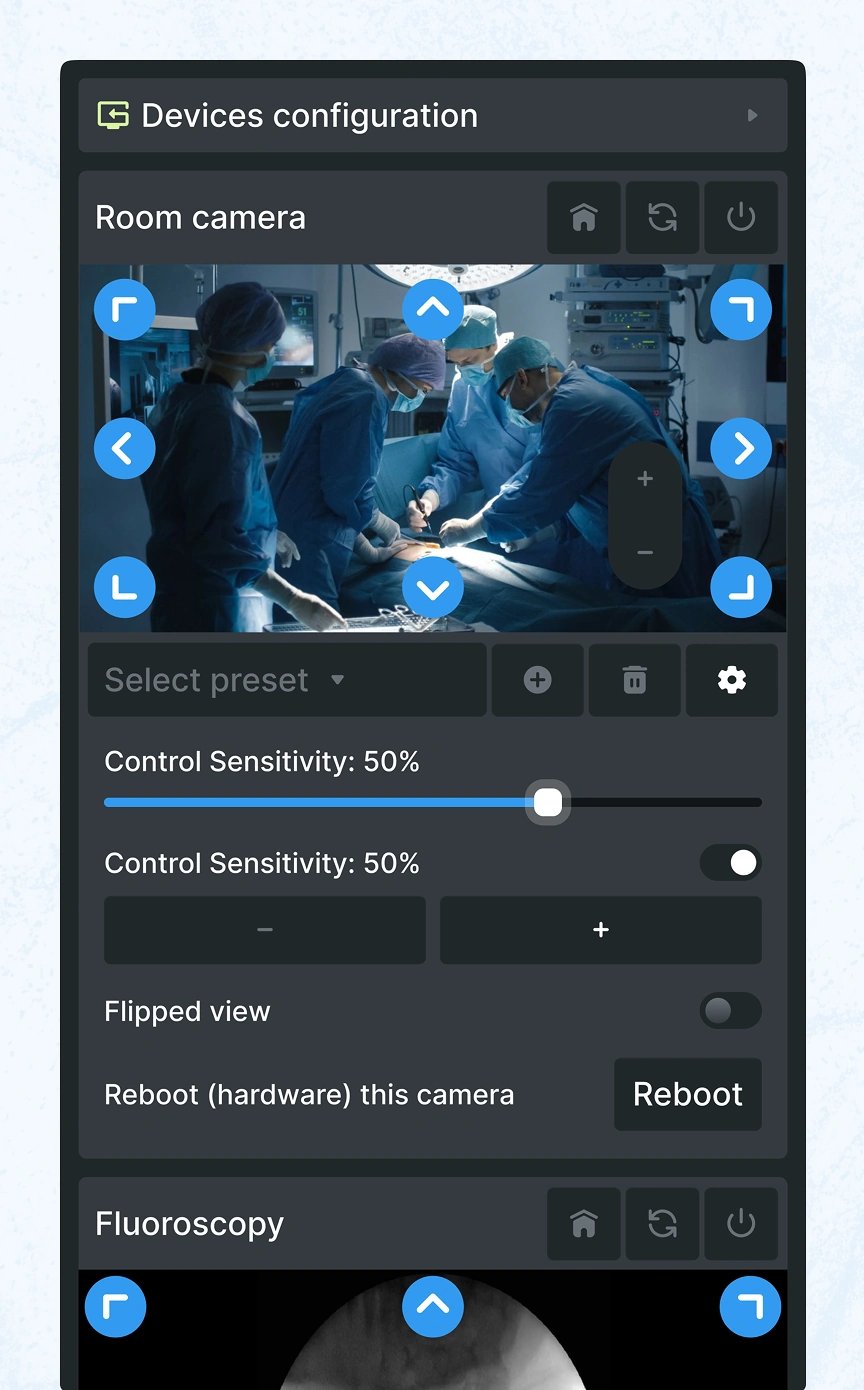
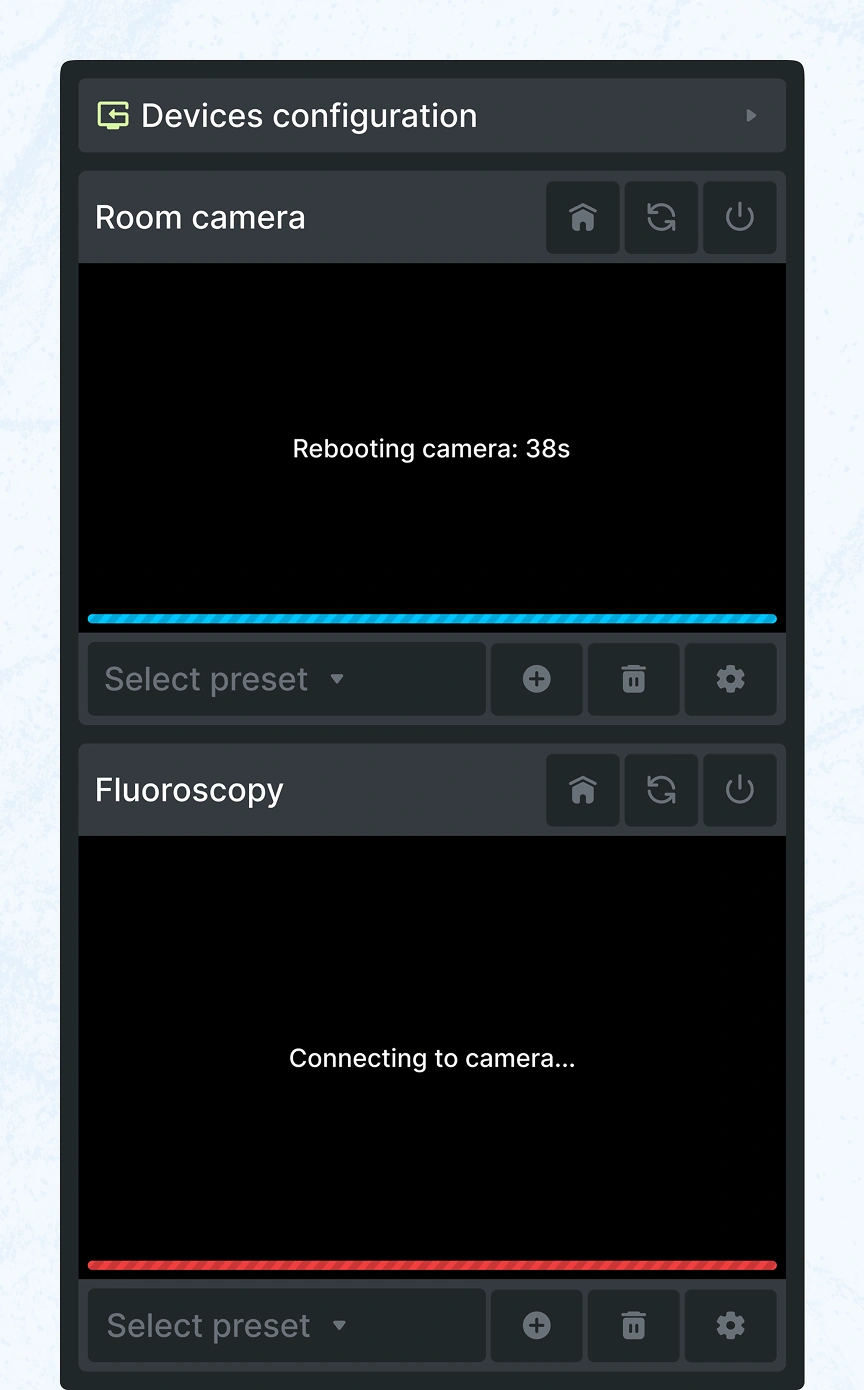
Pan-tilt-zoom controls and presets for each connected device, room camera and fluoroscopy shown here, laid over the live feed grid. Staff can reposition a camera without leaving the recording view.
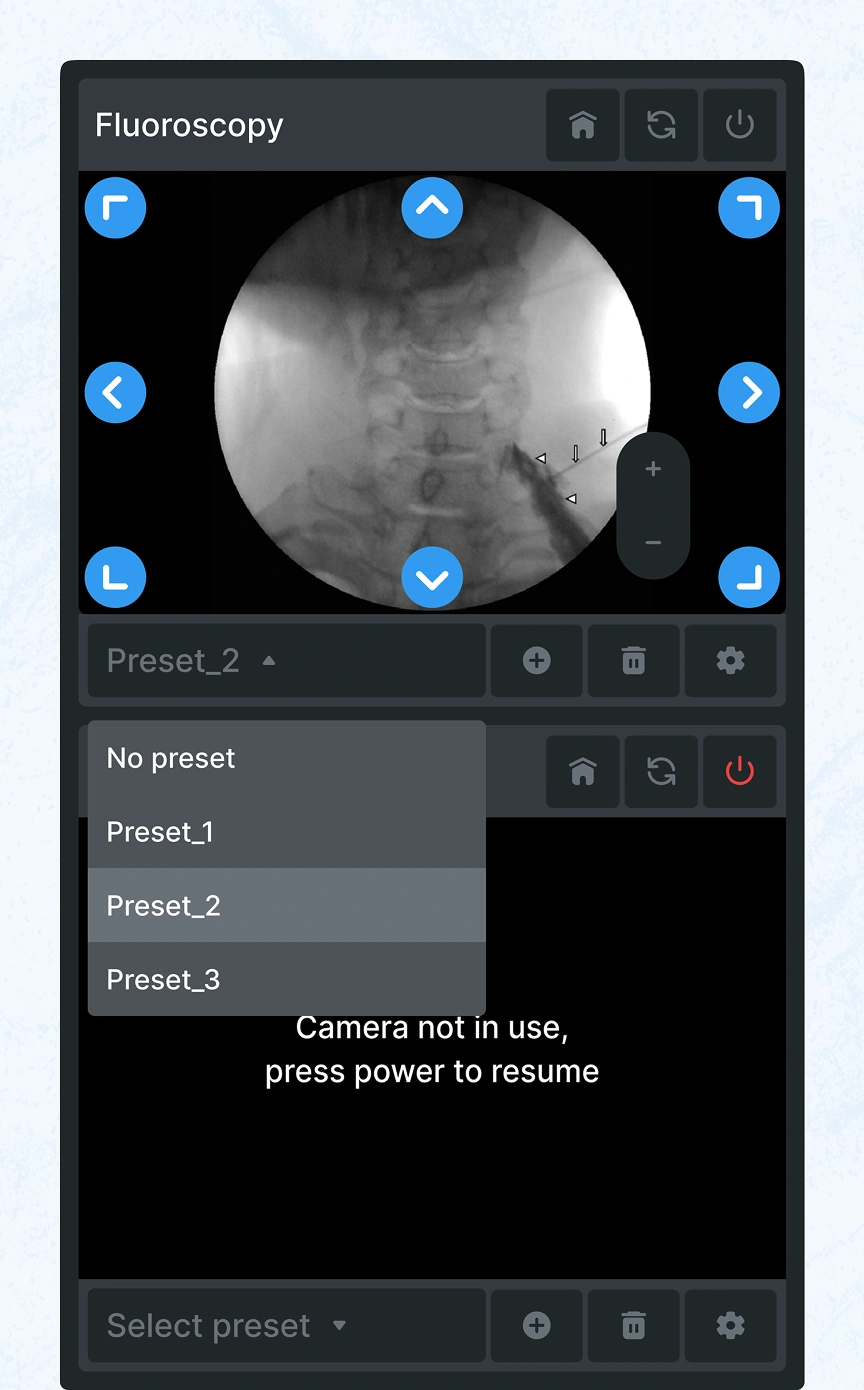
Presets, a rebooting countdown, and a 'camera not in use' overlay reuse the same states across every device panel. The same logic drives the live and recording indicators used throughout the platform.
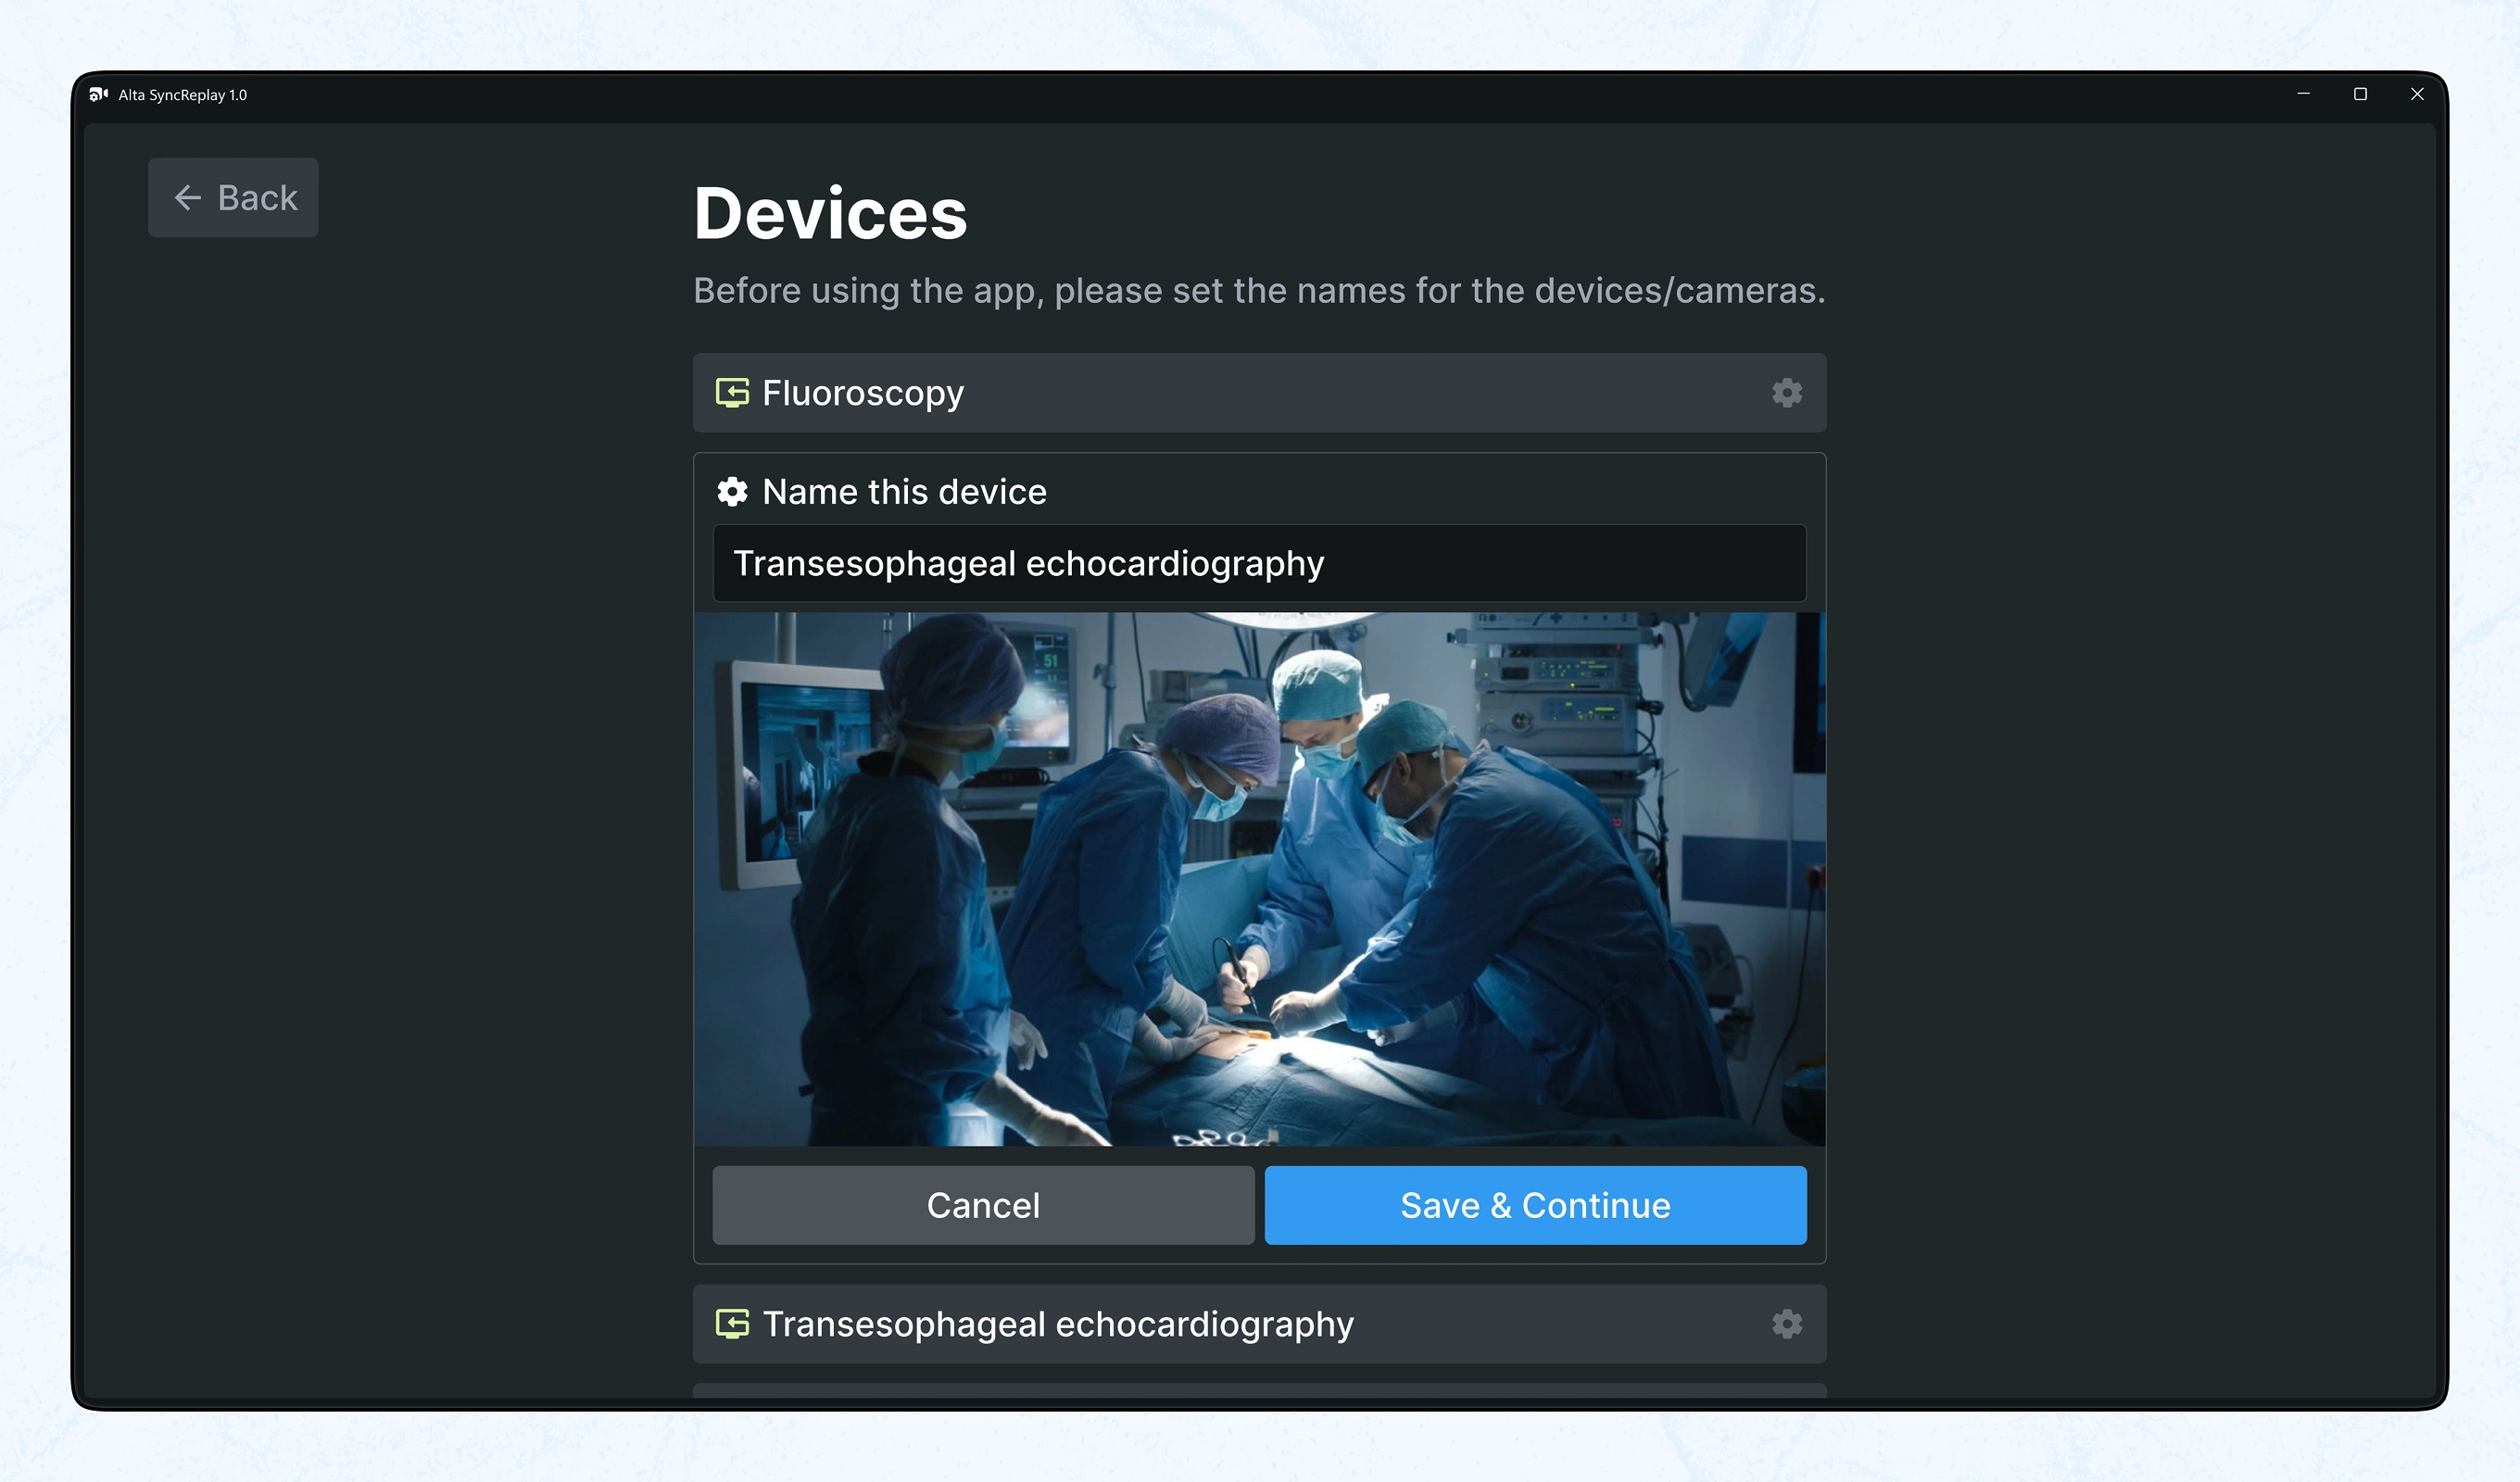
Before first use, each hardware input is assigned a clinically meaningful name, like Transesophageal echocardiography, instead of a generic port label. Save & Continue locks that name in for every session afterward.
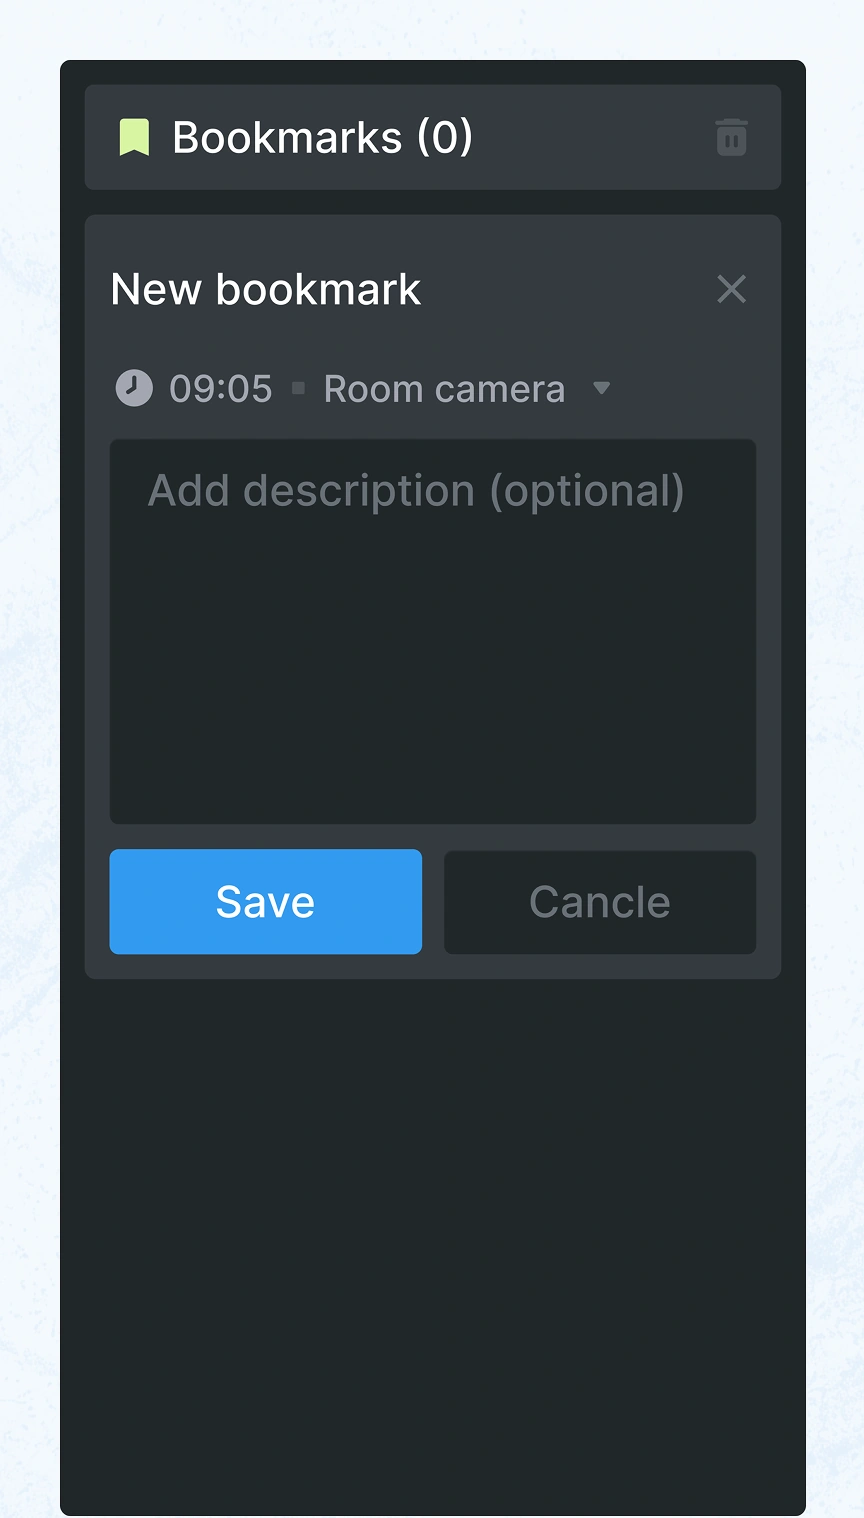
Notes like a brief heart-rate drop or a successful stent placement sit in a Bookmarks panel with one-tap Replay.
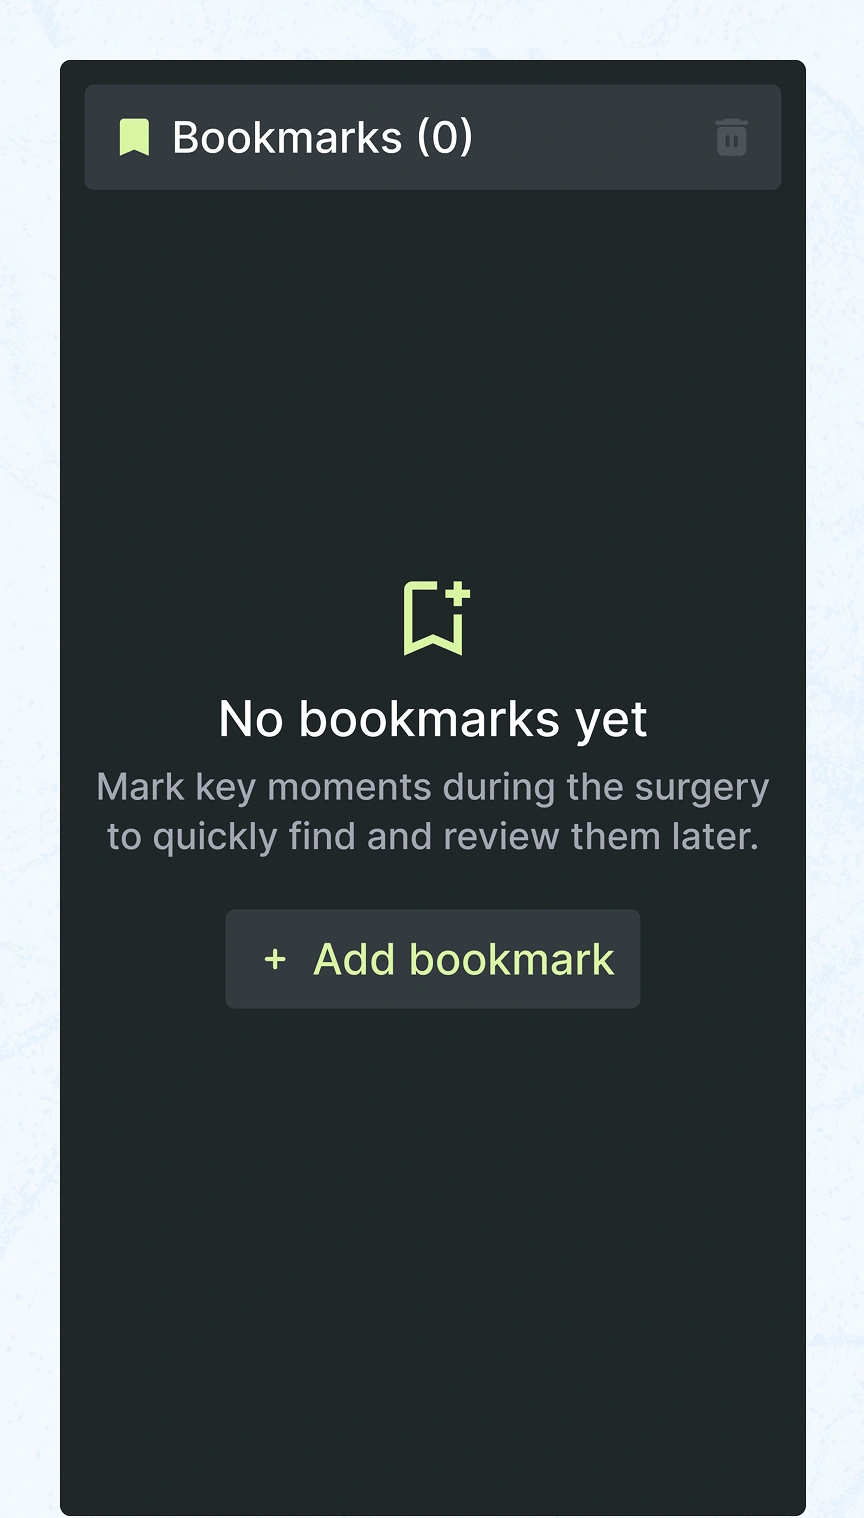
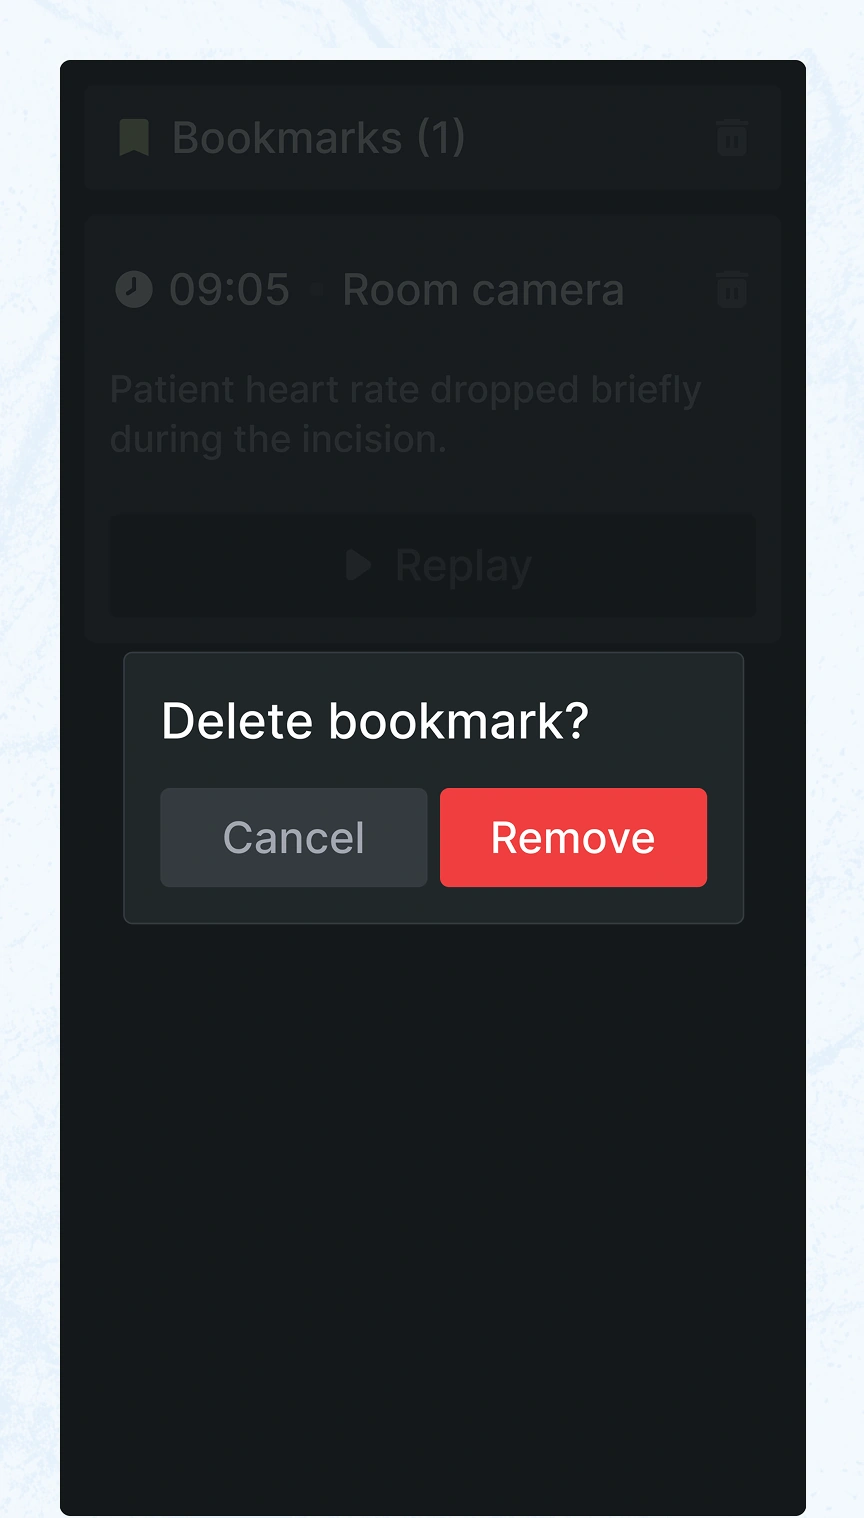
Empty, creation, and delete states for the same bookmark panel shown earlier. A New Bookmark modal captures timestamp, source, and an optional note, while removing one requires a confirmed Delete step.
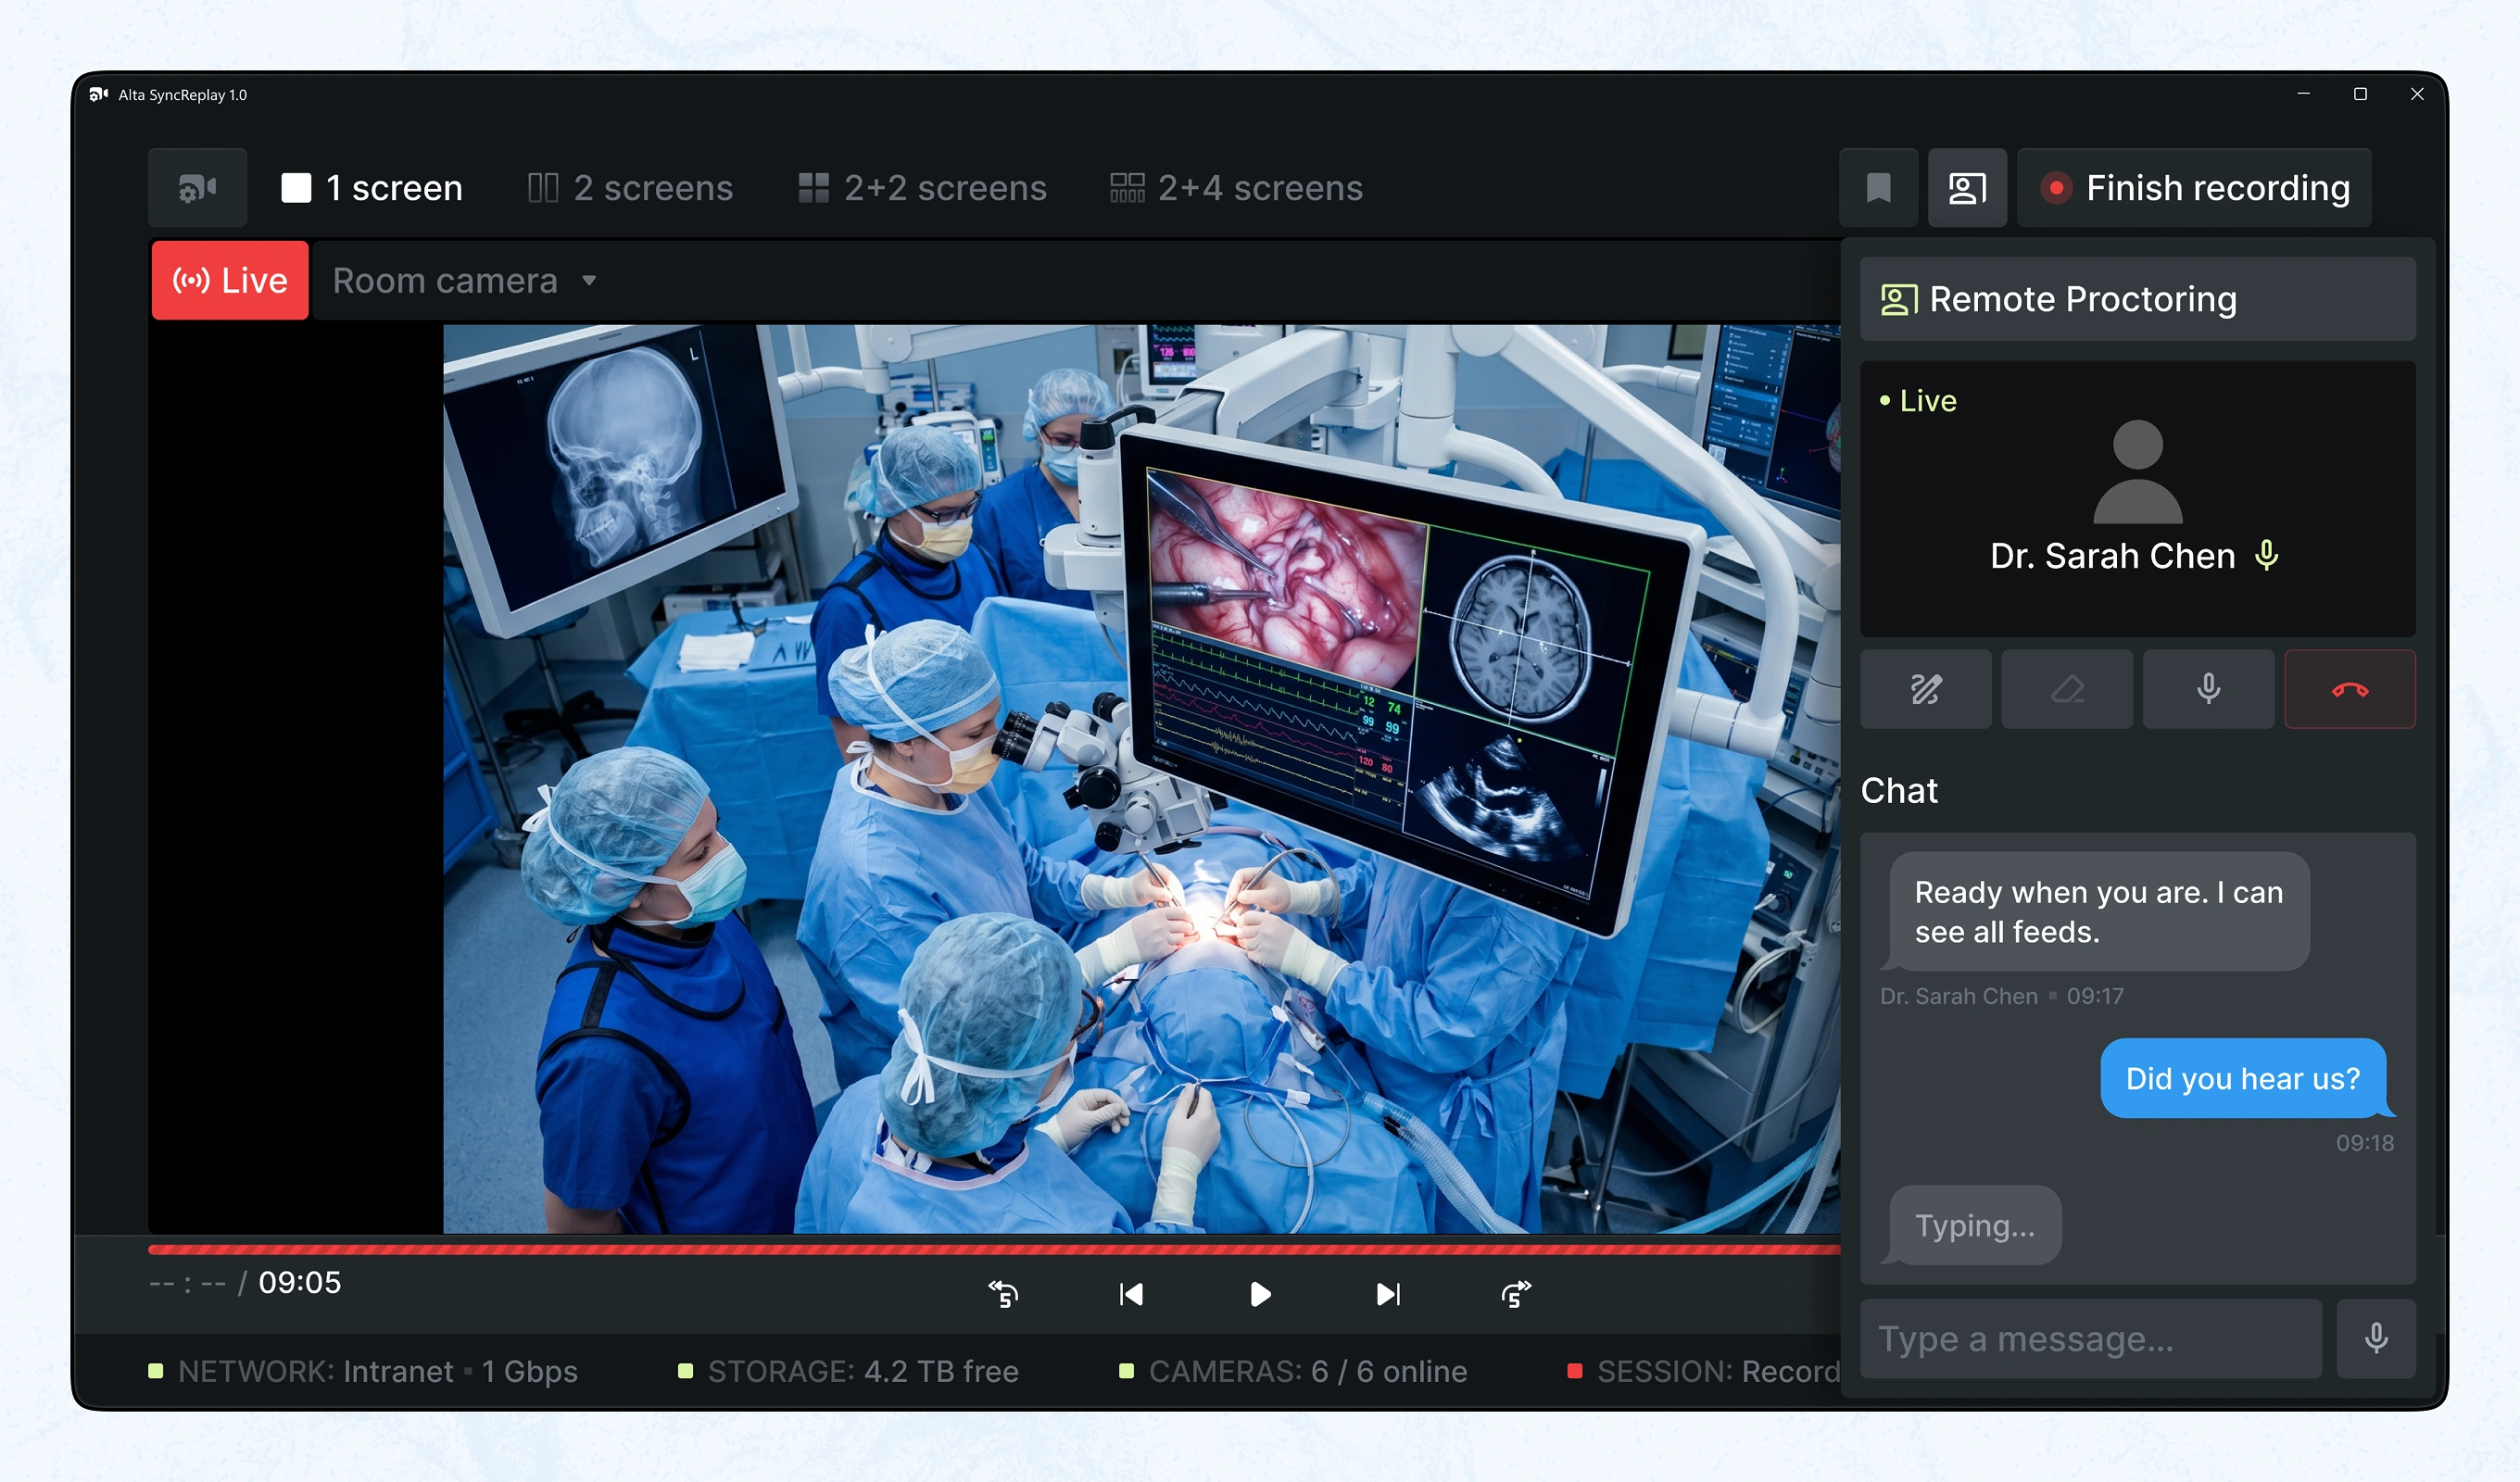
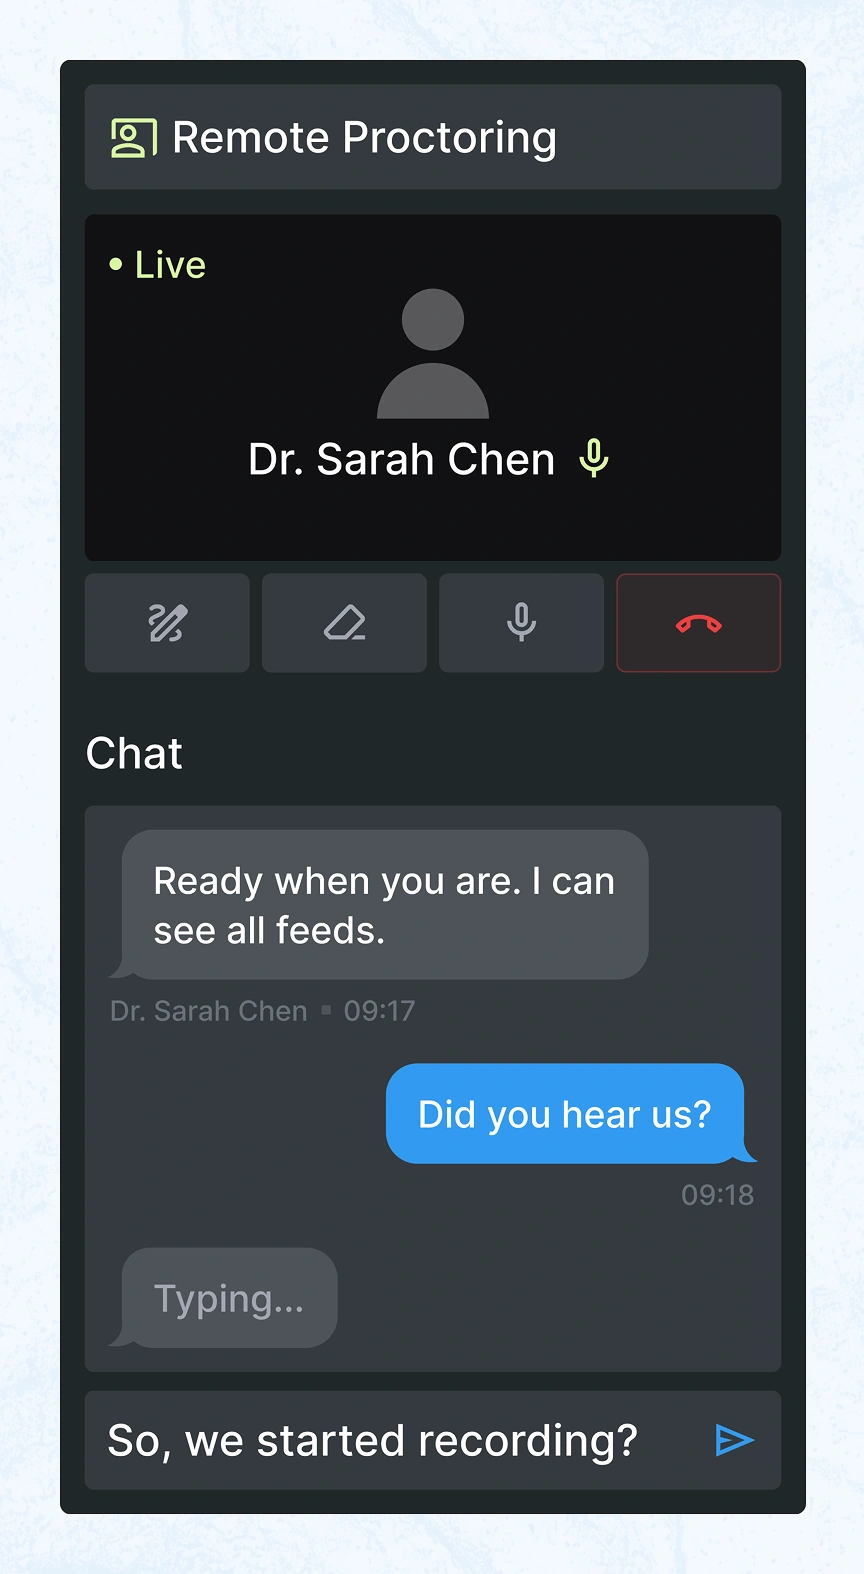
A named remote proctor joins the live session over video, with call controls for drawing, erasing, and muting alongside a text chat thread. Typing indicators and timestamps keep both sides in sync mid-procedure.
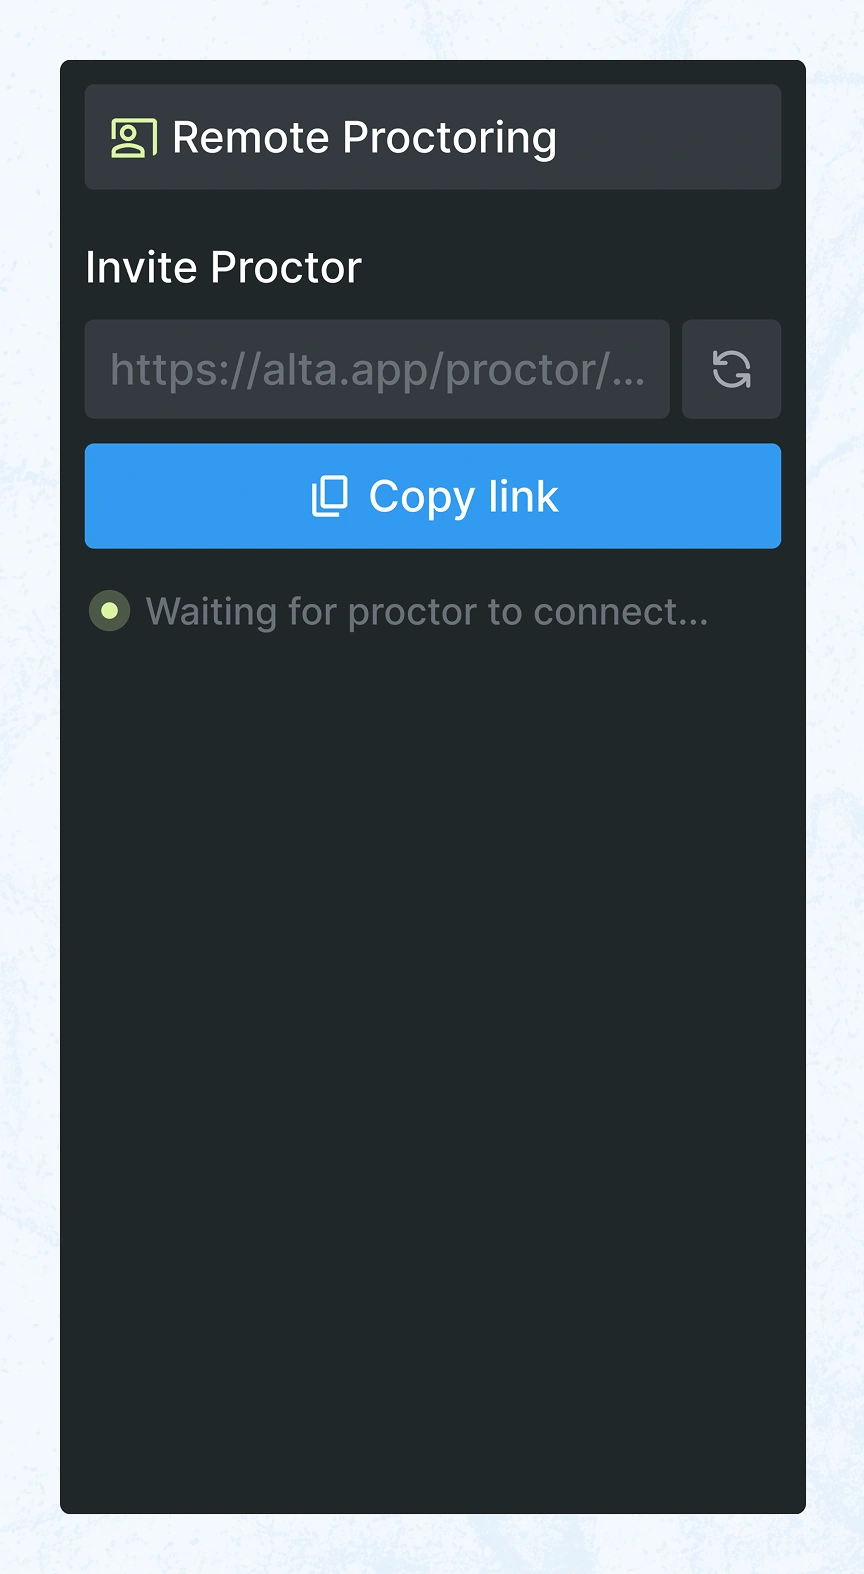
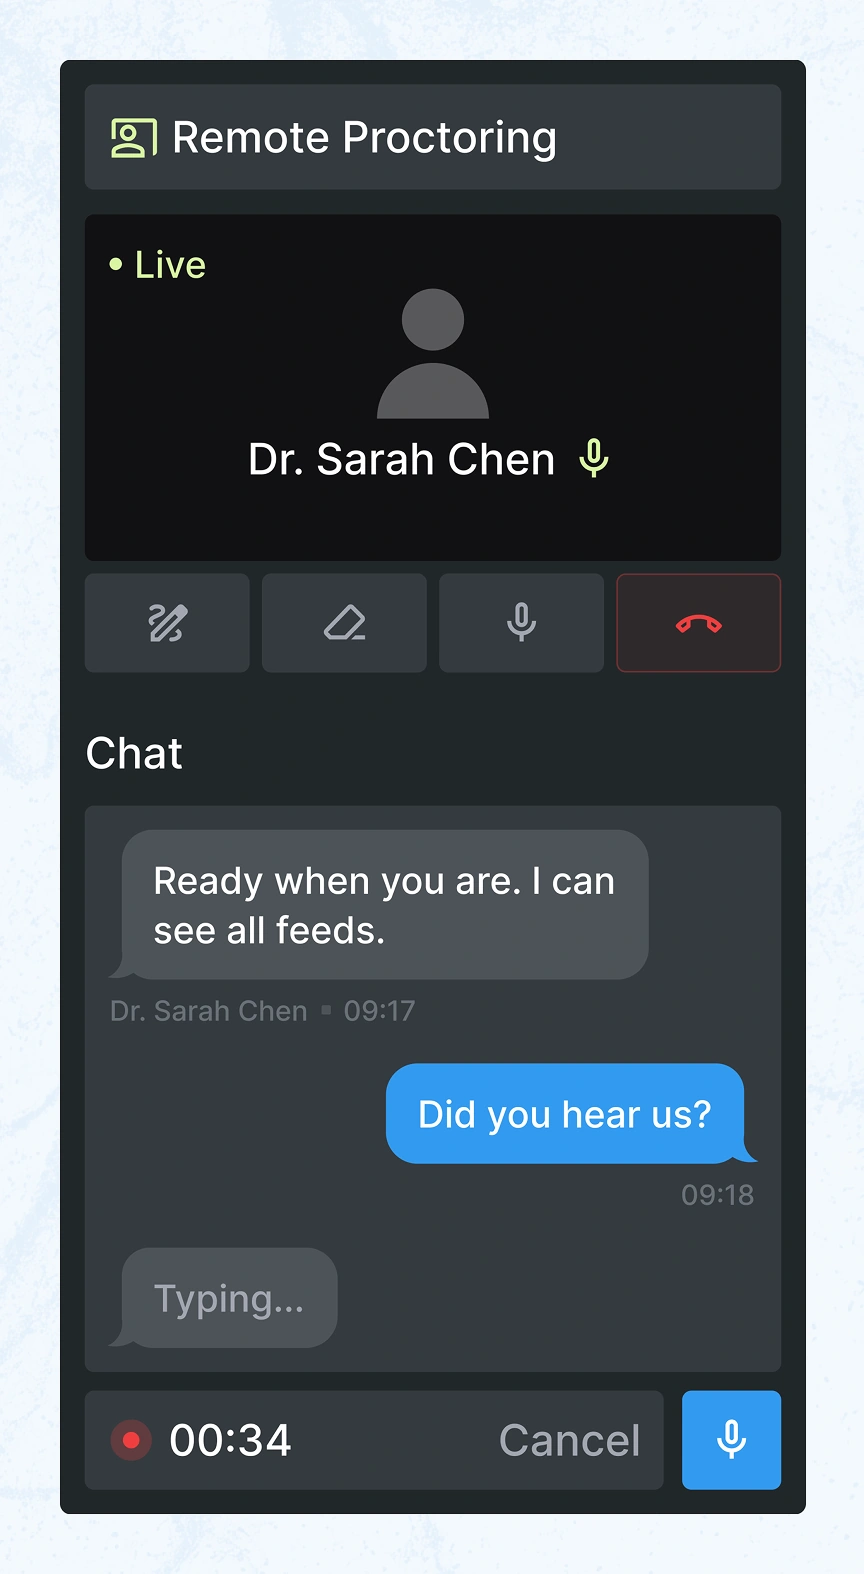
Before a proctor joins, the surgical team shares a one-time invite link and waits for connection to confirm. Once live, chat also accepts voice notes, recorded with a running timer and a Cancel option.
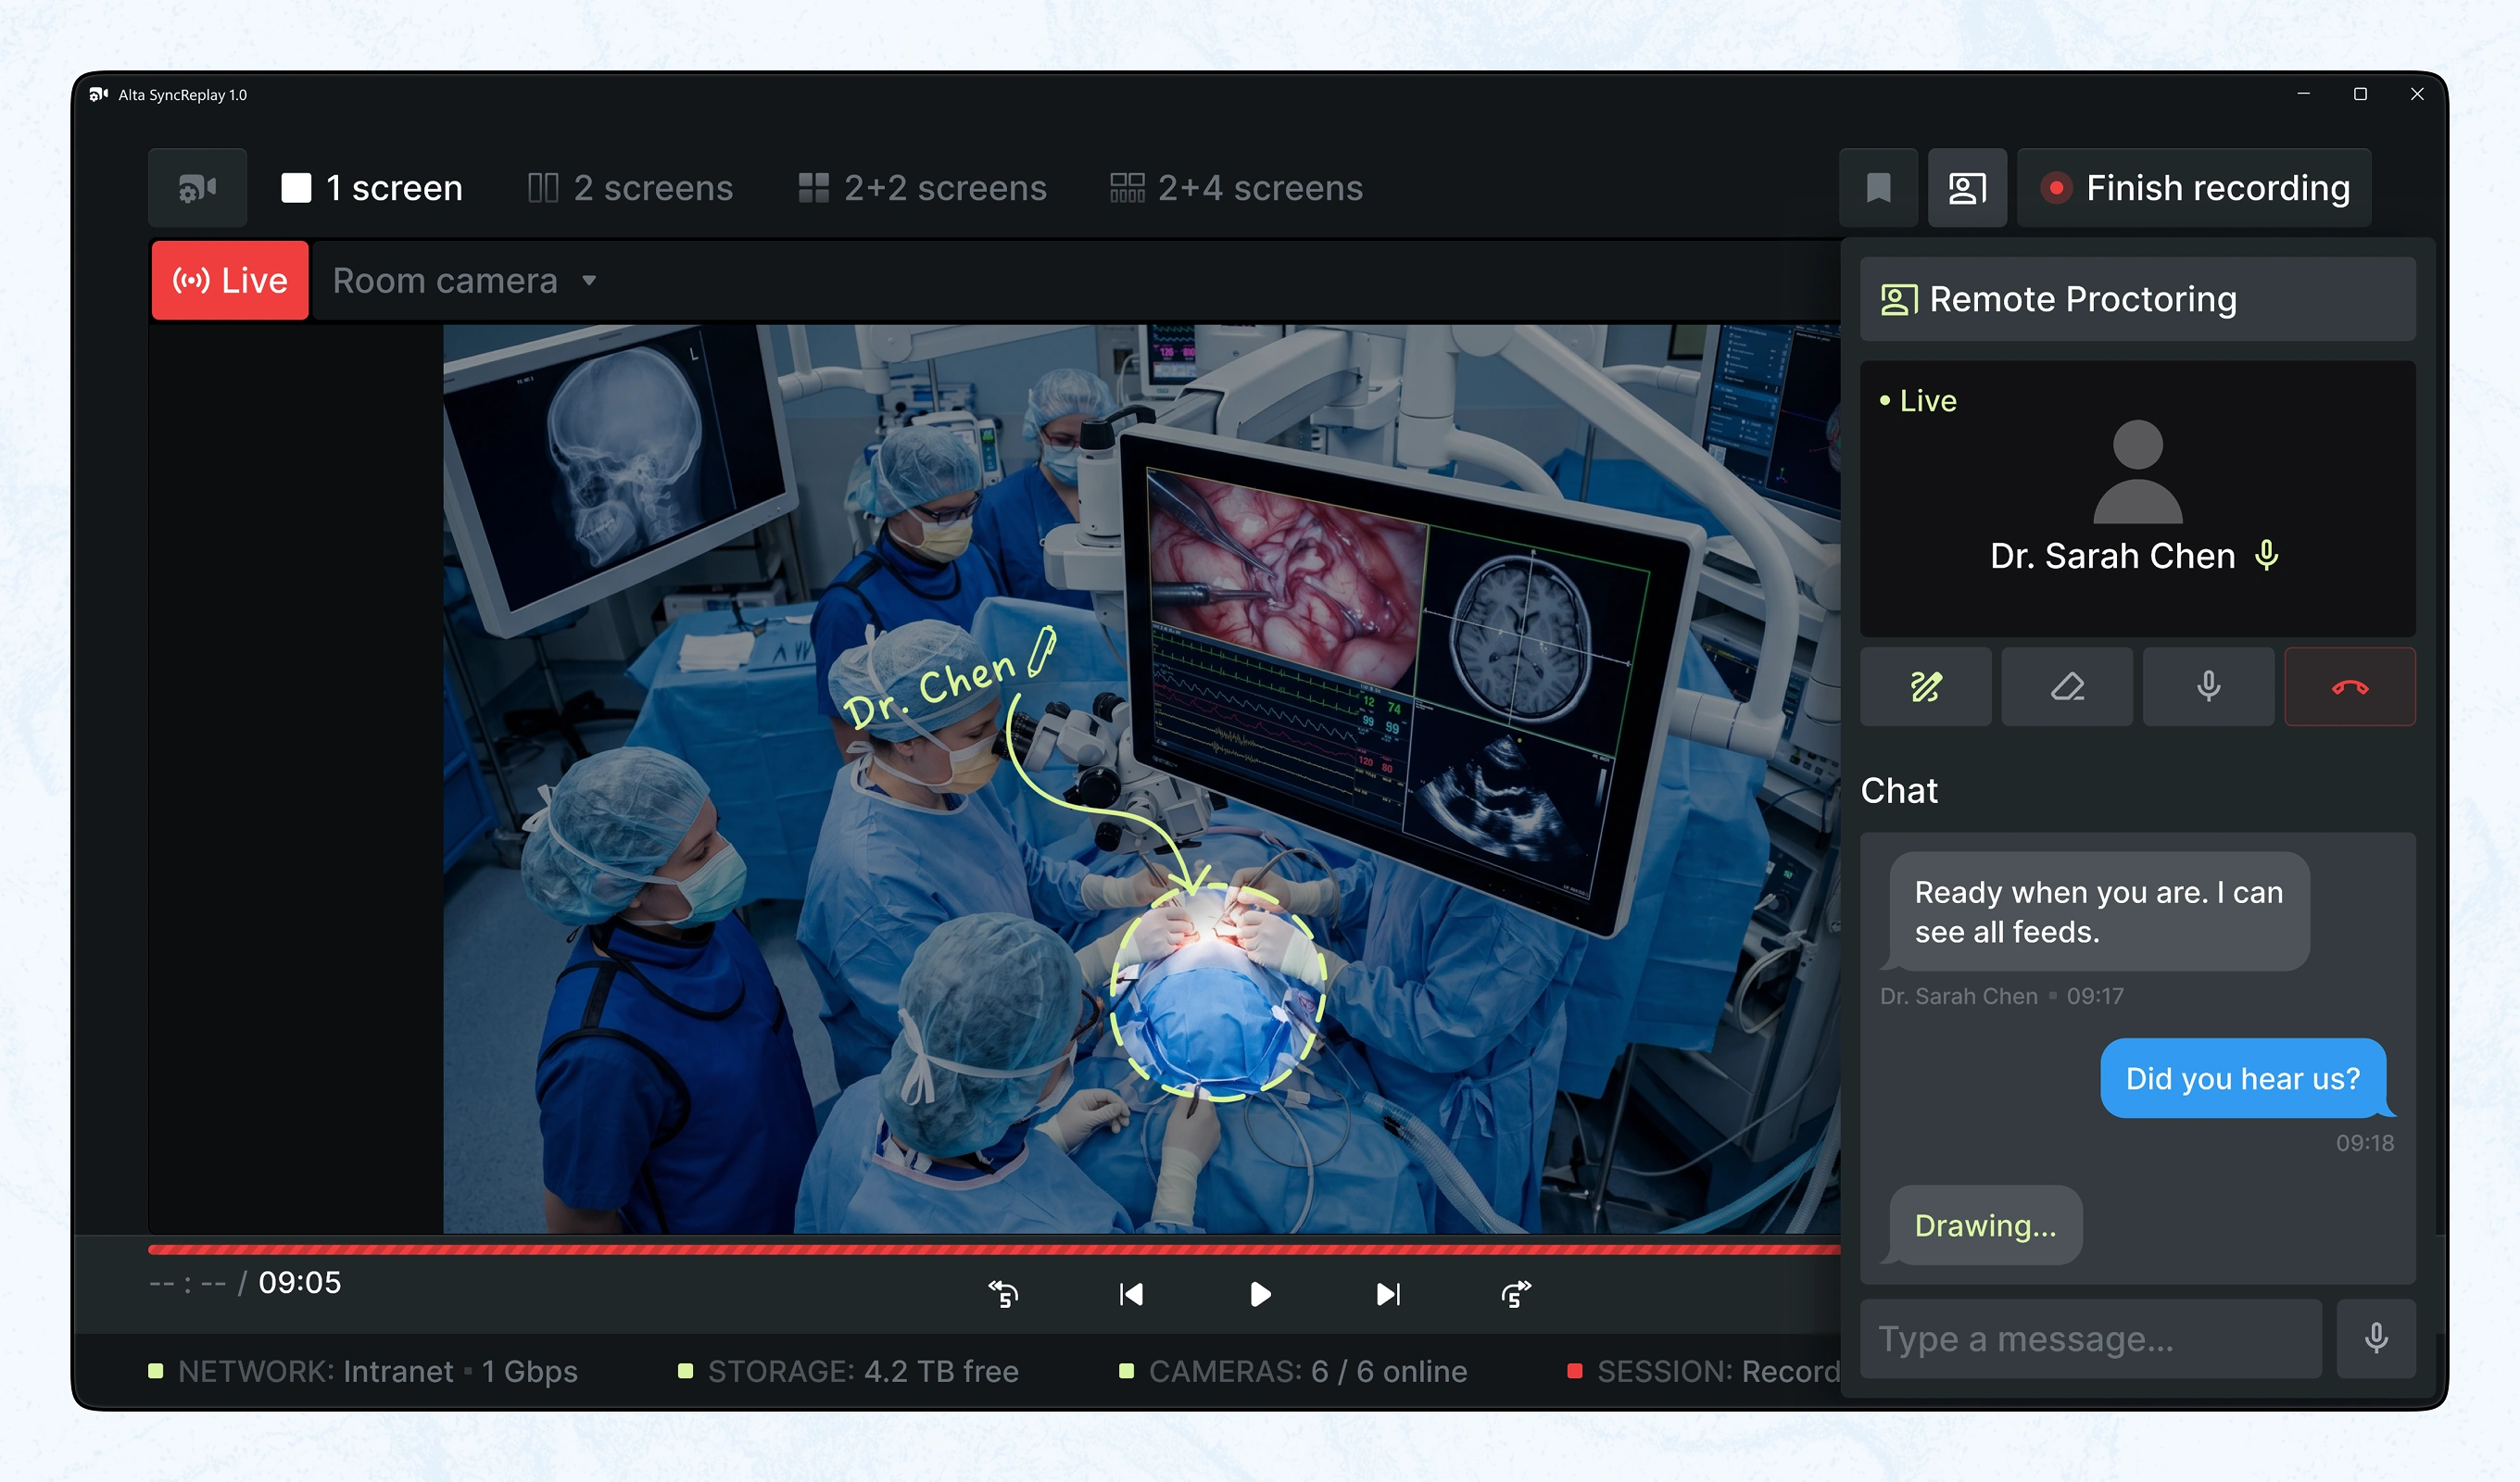
The remote proctor circles the operative site and labels it directly on the live feed, instead of describing the location in words. A 'Drawing...' status replaces the typing indicator while the mark is in progress.
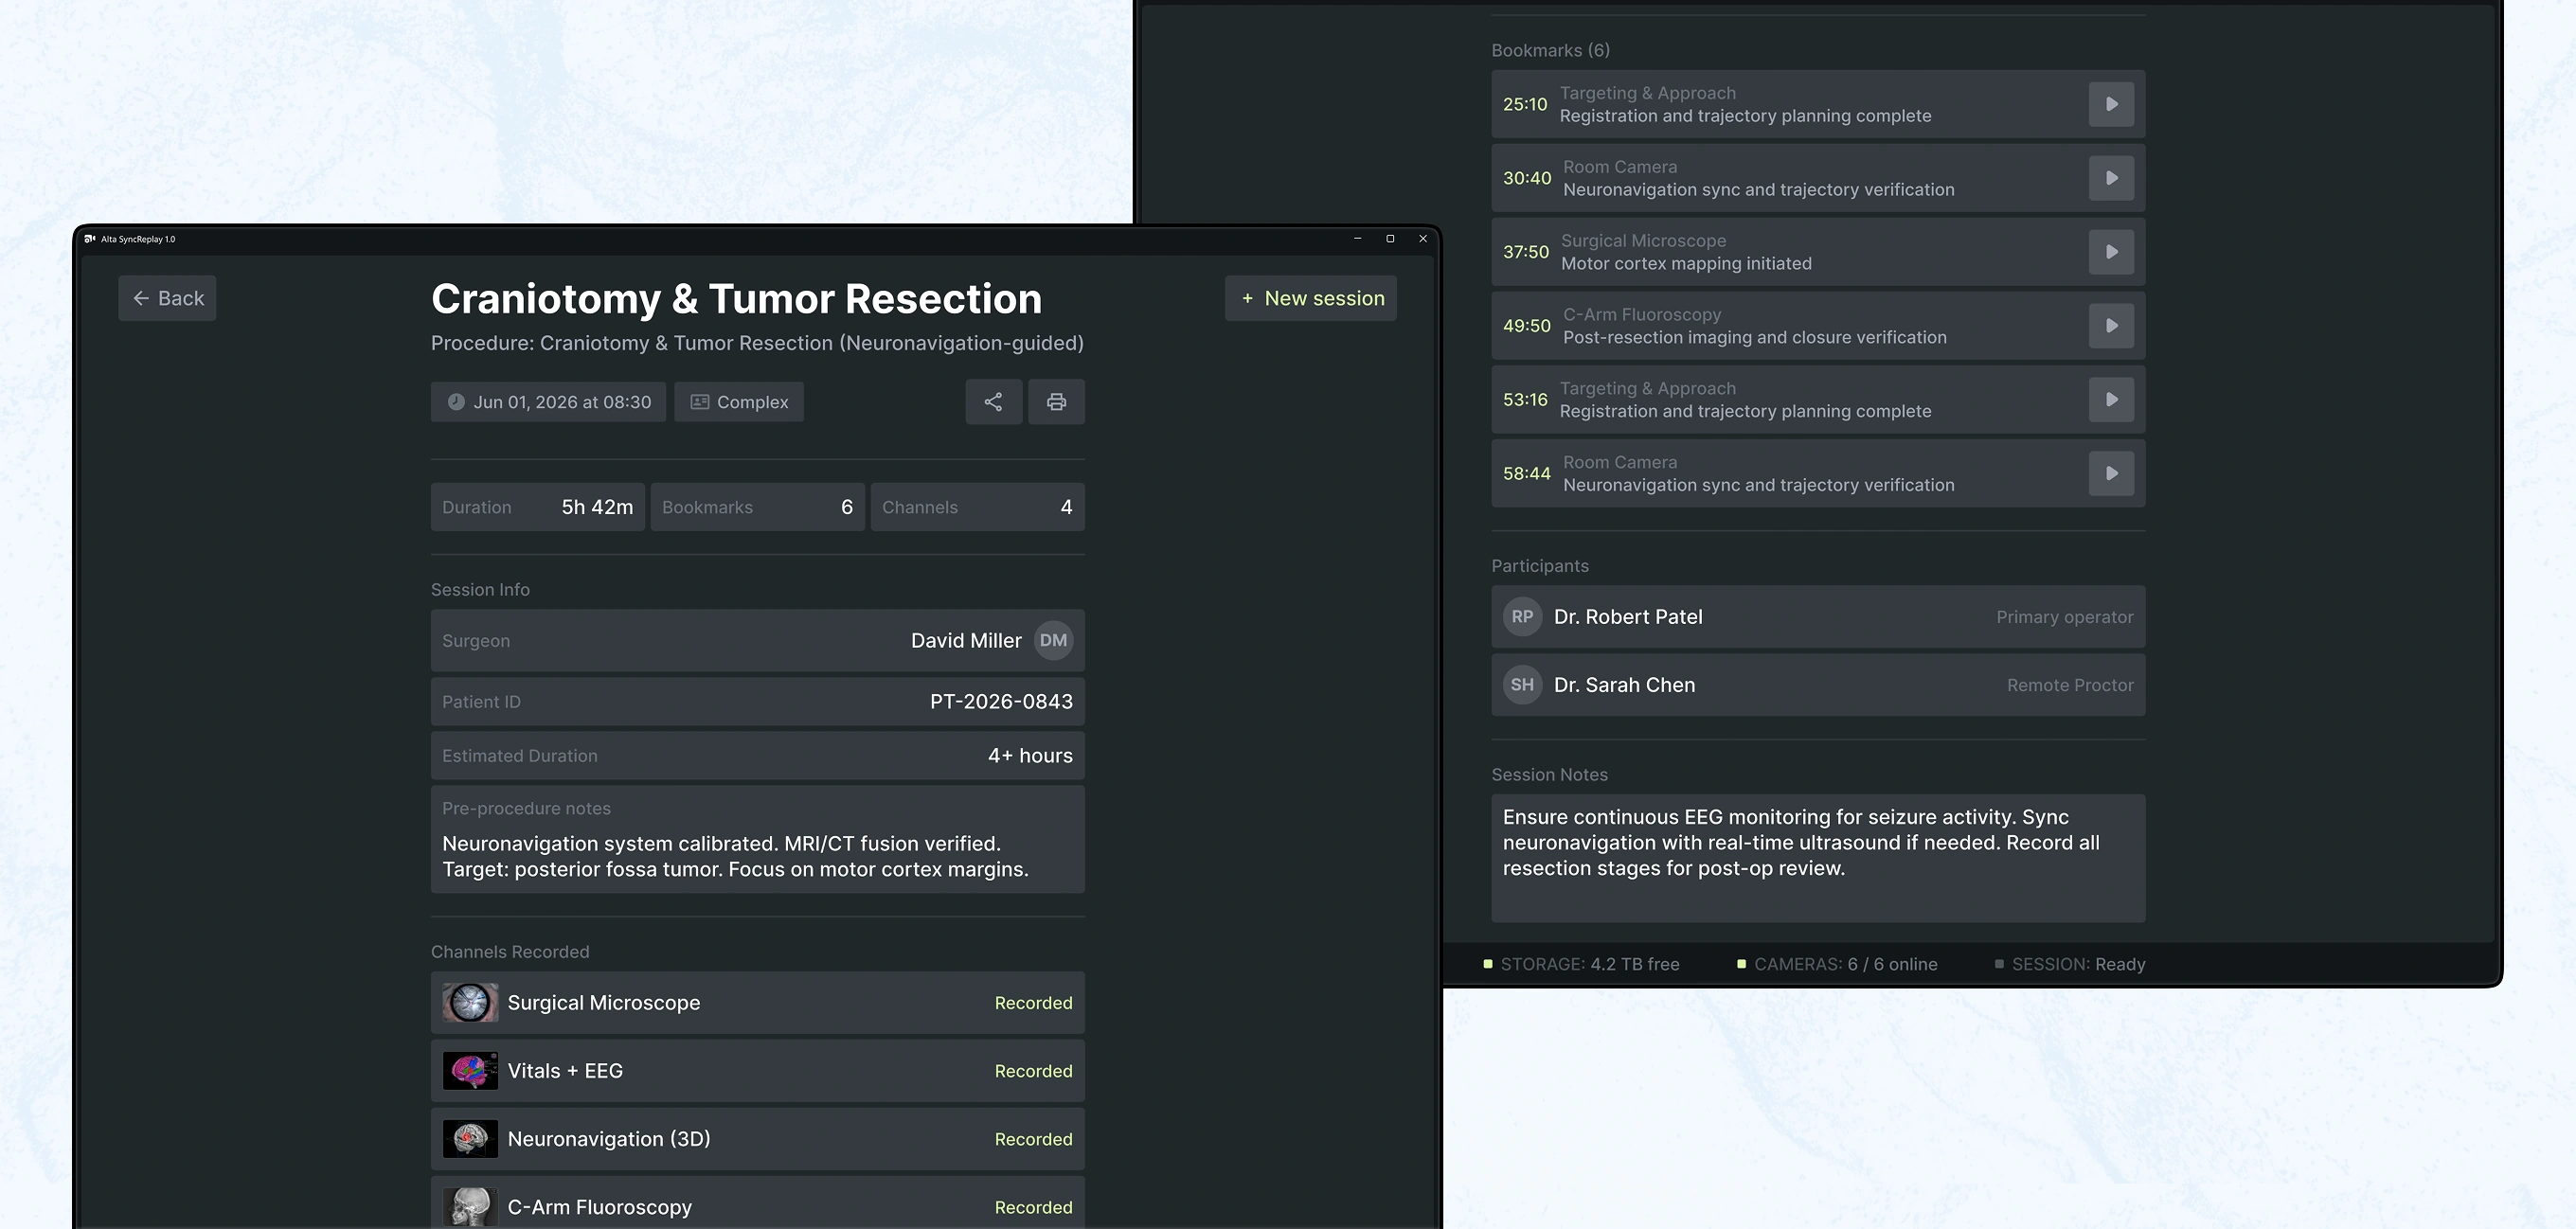
Read-only record of a finished session: duration, recorded channels, and a full bookmark timeline with timestamps and notes. Participants list both the primary operator and the remote proctor who joined mid-procedure.
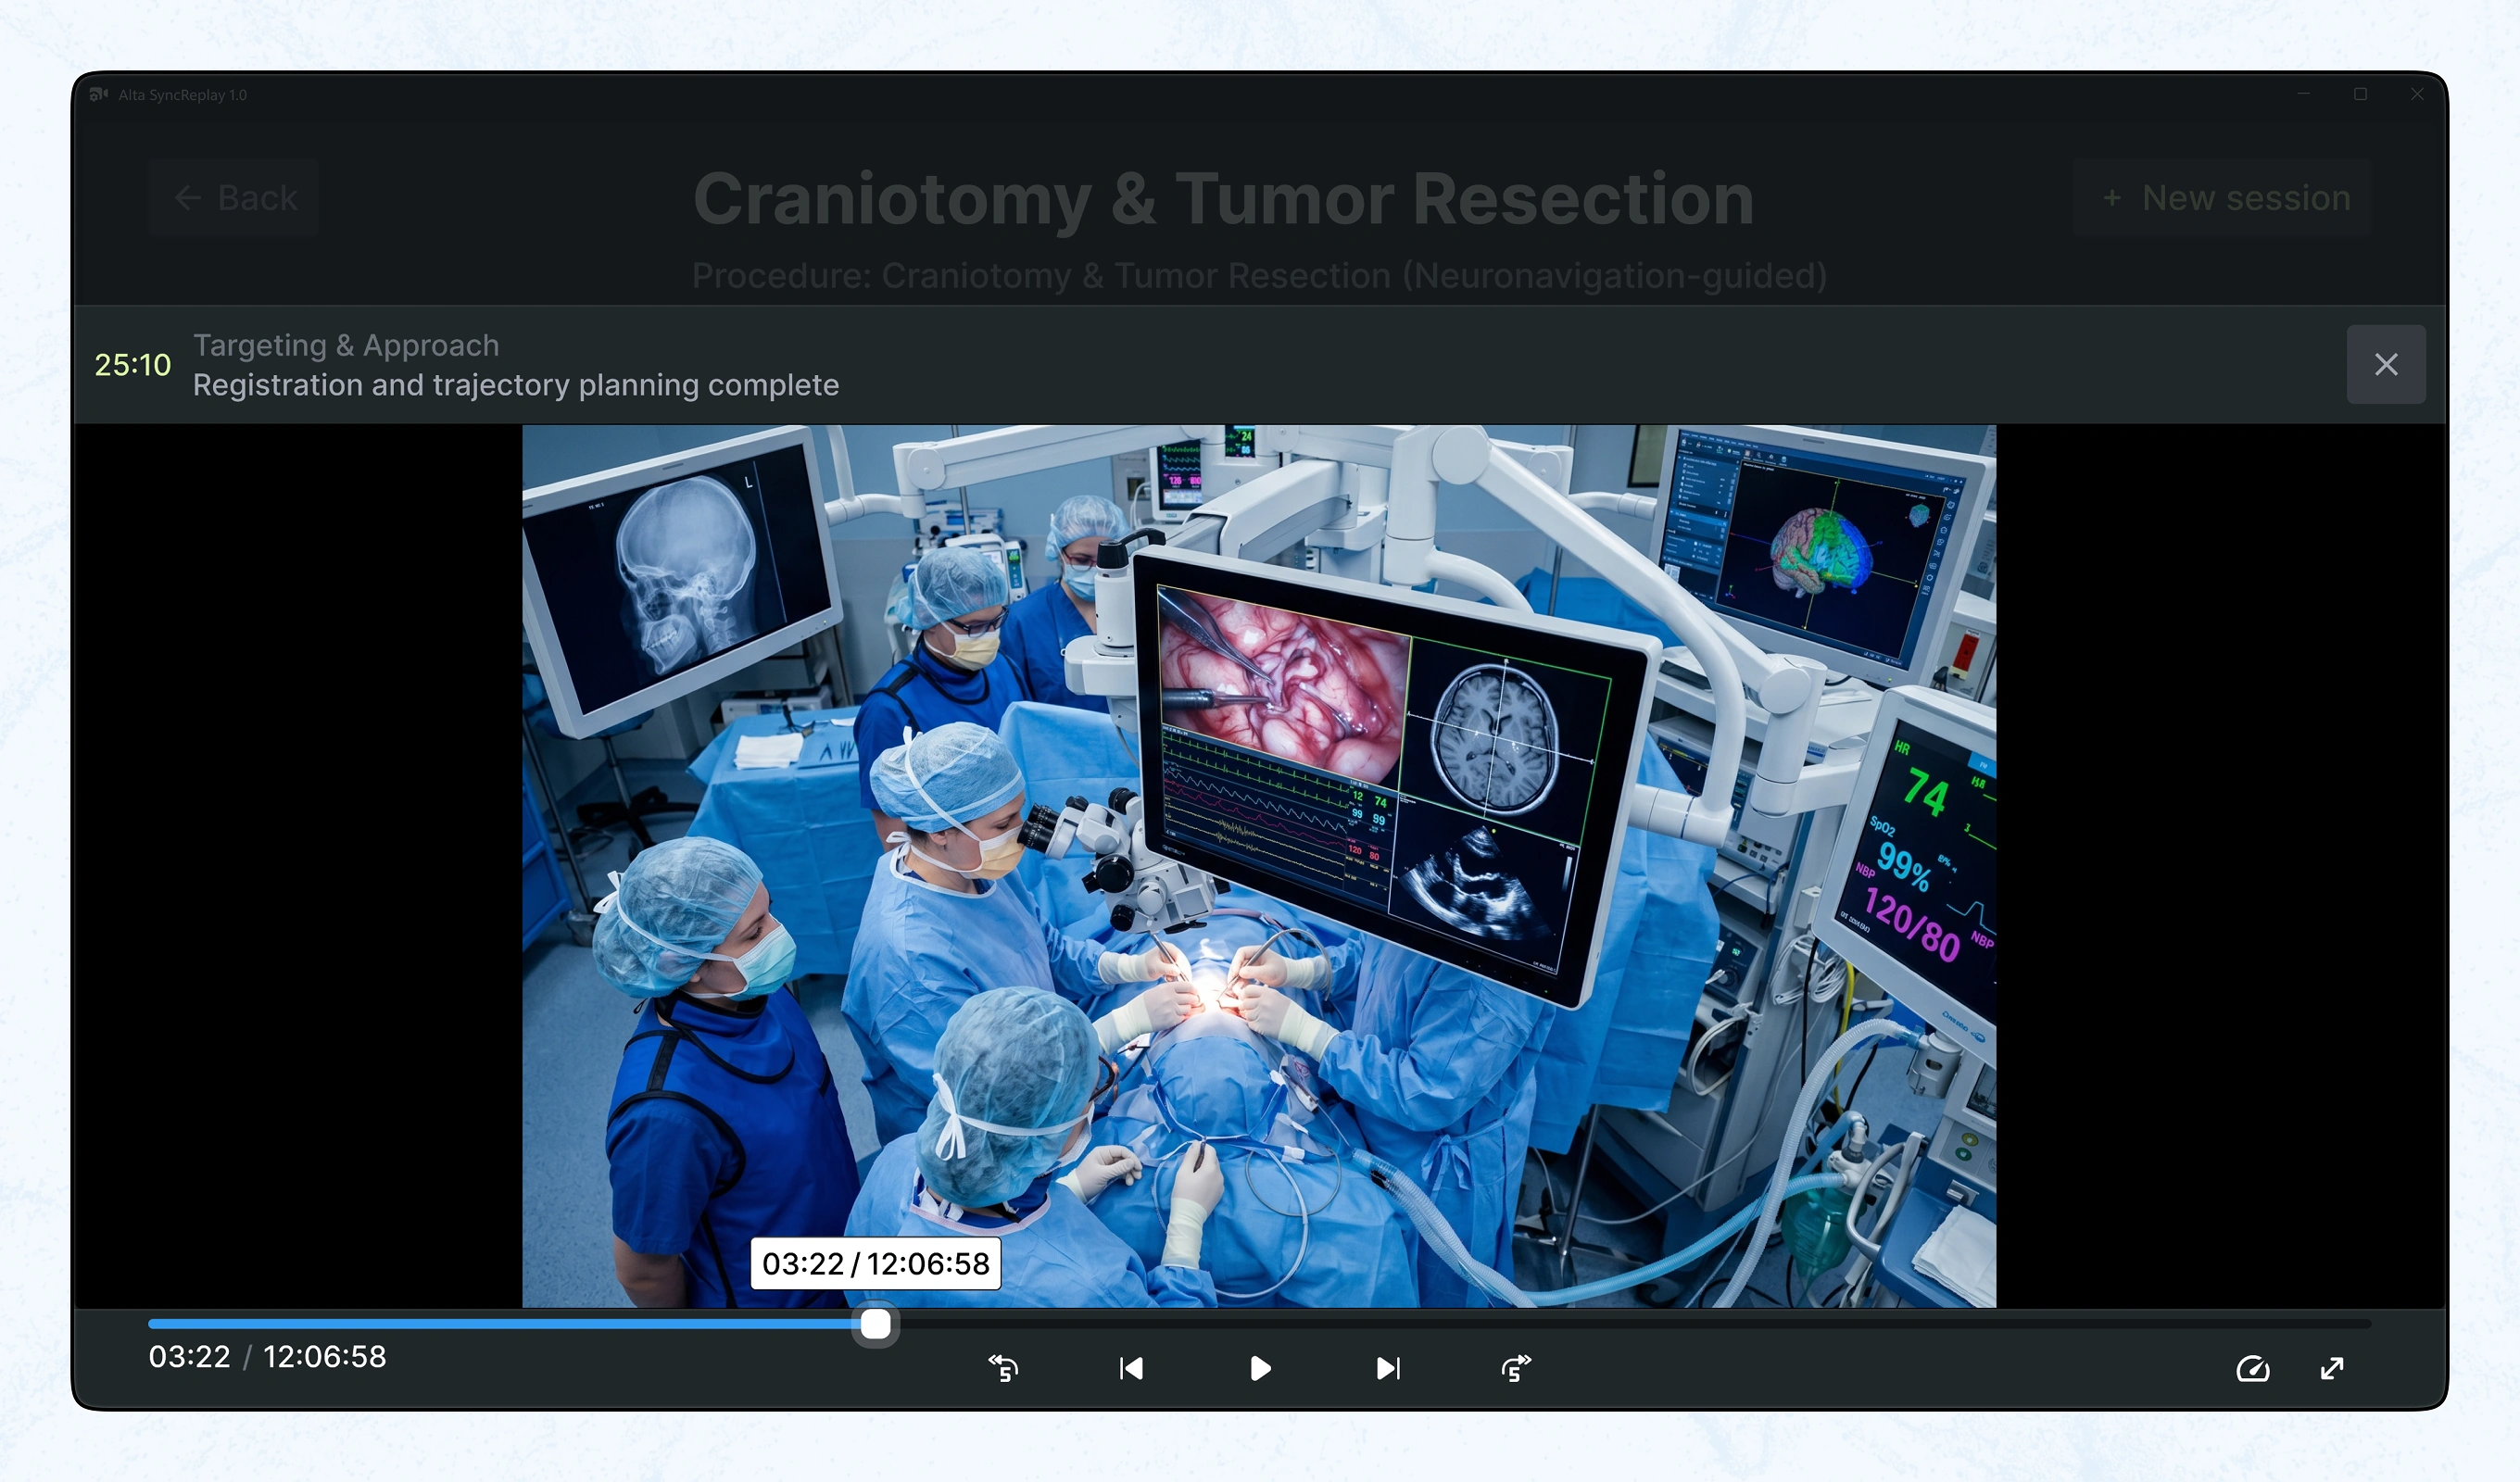
Clicking a bookmark from the case report, like Targeting & Approach at 25:10, jumps the recorded video straight to that moment. A dismissible banner confirms which event opened, with full scrub and playback controls below.
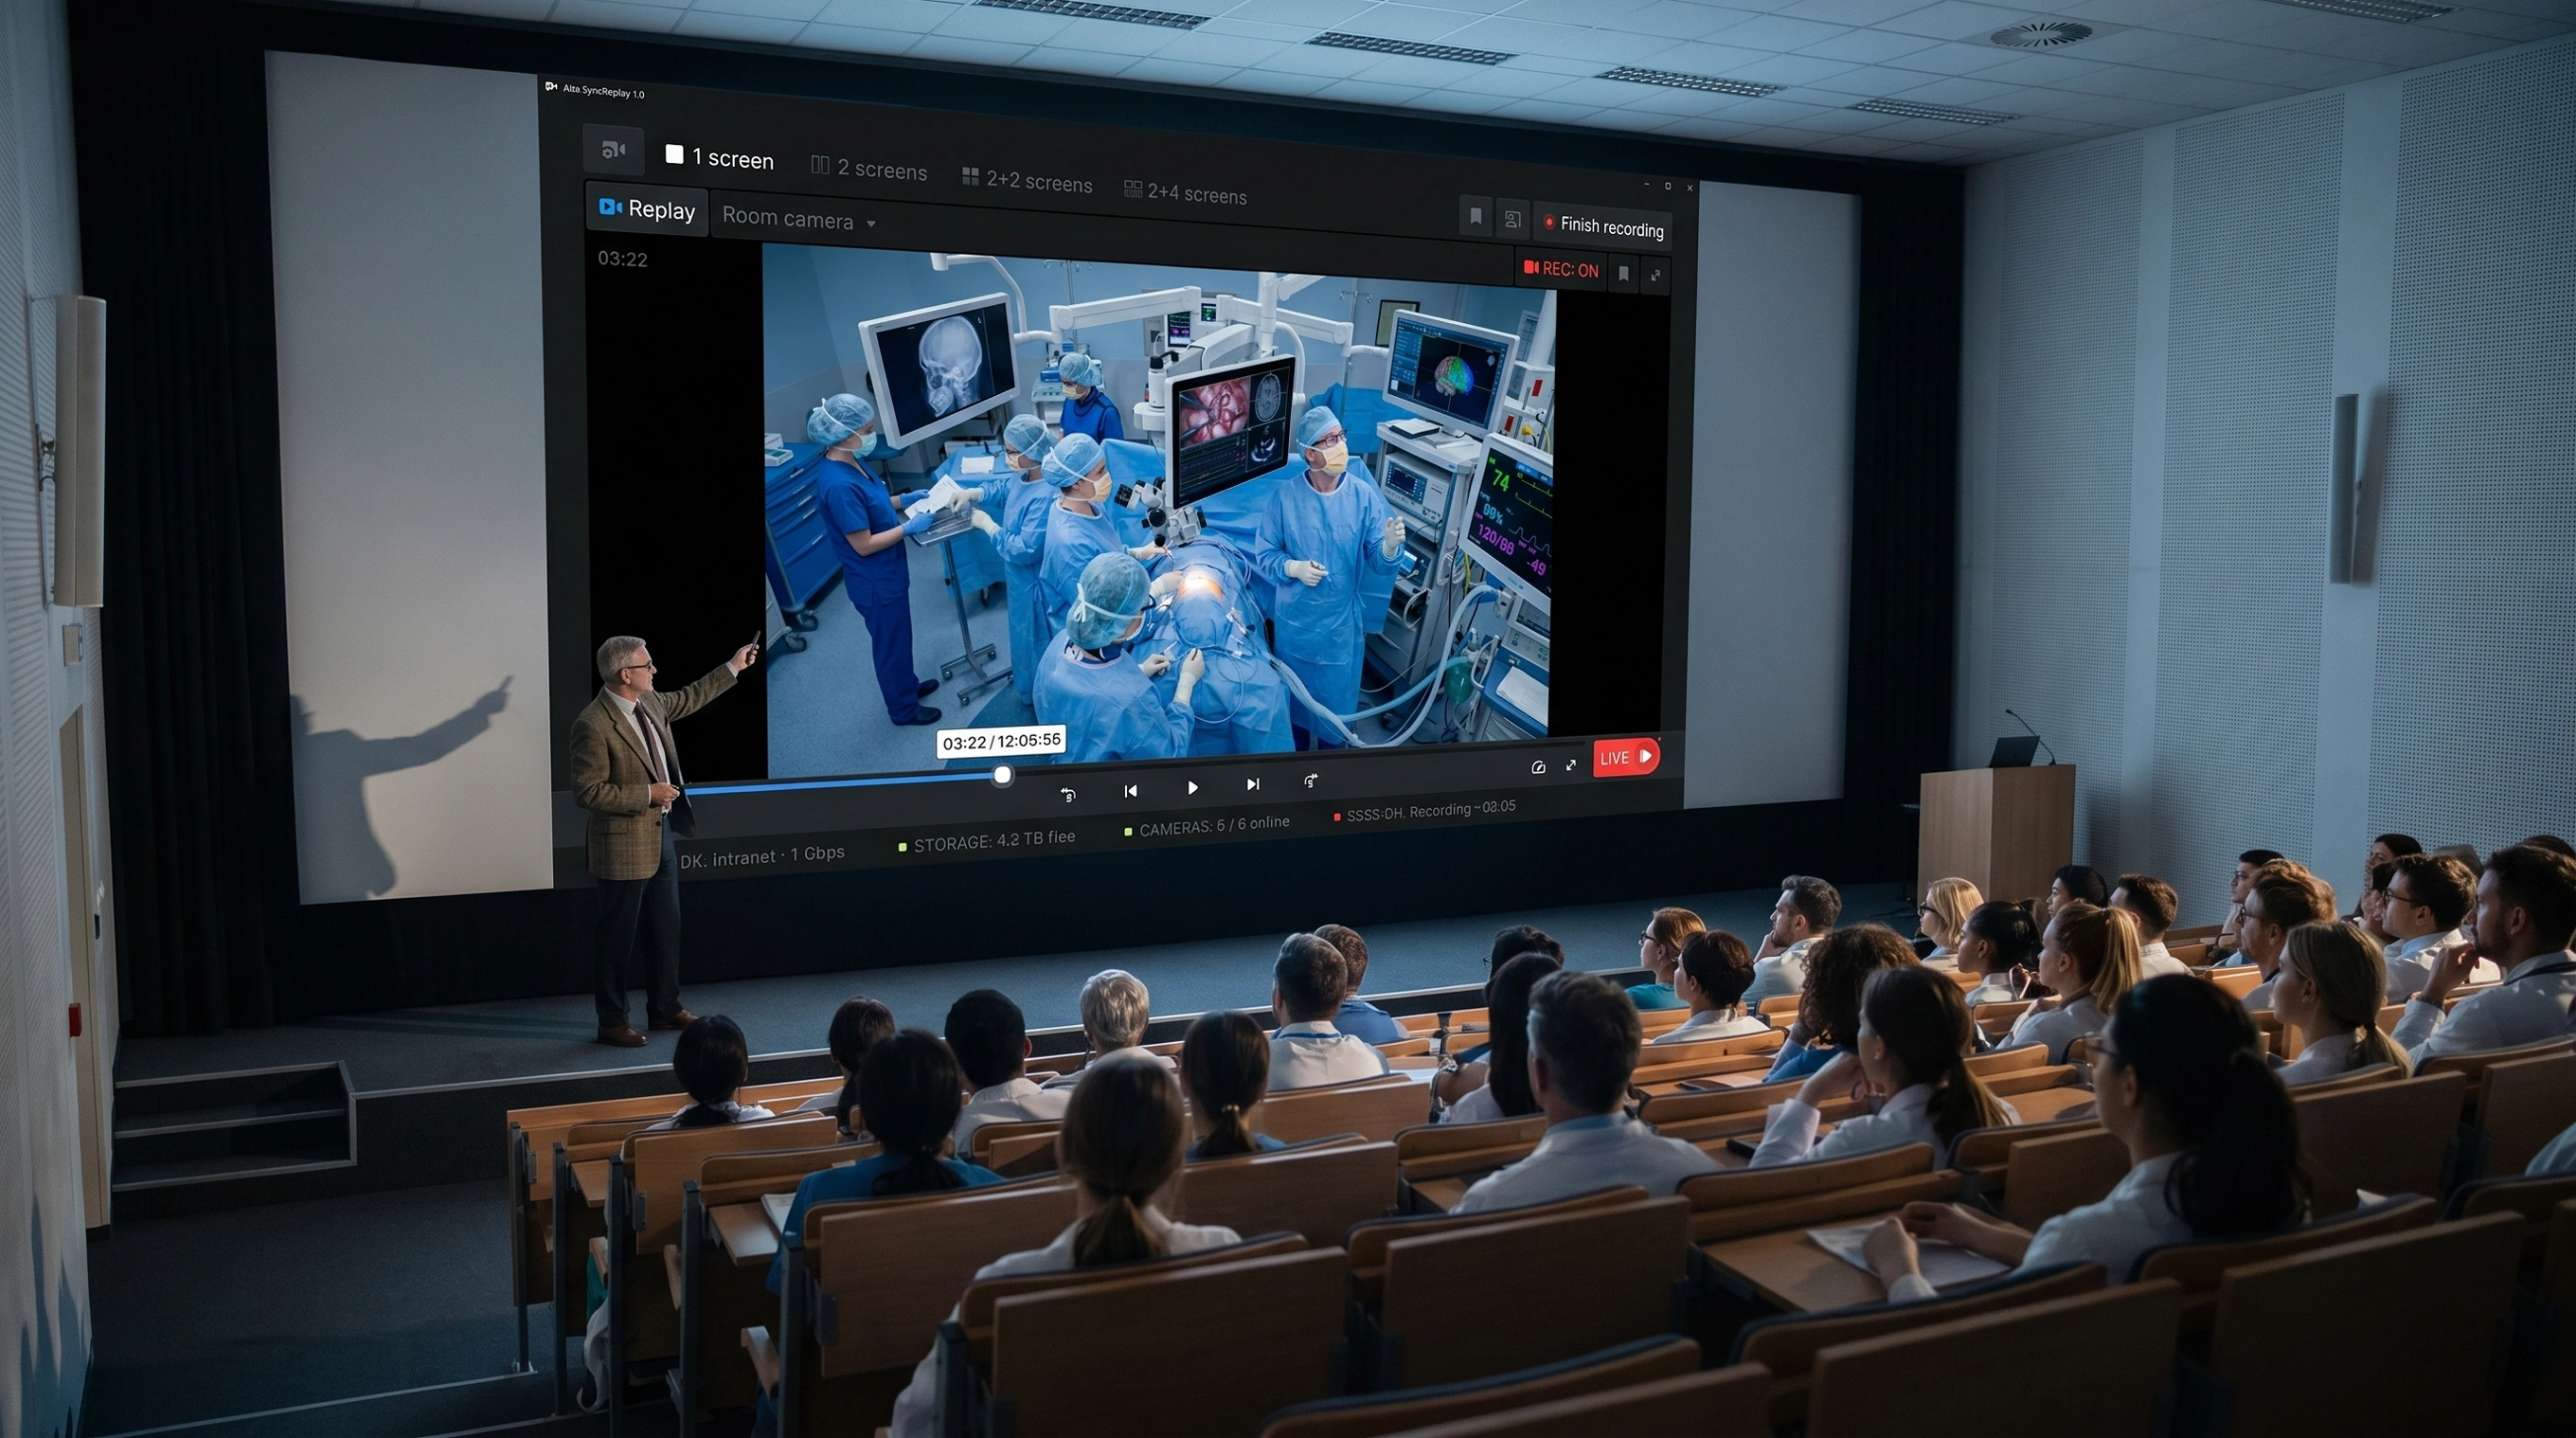
The same interface runs on an OR wall screen mid-procedure, a tablet in gloved hands, a workstation beside anesthesia equipment, and a lecture-hall screen for teaching replay. One layout, no separate builds.
Designing for environments where users cannot stop to look at the interface – clinical, industrial, high-pressure – is a specific discipline. We've worked in it. Tell us about your context.
